xFlow Sales Document Interface Workflow
The new xFlow Sales Document Interface Workflow (SI) module delivers functions for approving sales documents.
There are two options for launching an SI workflow: First, you can manually launch it using the Sales Document Monitor (transaction /WMD/FP_SDM). If there is an open document, the toolbar on the left side of the screen will show the Workflow button, provided the toolbar has been customized accordingly.
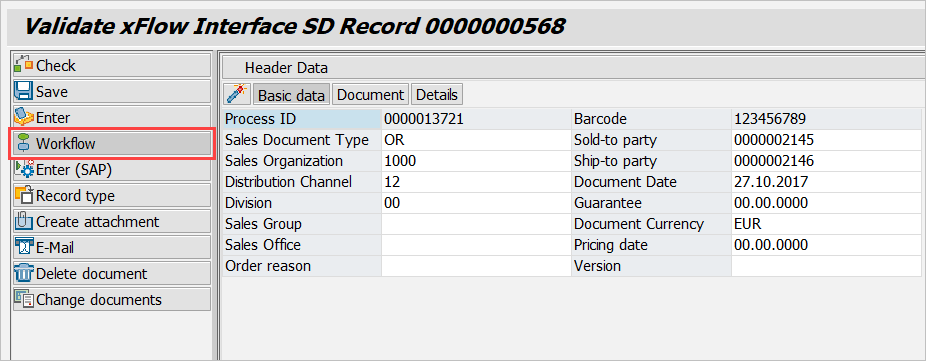
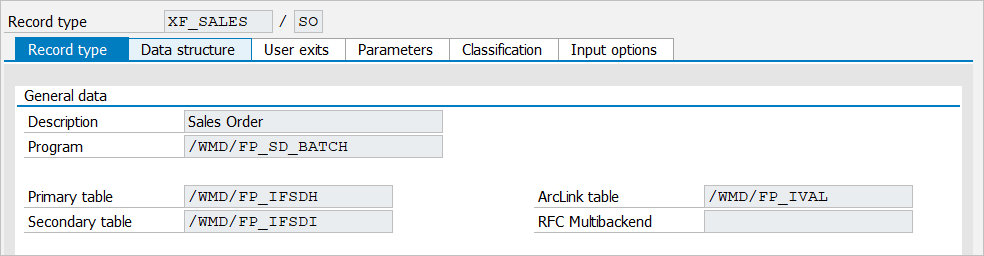
When you click this button, the document will be closed and the workflow will be launched. Documents in the workflow are opened in the SD monitor with read-only access. Alternatively, this can be done automatically using the /WMD/FP_SD_BATCH background process. Before you can use it, you need to perform the corresponding record type customizing steps (program).
You can open SI work items with the SBWP transaction:
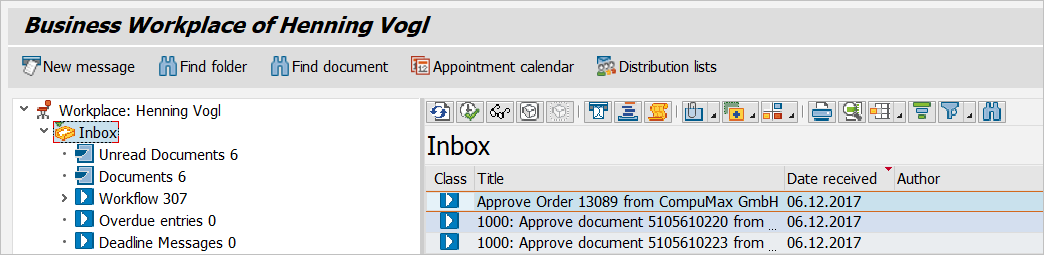
When you double-click the required work item, a dialog for the respective workflow task will open. Possible tasks include Approve document, Edit document, Edit Rejected, Post Manually and the Post Background task. The latter is not shown in the SAP Business Workplace as it is executed by a background user. If automatic posting fails, the system will generate a work item of task type Post Manually. It is ready for execution by an agent in the dialog.
Approve document (SIVA Role)
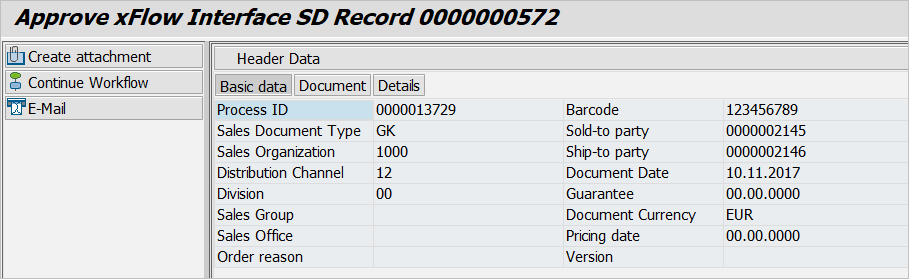
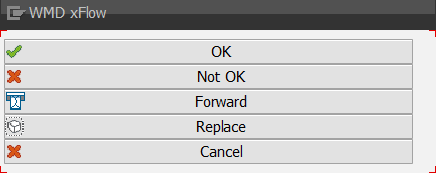
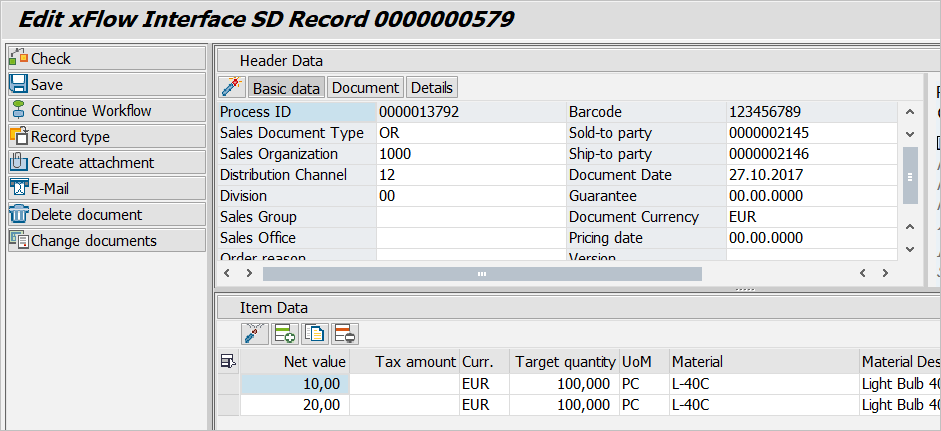
The approval procedure can be implemented as the first workflow step. It allows the approver to flag an order as OK or not OK. Click the Continue Workflow toolbar button located on the left side of the dialog screen to display the different options for processing the work item.
The header data shown in the upper central section of the dialog screen includes invoice basic data, detailed data as well as order header data. The screen also shows line-item data, normally directly below the header data. They provide information on order items.
Further down, you can enter a long-text comment to aid downstream processing. If the linked document contains errors that prevent you from flagging the document as OK, this option is a useful means of making other agents aware of any issues.
In addition, a workflow log shows the work item processing history. This includes, for example, information on who checked or forwarded a work item and a time/date stamp.
The lower left section of the dialog screen lists all documents attached to the invoice document. If there is an attachment, simply click it to view details in the right panel.
Edit document (SIET Role)
You can perform processing as the first workflow step rather than the Approve document task. This only requires an entry in the /WMD/XF_XI_FEED table, which you can create for certain documents via a user exit executed before the workflow. This may be helpful, for instance, if an automatic check performed before the workflow identified a document as incomplete or faulty.
The data shown is the same as in the Approve document step. It contains header data and line-item data as well as options for entering long comments or viewing the workflow log. What is different here is that you can change existing line-item data.
Edit rejected (SIER Role)
This task needs to be performed if the approver selected “Not OK.” For the assigned user it is basically the same as the processing task. However, you can configure different behavior for this task by means of a user exit.
Post background
This step is launched if the approval process was completed with “OK.” It is performed in the background by a background user. In other words, this task is not performed in the dialog (SAP GUI). Its purpose is to post the approved sales documents (i.e., to create an SAP document).
Post manually (SIPO Role)
Should it prove impossible to create the SAP document in the Post background step, the system will create the Post manually task. This step allows you to change data just like in the normal processing step. The display is the same as that for other tasks. You must complete this task (rejection is not possible), unless you decide to delete the document and thus end the workflow.
Release document (SIRE Role)
In addition to the steps described above, there is a release step for the remaining xFlow modules, which works much the same as normal release, except that it supports processing on the item level.
Moreover, there is an overview that shows all current and completed SI workflows. You can call it using the transaction /WMD/XF_SI_ADMIN.
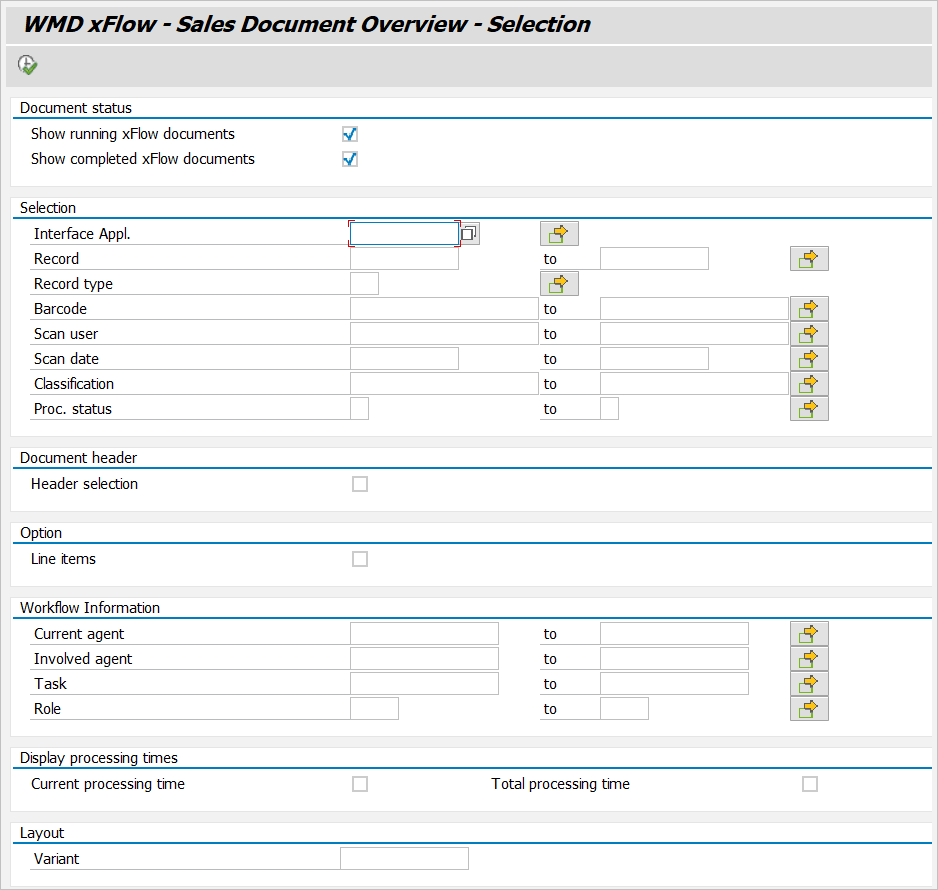
This will open a selection dialog screen. Depending on how many workflows were processed in the system to date, it may be advisable to enter precise selection criteria in order to limit the number of hits.
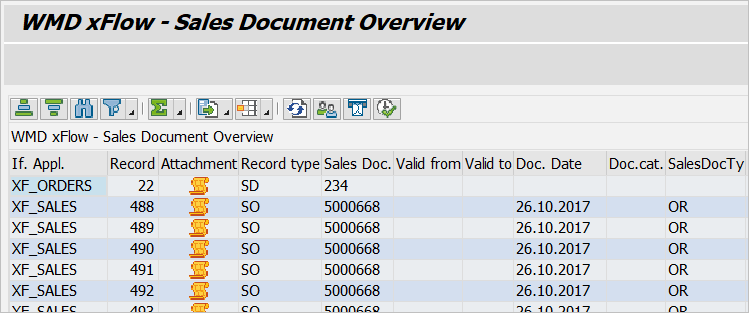
The resulting list provides all data on the workflows and documents. Click the record number within a line item to branch out into the document view. You can also use the toolbar buttons above the table to show the current agents  or to forward a document
  . As a further option, you can access directly to the work-item processing step
  directly if you own the work item.
Displaying and Editing Workflow Tasks
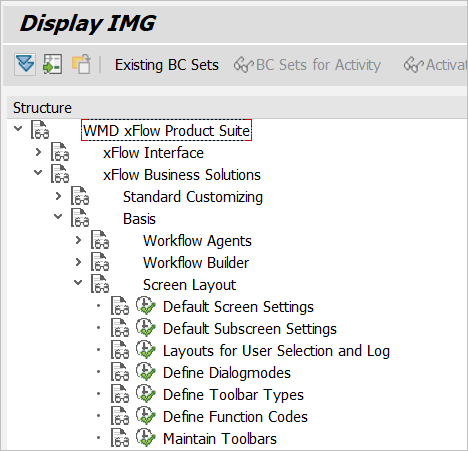
The Sales Document Monitor is used to display and edit workflow tasks, so the functions and editing options correspond to its range of features. Keep this in mind when implementing user exits. The toolbar buttons ( OK, Forward etc.) are configured in xFlow toolbar customizing. Ensure that the Sales Document Monitor and the SI workflow have dedicated toolbar definitions. Configure them using the object types /WMD/FP_SD (Sales Document Monitor) and /WMD/XF_SI (SI workflow).
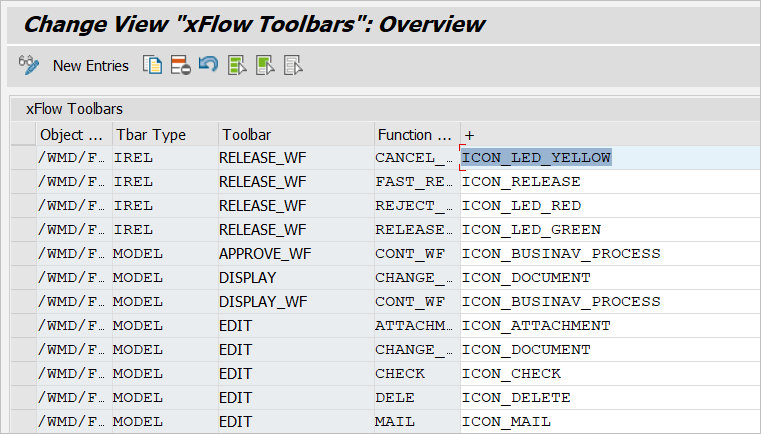
By default, the toolbar of each workflow step is configured as shown.
All classes relevant to the workflow are part of the /WMD/XF_SI package. The classes for display, approval and processing, however, are handled via the Sales Document Monitor. Therefore, if you wish to adjust any of these functions, you must do so by implementing user exits for the Sales Document Monitor classes. These are located in the /WMD/FP_SD package.
Possible user exits are:
SI00000001: /WMD/CL_XF_SI_ROLE
SI00000002: /WMD/CL_XF_SI_ROLE_SH
SI00000003: /WMD/CL_XF_SI_SCR
SI00000010: /WMD/CL_XF_SI_SBWP
SI00000011: /WMD/CL_XF_SI_UE
SI00000013: /WMD/CL_XF_SI_MOD
SI00000014: /WMD/CL_XF_SI_OVERVIEW
SI00000015: /WMD/CL_XF_SI_CONNECT
SI00000016: /WMD/CL_XF_SI_AGDET
They allow you to influence role resolution (/WMD/CL_XF_SI_ROLE, /WMD/CL_XF_SI_AGDET). Moreover, you can adjust column values, titles and descriptions of the work item in SAP Business Workplace (/WMD/CL_XF_SI_SBWP). You can even alter the sequence in the workflow by directly controlling the workflow (/WMD/CL_XF_SI_UE, /WMD/CL_XF_SI_MOD) or adjust the overview of all workflows such that, for example, the hit list is generated by user (/WMD/CL_XF_SI_OVERVIEW).
By default the system ships with workflow build “900.”
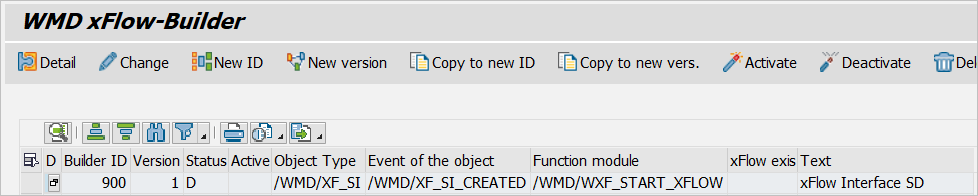

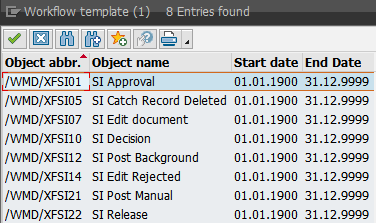
It contains the following tasks:
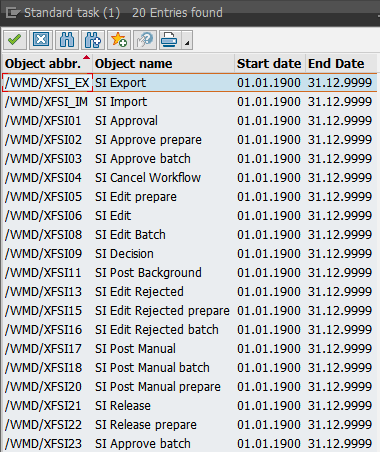
Standard tasks
Workflow templates
Activate the following tasks: TS00297513–TS00297532
Activate the following workflow templates: WS00297444–WS00297451