PNG Viewer – SAP GUI
In Version 5.2.7, a PNG viewer was introduced for the Invoice Monitor, which also supports the WebView2 control in the SAP HTML viewer, among other things.
In Version 5.2.8, this implementation was, once again, revamped from the ground up. The PNG Viewer now offers the following functions:
Support for Internet Explorer Control and WebView2 Control (Edge Chromium)
Support for xSuite Helix Capture
Support for xSuite Prism Capture with and without authentication
Support for the Invoice Monitor, Sales Document Monitor and Order Confirmation Monitor
Enabling the PNG Viewer
The new viewer is de-/activated for each xSuite Interface application.
Perform the following steps for activation:
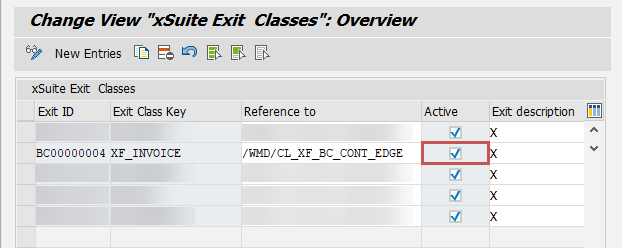
In the table /WMD/XF_XBCLE_XT (transaction /WMD/BC_SPRO → xSuite Business Solutions → Workflow → Basis → Basic Settings → Define Extended Userexit Classes), activate the class /WMD/CL_XF_BC_CONT_EDGE.
Create an RFC destination (transaction SM59) for each xSuite Capture Prism server that uses token authentication.
Enter the following value in the Path Prefix field:
/XFlowBusWebServiceHost/XFlowBusWebService.svc/web/Authenticate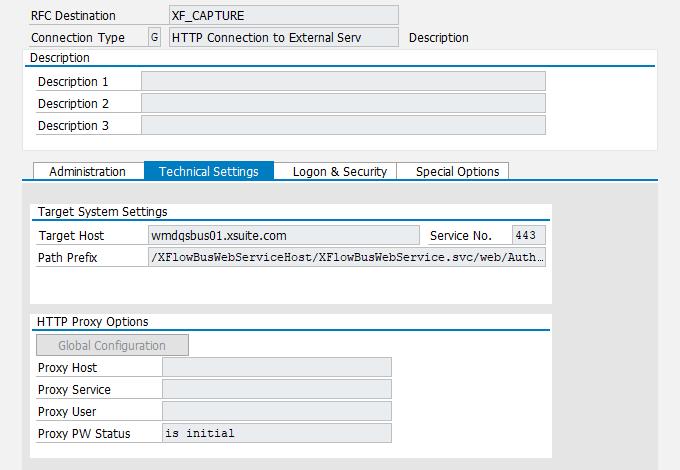
In the area Logon & Security → Logon, enter the database user on the xSuite Capture server, and click
 Save.
Save.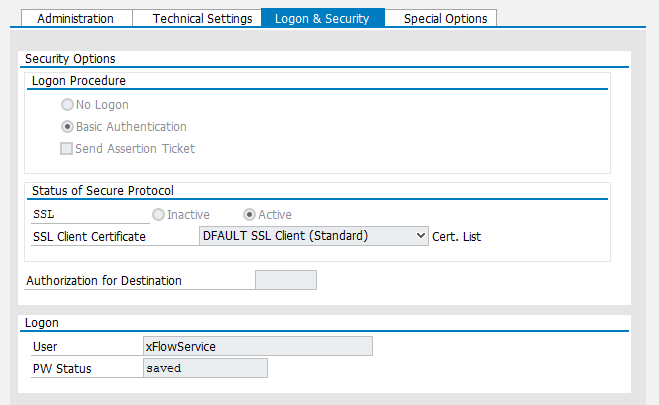
Call the transaction /WMD/XF_PARAM_XT.
➣ The view xSuite extended parameter settings will open.
Add the following advanced parameters:
Parameter
Description
XF_CAPTURE_DEST_<APPL>
Specify this parameter for each xSuite Interface application that uses an xSuite Capture server with token authentication.
Replace <APPL> with the name of the xSuite Interface application, e.g., XF_CAPTURE_DEST_XF_INVOICE.
Specify the name of the RFC destination from Step 2 as the parameter value.

XF_CAPTURE_URL_<APPL>
Specify this parameter for each application that uses xSuite Capture Helix or xSuite Capture Prism without authentication.
Replace <APPL> with the name of the xSuite Interface application, e.g., XF_CAPTURE_URL_XF_INVOICE.
As the parameter value, specify the protocol, host and port of the xSuite Capture server used.

Specify the Interface Cloud Connector when using xSuite Capture Helix.
XF_CAPTURE_TYPE_<APPL>
Use this parameter to specify the type of xSuite Capture Server used.
Replace <APPL> with the name of the xSuite Interface application, e.g., XF_CAPTURE_TYPE_XF_INVOICE.
Possible values:
HELIX,BUS(default value:BUS)
XF_CAPTURE_CATALOG_<APPL>
Use this parameter to set the field catalog.
Replace <APPL> with the name of the xSuite Interface application, e.g., XF_CAPTURE_CATALOG_XF_INVOICE.
For xSuite Invoice scenarios, specify the
InvoiceLegalRuleparameter value.
Structure – PNG Viewer in the SAP GUI
For the most part, the structure and the functionality of the PNG Viewer correspond to the previous versions of the xSuite Viewer.
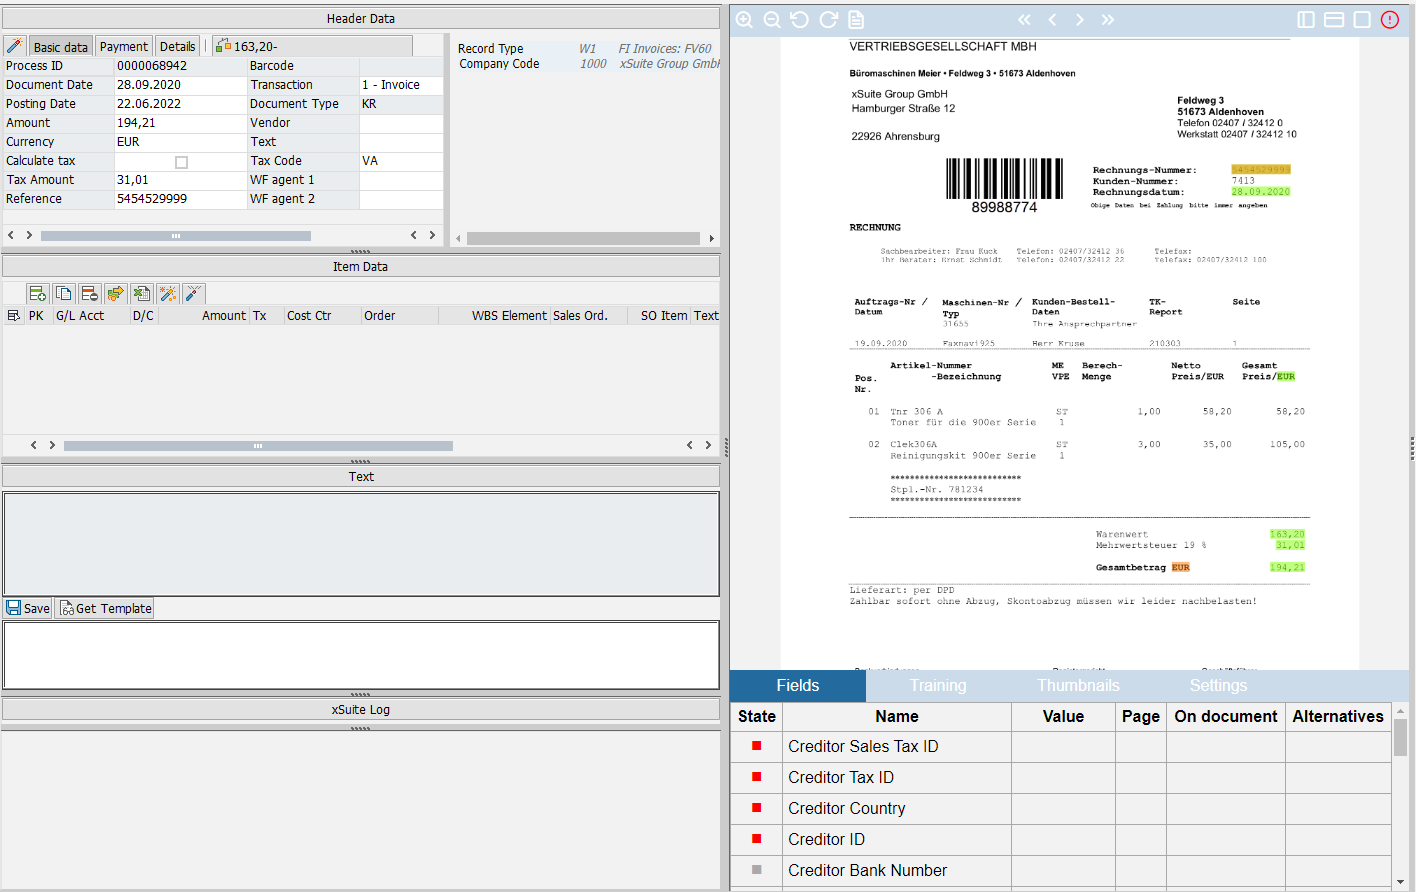 |
Buttons in the toolbar
Button | Name | Description | |
|---|---|---|---|
| Zoom in | Zooms in on the page. | |
| Zoom out | Zooms out of the page. | |
| Rotate left | Turns the page 90° to the left. | |
| Rotate right | Turns the page 90° to the right. | |
| Highlighting | Highlights all field values found. | |
| First page | Brings you straight to the first page. | |
| Page back | Scrolls one page back. | |
| Page forward | Brings you forward a page. | |
| Last page | Brings you straight to the last page. | |
| Fit page | Fits the page to the overall size of the pane. | |
| Fit height | Fits the page to the height of the pane. | |
| Fit width | Fits the page to the width of the pane. | |
| Additional functions | Shows or hides the tabs. The color of the button may be gray, green or red. The color indicates the status of the completeness check for the image. |


Functions in page display
Left-click and hold: Drags page
Right-click and hold: Marks full text area
Double-click on selected area: Transfers full text to selected field in monitor
Double-click on selected field: Transfer recognized field value to selected field in monitor
Notice
Unlike in previous versions, it is no longer necessary to switch between the mode for displaying recognized fields and the mode for marking full text.
Tabs
Tab | Description | |
|---|---|---|
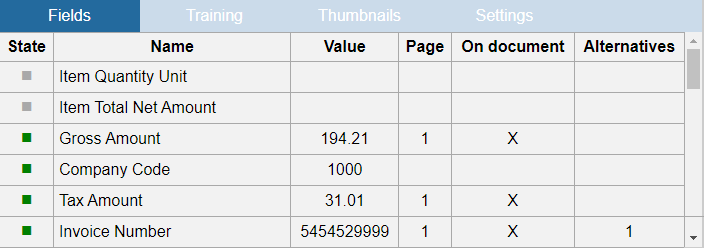
Fields | This displays the recognized values for each field from the field catalog. Clicking on a column name sorts by that column. Double-clicking on a field name will highlight the field, if recognized, in the document. A double-click on the Alternatives column also marks alternative recognized values on the document.
| |
Training | This allows the user to explicitly train the field recognition for xSuite Capture Prism. NoticeWhen using xSuite Capture Helix, this tab is hidden, because in xSuite Capture Helix there is always an implicit training when posting or parking an SAP document. For more information, see Training – PNG Viewer in the SAP GUI. | |
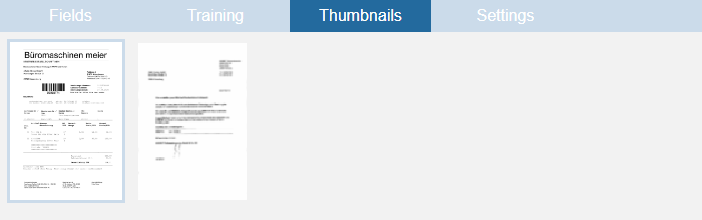
Thumbnails | A gallery view of all individual pages is displayed here. Clicking on a single page will open that page in the main window.
| |
Settings | Here the user can configure the display the settings for displaying a new document or a new page.
|

Training – PNG Viewer in the SAP GUI
In xSuite Capture Prism, a training is always created for a vendor. Therefore, the vendor must first have been recognized by or trained to the xSuite Capture system.
If no vendor could be determined, the user must set the vendor at the beginning of the training and transfer it to the xSuite Capture system.
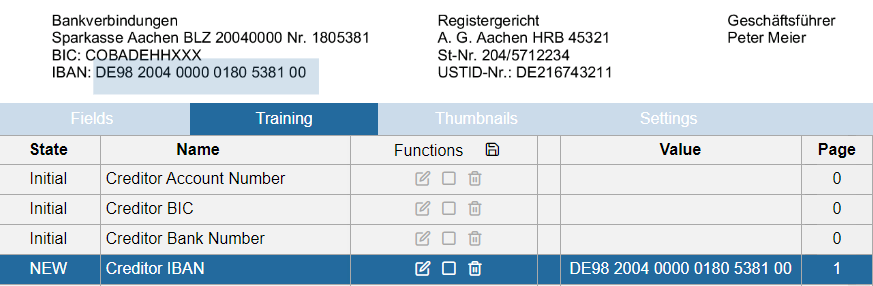
Vendor training
If no vendor could be determined, the vendor training will be displayed:
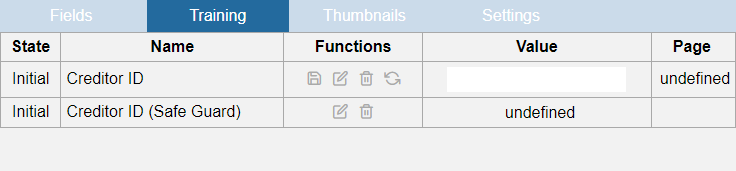 |
In the Value column of the Creditor ID row, the user must enter the SAP vendor number to be trained. The system always uses the entire first page of the document as the area to be trained.
In addition, the user can mark a Safeguard area in the document with a right mouse click. To add the Safeguard area to the training, click the Training Safe Guard button.
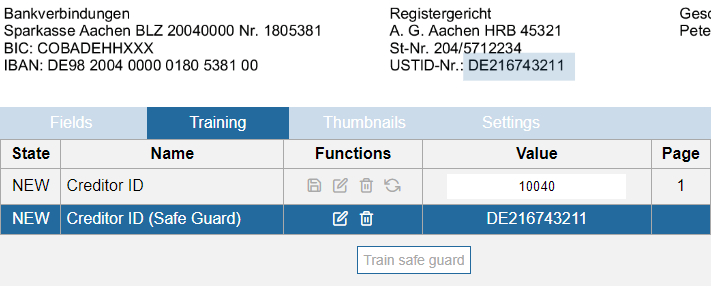 |
Then, to send the training to the xSuite Capture server where the training will be saved, click the Save button. This process may take a few seconds to complete. During this time, a message will appear reading "Training is pending. Please wait."
When the vendor training is complete, the field training view is displayed.
Field Training
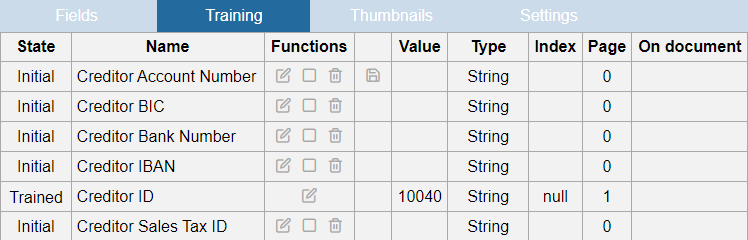 |
The field training view displays a list of all fields that can be trained.
Double-click on a column to sort according to that column. The individual trained areas can be displayed by marking the respective line.
The following buttons are available for field training:
Button | Name | Description | |
|---|---|---|---|
| Training (Area + Text) | Adopts the selected area, including full text. The text is displayed in the Value column.
| |
| Training (only area) | Only adopts the selected area.
| |
| Delete | Clears the field training. | |
| Save | Sends the training to the xSuite Capture server. There the training is saved. Training is always saved for all fields at the same time. Saving may take a few seconds. During this time a message will appear indicating that waiting is required. |


By clicking on Training (Area + Text) in the Creditor ID column, the user can switch from field training to vendor training.
 |
Caution
Changing and re-saving the vendor training will delete all the associated field training. The field training must be recreated afterwards.
To exit vendor training and switch to field training again, the user can use the Reload function.
 |