Invoice Monitor App
In the document view of the Invoice Monitor App, several buttons have been added to the footer bar and the item level.
New buttons in the footer bar
Change documents
The Change documents button is now available in the footer bar, provided that this button is also displayed in the SAP GUI for the document.
By clicking on the button, a table is displayed in which all change documents of the document are listed.
The Close button at the bottom right allows you to return to the normal view of the document.
Display document
The Display document button is now available in the footer bar, provided this button is also displayed in the SAP GUI for the document and the ITS functionality has been activated in settings.json.
Click the button to open the ITS transaction.
After completing the transaction, click on the Close button at the bottom right to continue with the Invoice Monitor App.
Post (SAP)
The Post (SAP) button is now available in the footer, provided that this button is also displayed in the SAP GUI for the document and the ITS functionality has been activated in settings.json.
By clicking on the button, the user must first confirm that the document is being saved. This transfers the unsaved data from the cache to the document. The ITS transaction then opens.
After completing the transaction, click on the Close button at the bottom right to continue in the Invoice Monitor App.
The E-Mail button is now available in the footer bar, provided this button is also displayed in the SAP GUI for the document.
Click on the button to display the Send e-mail form. A recipient (To), a subject and a message must be entered there. The CC field is optional. If the document has one or more attachments, they can be selected as attachments to the e-mail.
In the footer next to the cache timer, the buttons  Load template,
  Send mail, and
  Cancel are displayed.
Create vendor
The Create Vendor button is now available in the footer bar, provided this button is also displayed in the SAP GUI for the document and the ITS functionality has been activated in settings.json.
By clicking on the button, the user must first confirm that the document is being saved. This transfers the unsaved data from the cache to the document. The ITS transaction then opens.
After completing the transaction, click on the Close button at the bottom right to continue in the Invoice Monitor App.
Park (SAP)
The Park (SAP) button is now available in the footer, provided this button is also displayed in the SAP GUI for the document and the ITS functionality has been activated in settings.json.
First the user must click the button to confirm that the document is being saved. This will transfer the unsaved data from the cache to the document. The ITS transaction will then open.
After completing the transaction, click on the Close button at the bottom right to continue with the Invoice Monitor App.
Workflow
The Workflow button is now available in the footer bar, provided that this button is also displayed in the SAP GUI for the document.
Click on the button to display potential workflow steps. When a step is selected, the system will check whether one or more users are to be selected for this workflow step. If this is the case, a list of possible users is displayed. At least one must now be selected here. The OK button confirms the user selection and starts the workflow. If no user selection is required, the workflow will start immediately after the workflow step has been selected.
The Cancel button can be used to cancel the process in the selection of the workflow step or of the user.
New buttons on line-item level
Entering account assignment
The Enter account assignment button is now available in the toolbar of the item data tables, provided this button is also displayed in the SAP GUI for the document.
Click on the button to display the available templates.
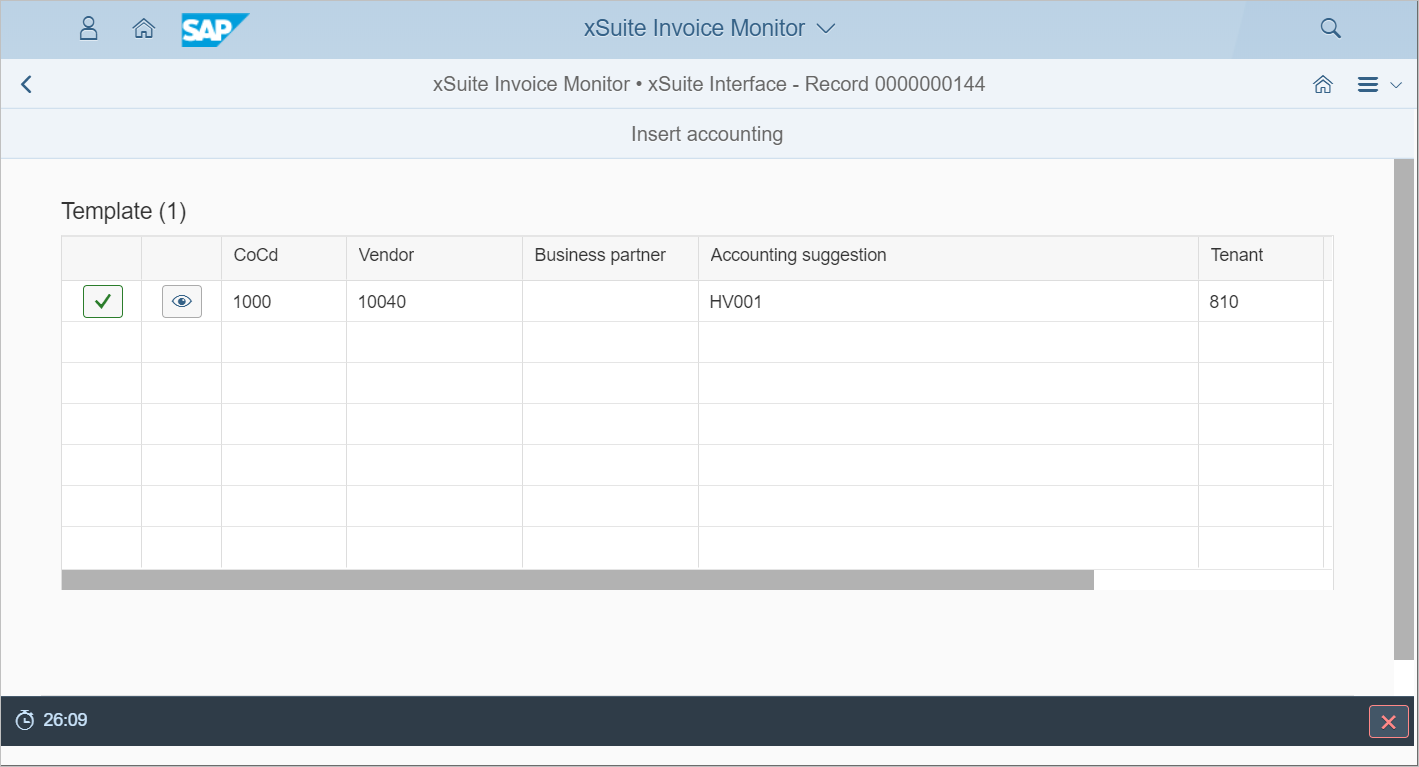
Click on the button  Copy, to insert the template into the document. Click on the button
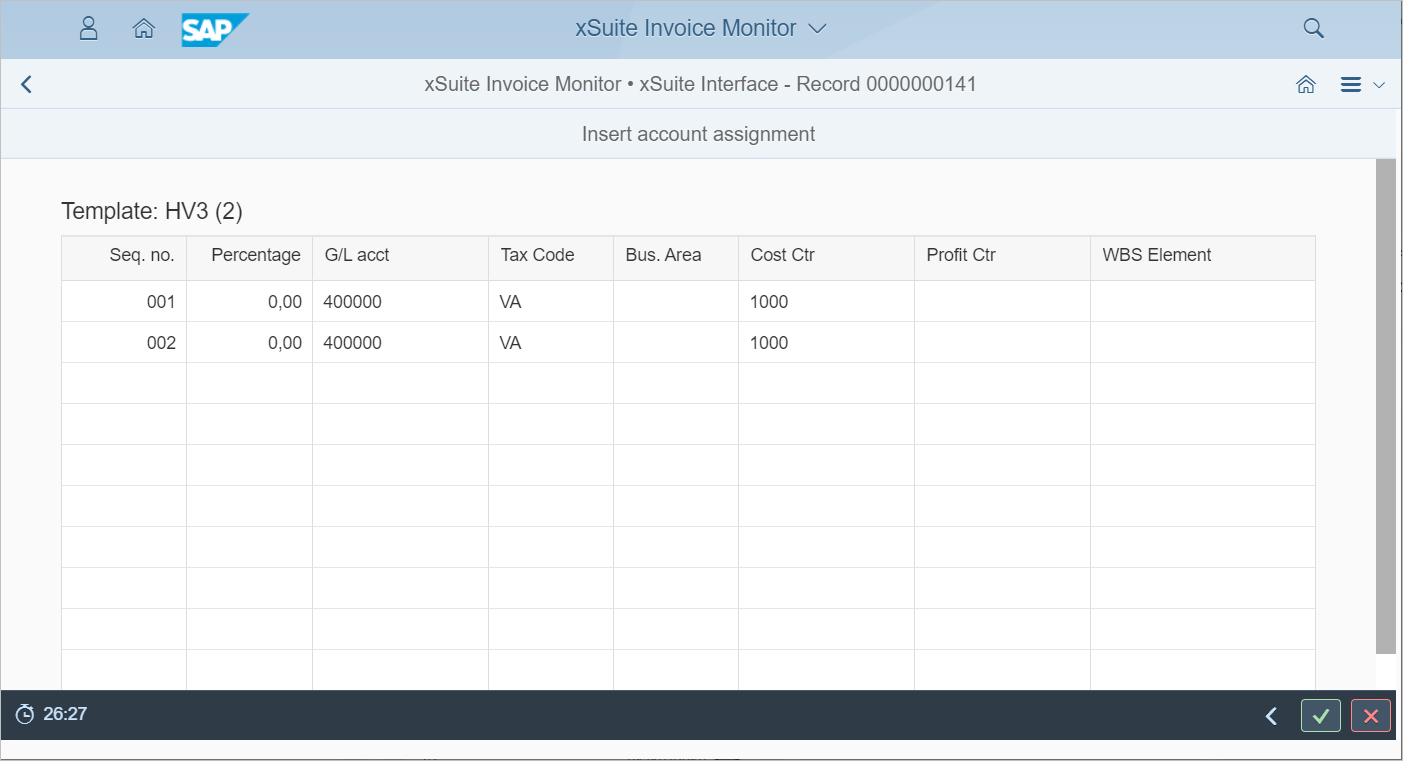
  Display Details, to display the item data of this template.
There are three buttons in the footer in this view:
Back navigates back to the list of available templates.
Copy copies the current template whose items are displayed.
Cancel cancels the process and displays the document data again.
Post goods receipt
In the toolbar of the item data tables, the button Post Goods Receipt for Purchase Order is now available, provided that this button is also displayed in the SAP GUI for the document. This button will also be displayed in each table row.
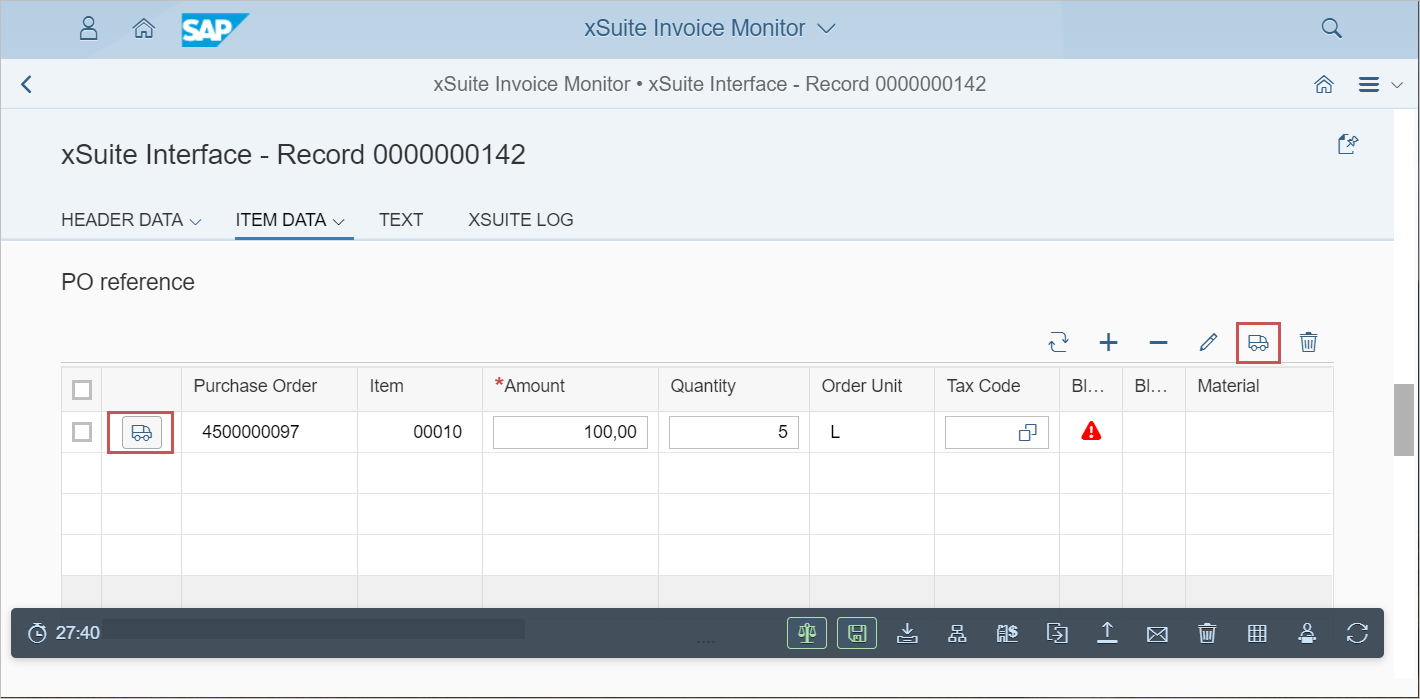
Click the button in the table toolbar to open the dialog Book Goods Receipt. The initial data of the first order listed in the table is displayed there.
If a goods receipt can be posted for this item in the purchase order, you can open a dialog screen by clicking on the button in a line item. In this case, the data will initially only be displayed for this line item.
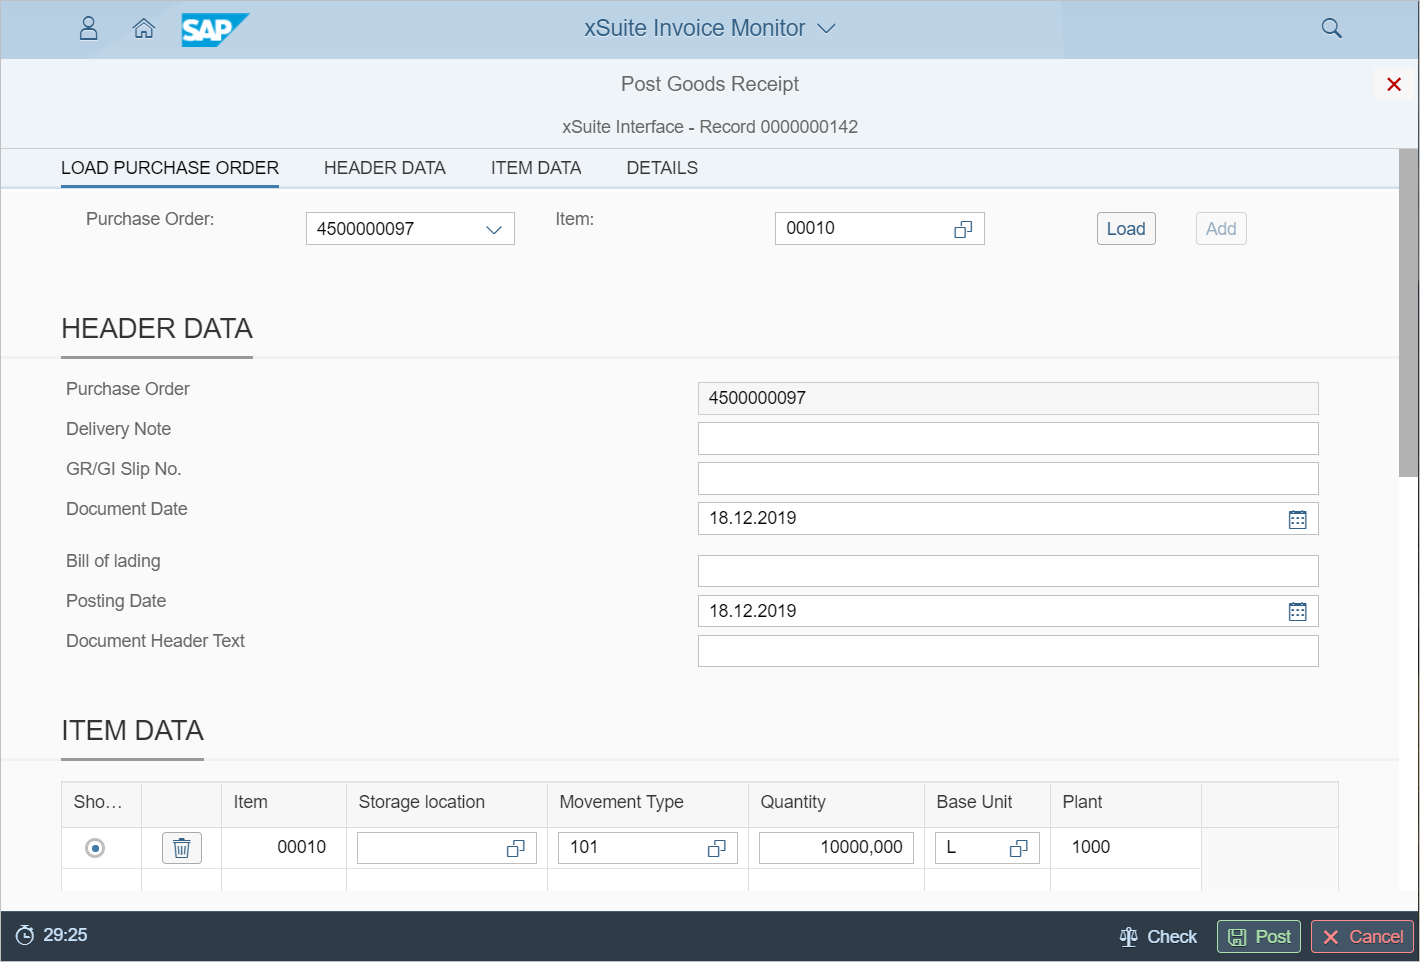
Post goods receipt → "Load order" section
In the Load order area, you can specify the orders whose data is to be loaded. Only purchase orders that appear in the item data of the document are available for selection. Optionally, a line item can be specified. If no line item is specified, all available line items will be loaded.
The Load button loads the respective order and optionally only the specified line item. The data displayed in the sections that then appear will also be reloaded.
The Add button will only be available if the order is selected and if an item is specified that is not yet listed in the Item Data area. Then the data for the order will be displayed below.
Purchase order "0001" is displayed in the Header data area and only item "01" in the item data area.
If the order "0002" is now selected under Load order, the Add button will not be available. The order "0002" can only be loaded, whereby the previously loaded data of the order "0001" is discarded.
However, if you select "0001" under Load purchase order and enter an item other than "01", you will be able to add this item. The existing header data of the purchase order and the data of the other items remains unchanged. If, on the other hand, you click Load, the order data will be reloaded and the data for the other items discarded.
Post goods receipt → "Item data" section
With the button  Remove line, the respective line item can be removed from the table. Then goods will not be posted for this item.
If you click on a line-item data row, the details for this row will be displayed in the Details section that then opens. The radio button in the first column shows the item data row for which the details are displayed.
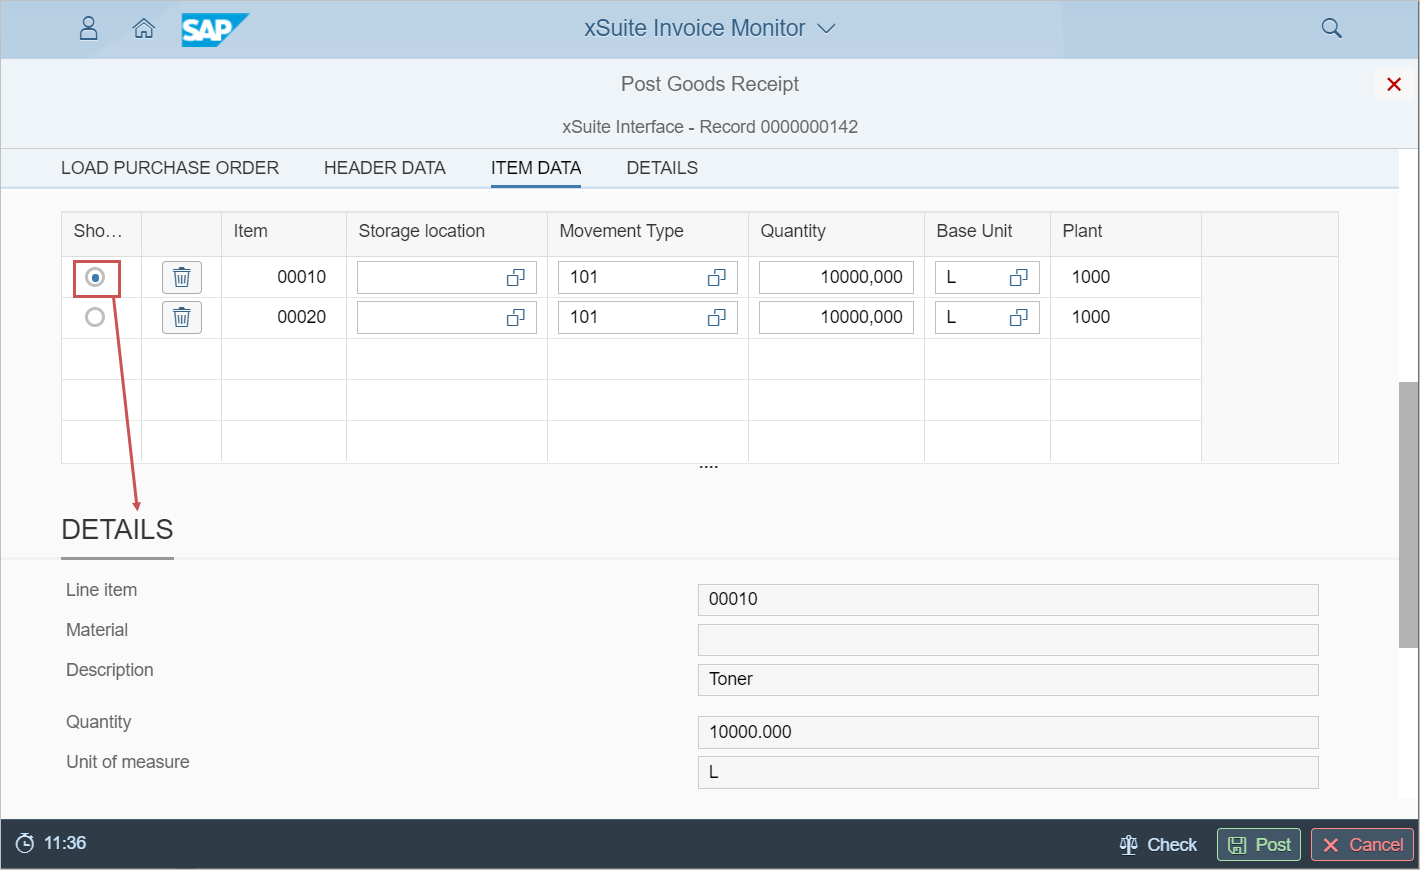 |
Post goods receipt → Footer
The footer contains the following buttons next to the cache timer:
Check
Post
Cancel