Schemas (V2)
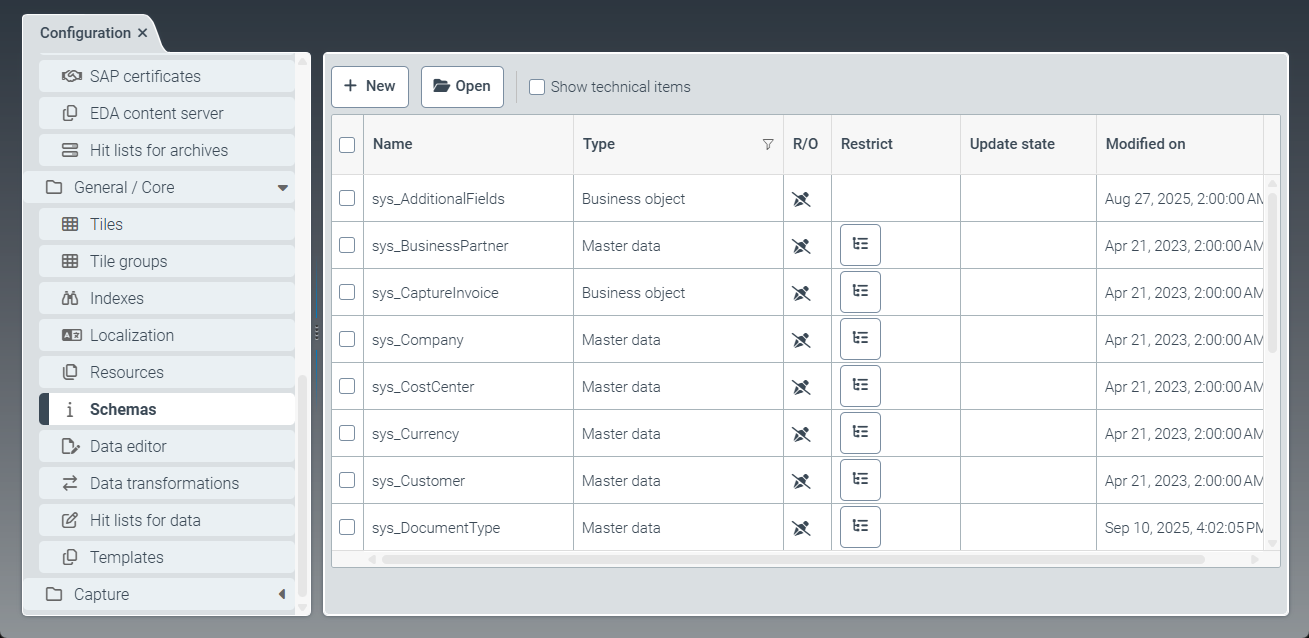 |
A schema specifies the structure of an object (e.g., an archive document or a workflow). Multiple schemas come with the software. These delivered schemas are identified by the prefix sys_ and cannot be deleted or edited.
It is possible to create and modify copies of the provided schemas, or to create new customer-specific schemas.
The following types of schemas are available:
Business object: Schemas of this type are used for structuring workflows.Master data: Schemas of this type are used to record external master data.Virtual: Schemas of this type are used for data structuring. These schemas are used exclusively as sub-schemas in higher-level "business object" schemas.External archive document: Schemas of this type are used for structuring archive documents.
Notice
If the Show technical items checkbox is selected, the technical schemas are displayed in the table. The system uses these schemas for certain background actions.
Creating a schema (V2)
Caution
Schemas may only be created and edited by trained xSuite consultants.
Caution
Subsequent changes to an existing schema are only possible if no key fields are affected and no transactional data needs to be deleted.
Plan the schema structure carefully before creating the schema.
Notice
Creating and editing schemas requires the sys_SchemaAdmin user role.
Select the Schemas menu item, then click New.
➣ The Schema: Unnamed item tab will open.
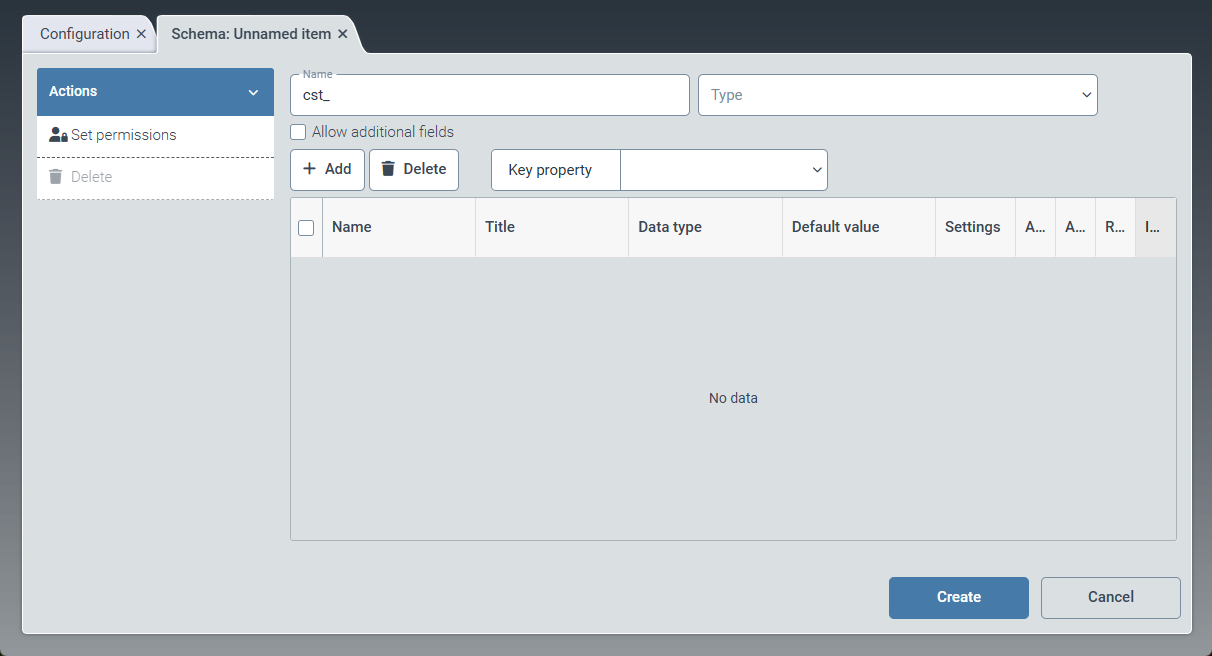
Enter the technical name of the schema in the Name field.
Notice
The technical name comes prepended with cst_. This prefix cannot be deleted.
Select the type of schema from the Type drop-down list:
Business objectMaster dataVirtualExternal archive document
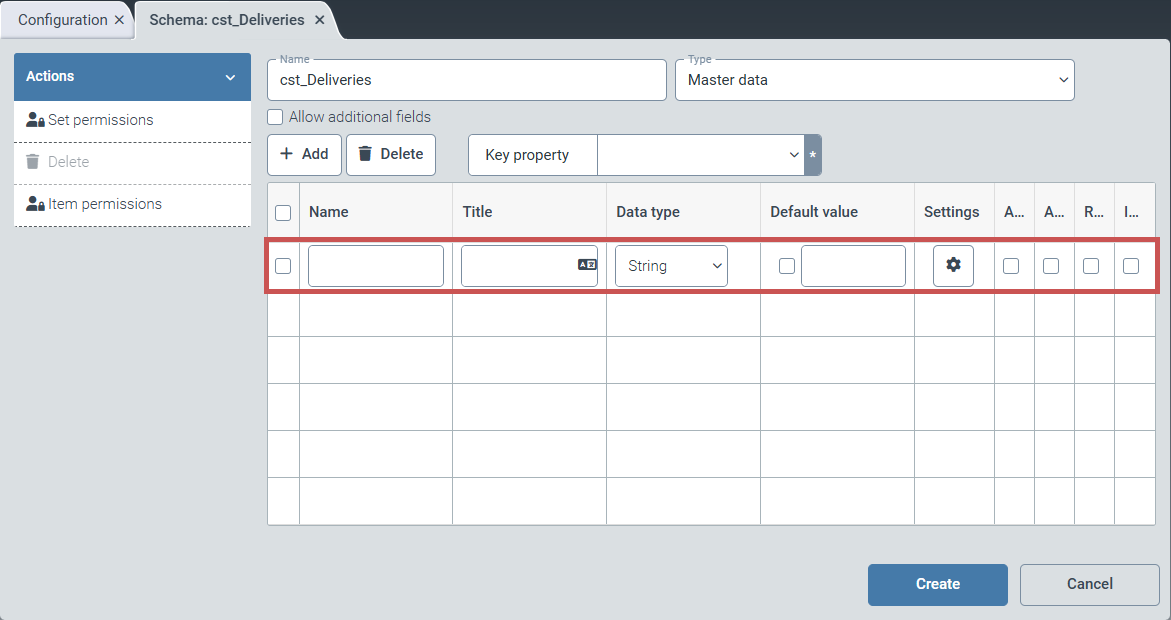
Click Add to add a field to the schema.
➣ An empty table row will be added.
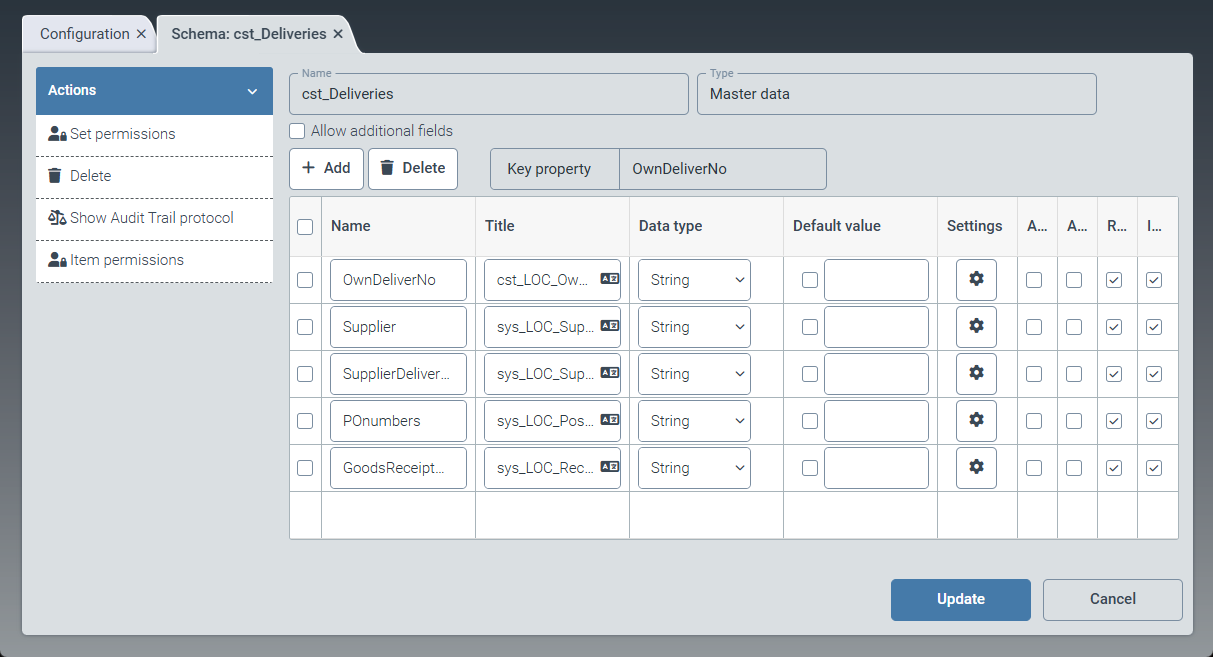
Edit the following columns:
Column
Instructions
Name
Enter the technical name of the field.
Title
Enter the localization key for the display name of the field.
To open the Select localization dialog box, click the
 button.
For more information, see Selecting a localization.
Data type
Select the data type of the field (e.g.,
String).A sub‑schema can be selected as the data type. All schemas of type "virtual" are available.
Default value
Enter a default value for the field (optional). If the default value is to be used, select the checkbox in the Default value column.
Settings
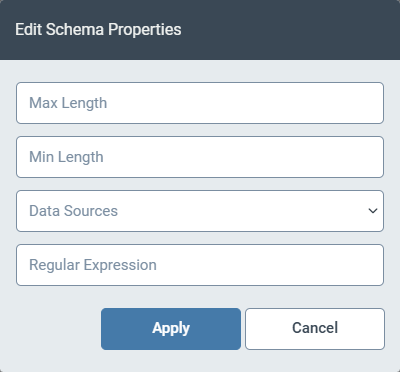
Click the
 Settings button to open the validation settings for the field.
Here you can define the minimum and maximum length of the field. In the Regular Expression field, you specify a regular expression. This regular expression must match the field value.
Array
If you select the checkbox in the Array column, the field can appear multiple times in a data record.
Allows null
If you select the checkbox in the Allows null column, the field can be empty.
Required
If you select the checkbox in the Required column, the field is marked as mandatory and cannot be empty.
Indexed
If you select the checkbox in the Indexed column, the field is included in the full-text indexing.
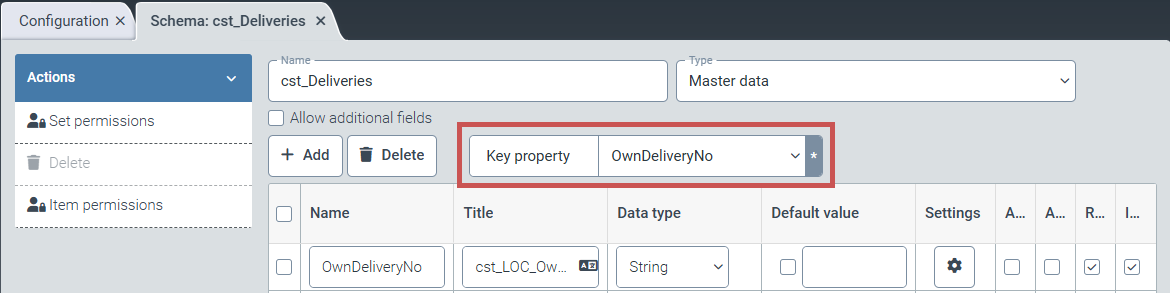
From the Key property drop-down list, select one of the added fields to use as the key field.
Notice
The key field is the field that uniquely identifies a record. Specifying a key field is mandatory for schemas of the type "Master data".
In the action menu, click Set permissions and configure the permissions for editing the schema.
In the action menu, click Item permissions and configure the permissions for viewing and editing the data.
Notice
The Item permissions button is only available for schemas of type "Business object" and "Master data".
Click Create.
➤ The schema has been created.
Editing a schema (V2)
Caution
Editing a schema that is already in use can have far‑reaching effects. The edited schema must not contain any dependent objects (e.g., workflows or work items) or any incompatible structures or data.
Make sure that editing a schema does not result in existing data being deleted. For schemas that are already in use, adding new fields is usually possible without any issues. Deleting fields from the schema, on the other hand, is generally not possible without causing problems.
Caution
Before editing a schema, check whether changes to the schema are used by all workflow nodes and whether all fields are populated with data. Additional fields in the workflow, for example, are not populated with data by the document extraction.
The data of customer-specific schemas (prefix cst_) can be edited. When schema data is changed, the system first validates the changes and then updates the affected databases and structures. The databases and structures are updated once per minute, so delays of up to one minute before the update starts are possible.
Select the Schemas menu item, then click a schema with the prefix cst_.
➣ The Schema: {schema name} tab will open.
Edit the data of the schema.
You can add new fields, or edit and delete existing ones.
Click Update.
➣ The Schema update dialog box will open. The planned changes, as well as the existing data and structures, are displayed.
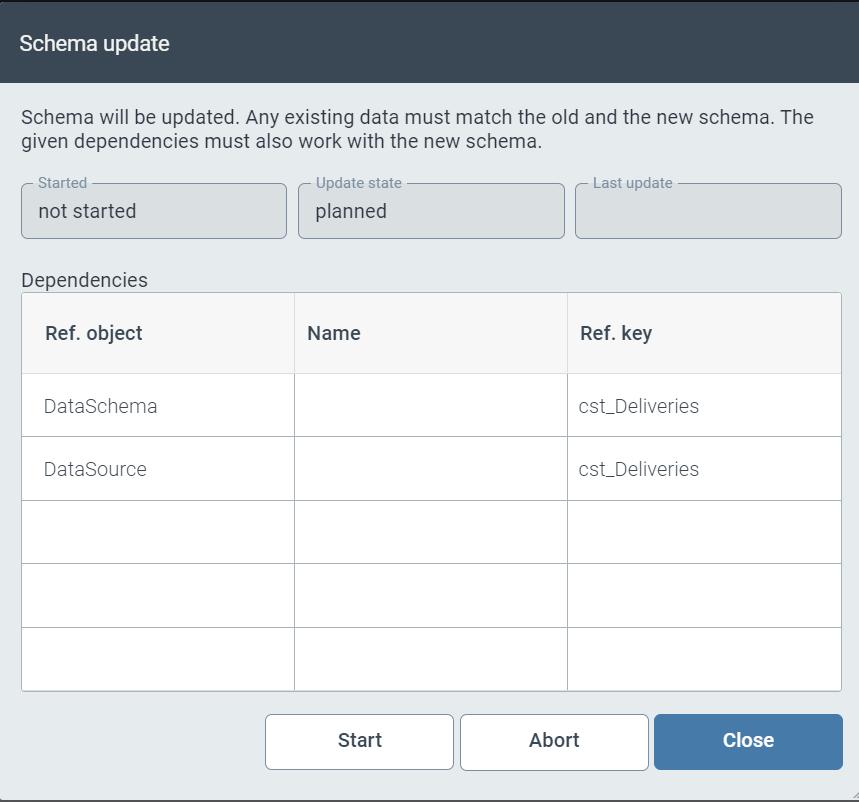
Review the planned changes.
Click Start, then click Close.
➤ The changes have been applied. The last five changes are displayed in the Updates panel.
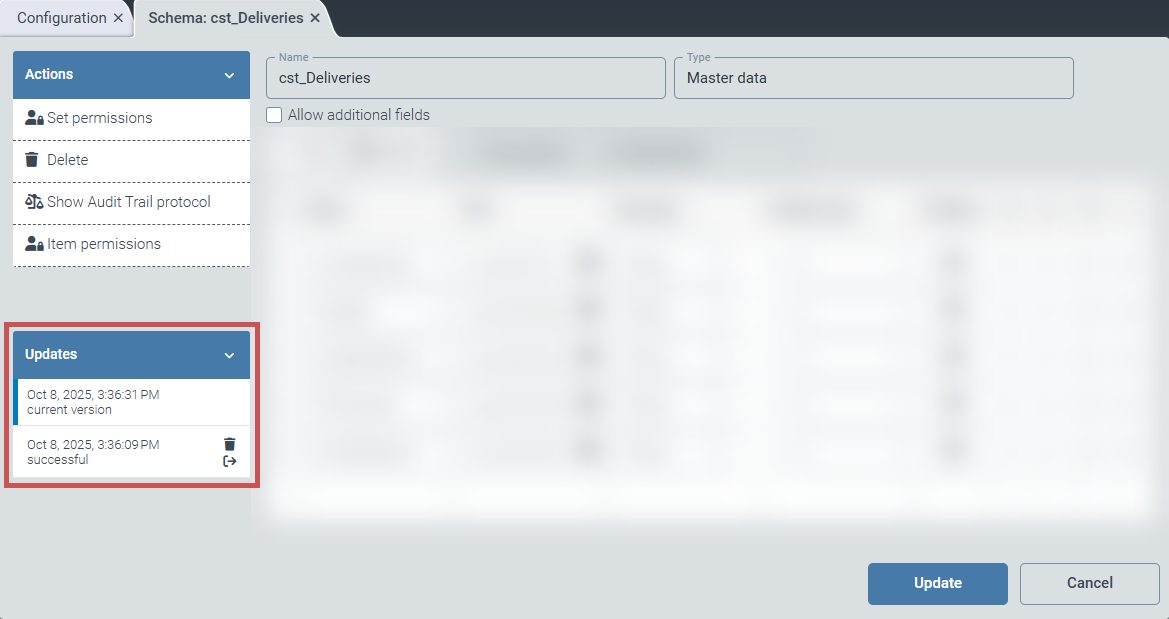
Tip
You can reactivate old changes (button
 ) or delete them (button
  ).
).