SAP Content Server (V2)
 |
The SAP content server menu item provides the option to edit the settings for the "Archive Indexer for SAP".
You can edit the default settings sys_Config or create new SAP Content Server settings, for example, to operate different SAP systems with one archive.
Editing SAP Content Server default settings (V2)
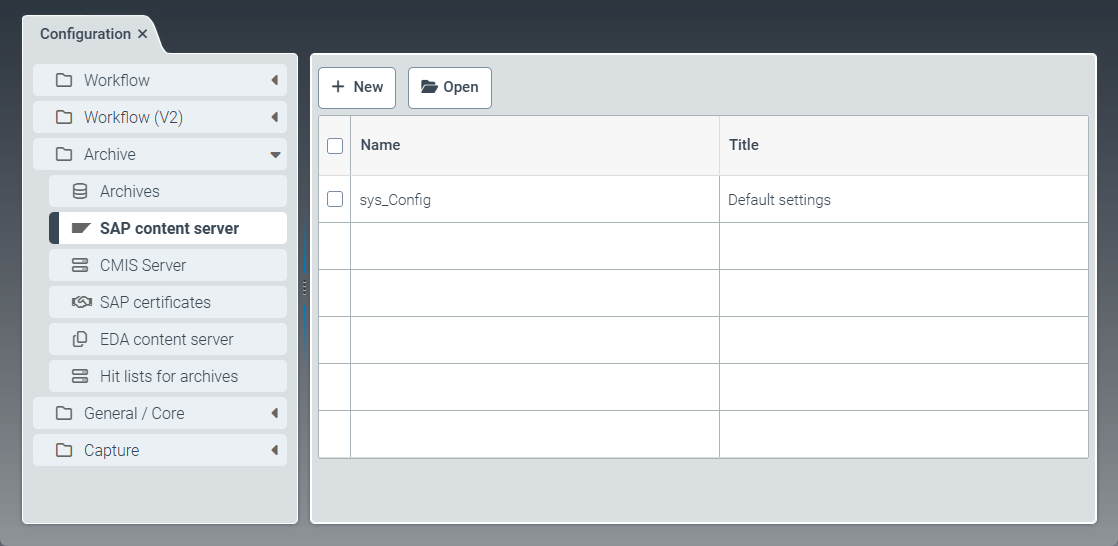
Select the SAP Content Server menu item, then click on the
sys_Configentry.➣ The ContentServer: sys_Config tab will open.
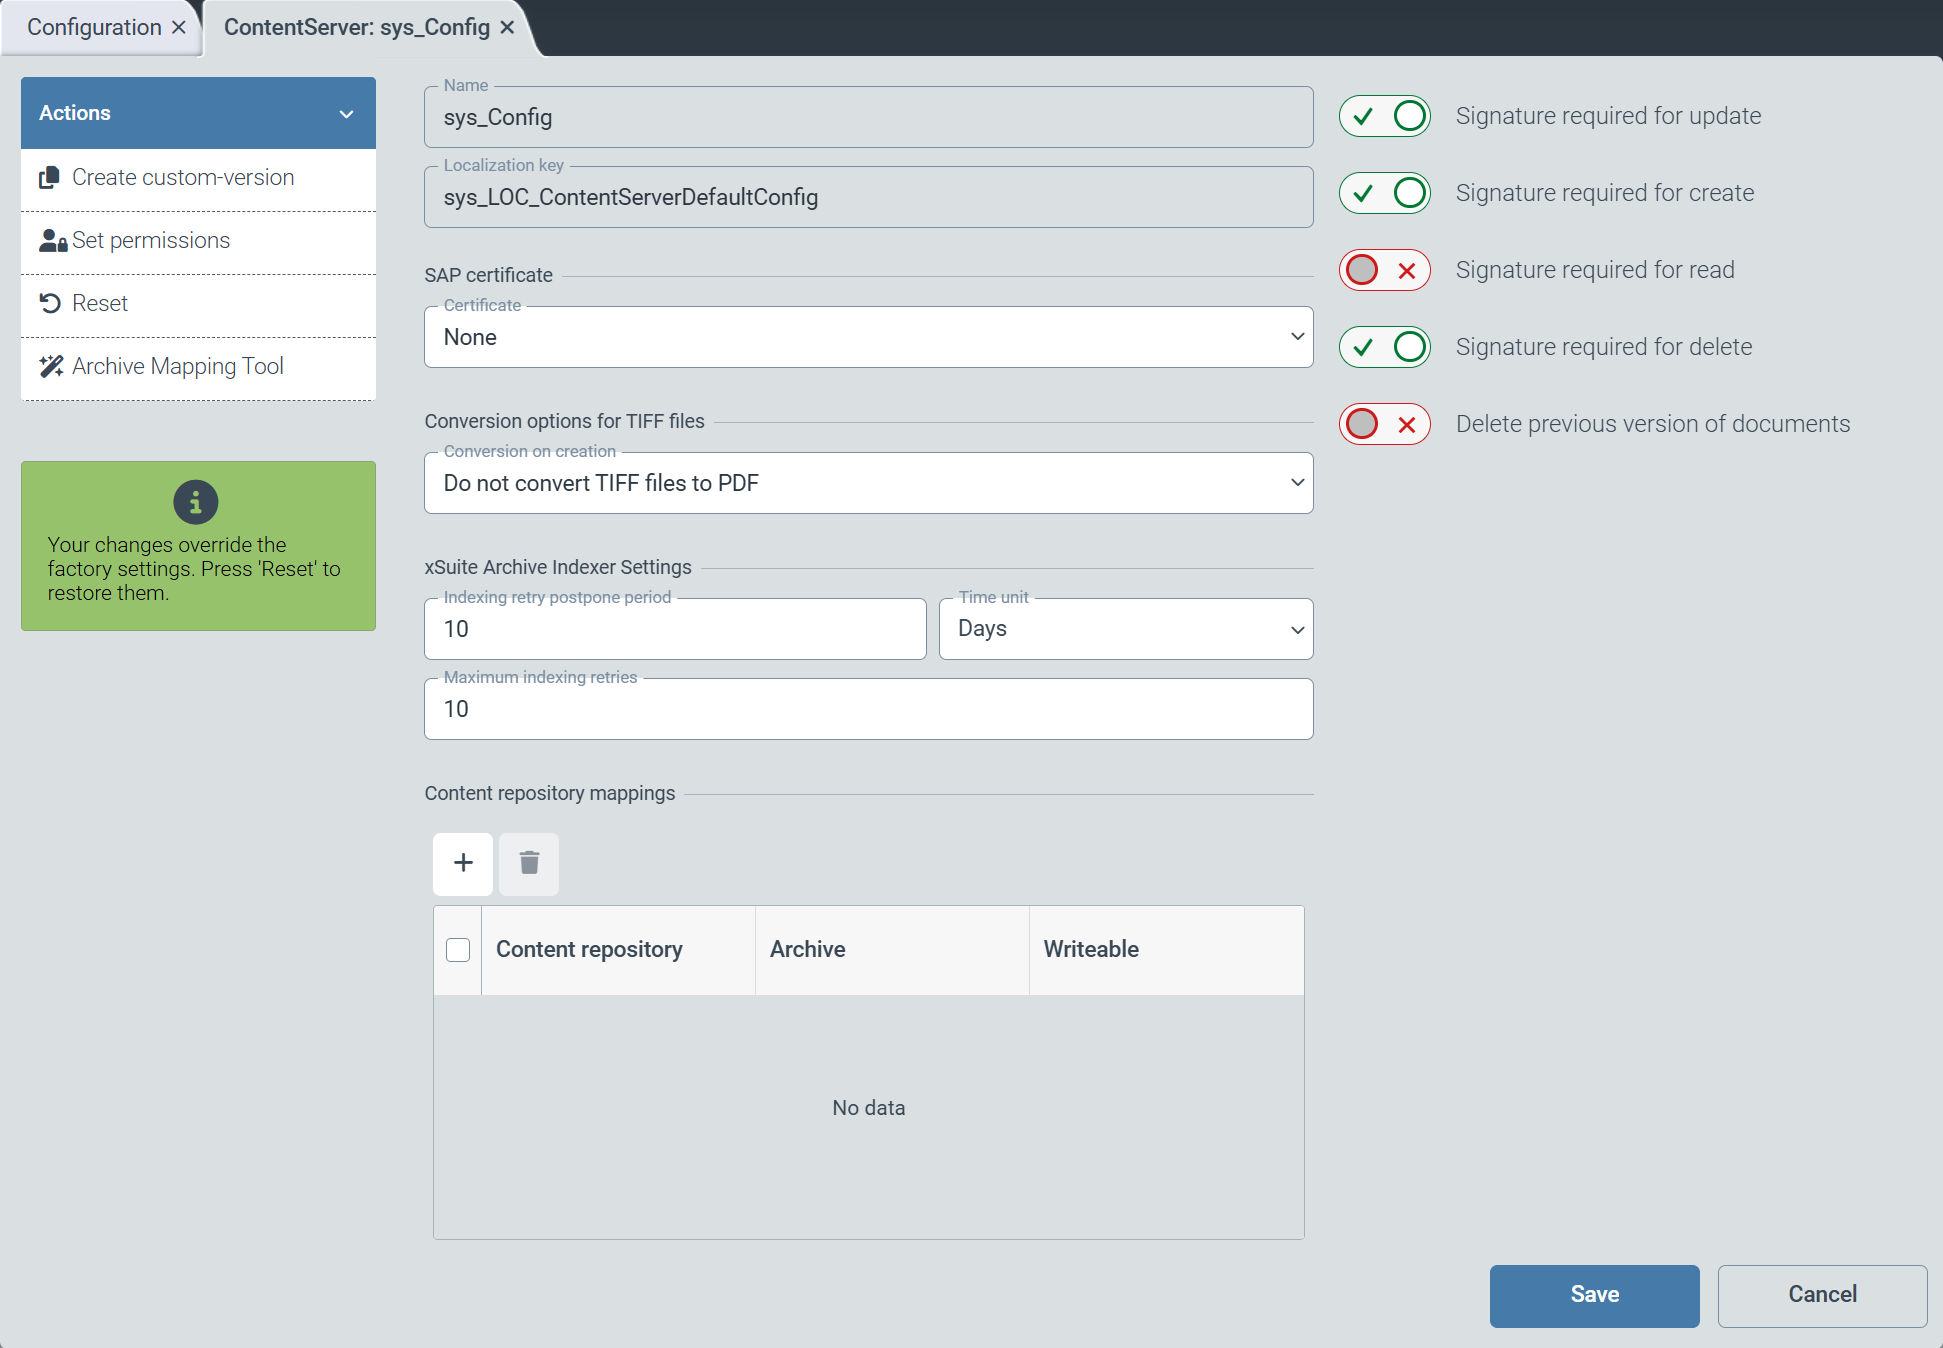
From the SAP certificate drop-down list, select an SAP certificate that will be linked to the configuration.
All SAP certificates that have been created and activated under the SAP certificates menu item are available for selection.
Select one of the following entries from the Conversion options for TIFF files drop-down list:
Do not convert TIFF files to PDF: Specifies that TIFF files are not converted. If TIFF files are not converted, direct document display in the xSuite Viewer is not possible.Convert TIFF files to PDF and archive both: Specifies that TIFF files are converted to a PDF document. The original TIFF files and the PDF document are archived.
In the xSuite Archive Indexer Settings section, define the settings for the Archive Indexer for SAP.
For more information about the Archive Indexer for SAP, see Configuring xSuite Archive Indexer for SAP (V2).
If necessary, activate the following options via the toggle buttons:
Caution
For security reasons, only signed ArchiveLink requests are permitted.
Signature required for update: Specifies that a signature is required to update an archive document.
Signature required for create: Specifies that a signature is required to create an archive document.
Signature required for read: Specifies that a signature is required to read an archive document.
Signature required for delete: Specifies that a signature is required to delete an archive document.
Delete previous version of documents: Specifies that when an archive document is updated, the previous version of the archive document is deleted.
To assign an archive to an SAP content repository, click
 Add in the Content repository mappings area, and then enter the following data:
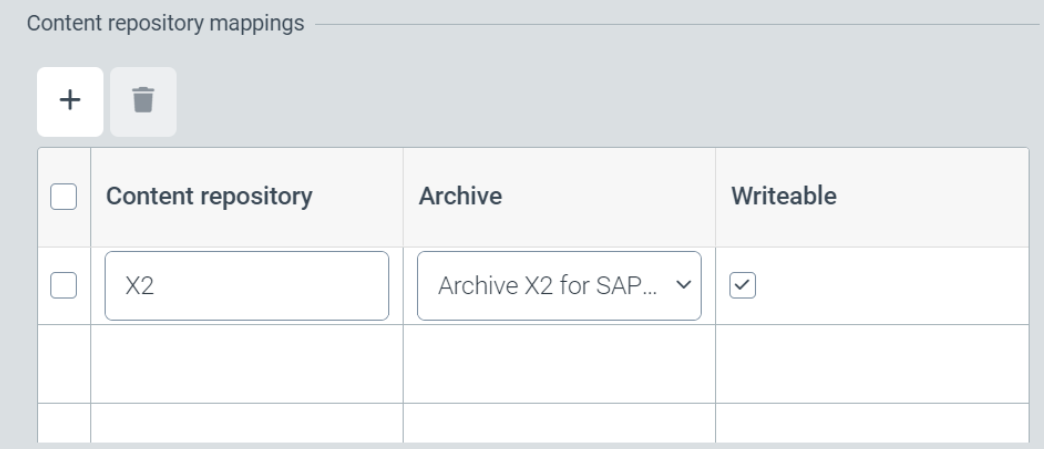
Content repository: Enter the name of the SAP content repository.
Archive: Select the archive that is assigned to the SAP content repository. All archives created under the Archives menu item are available for selection.
Writeable: If you select this checkbox, the xSuite Helix archive will be used for write operations. Only one archive may be used for write operations per SAP repository.
Click Save.
➤ The changes have been saved.
Configuring xSuite Archive Indexer for SAP (V2)
To configure the "Archive Indexer for SAP," you must make settings in xSuite Helix, xSuite Interface Prism and in the SAP system.
Configuration in xSuite Helix
Select the Archive menu item and create a new archive.
Caution
If you operate different SAP systems with a single archive client, creating a superordinate archive is mandatory. Otherwise, repositories with the same name would be mapped in the SAP systems with the same archives.
Select the SAP Content Server menu item, then edit the SAP Content Server default settings or create new SAP Content Server settings.
Caution
If you create your own SAP Content Server settings, it is mandatory to specify a different archive path in SAP for each configuration.
Configuration in xSuite Interface Prism
The xSuite Cloud Proxy server is used to centrally manage communication between the company network and the xSuite Cloud on the Internet. Communication via the ArchiveLink standard is enhanced with the necessary security context for Internet systems.
The xSuite Cloud Proxy Server is implemented using a configured instance of xSuite Interface. For information on configuration, see the xSuite Interface Prism online help.
To use it as an xSuite Cloud Proxy Server for Helix Archive V2, make an adjustment to the configuration line for forwarding communication. Make the following adjustment in the relevant section for ArchiveLink communication:
Customize the
ToURLkey so that the Helix API V2 uses the full HTTP script for ArchiveLink communication. The line must read as follows::ToURL=%ToURL%/api/v2$1
Configuration in SAP
Execute the transaction OAC0.
➣ The view Display Content Repositories: Overview will open.
Create a new content repository or select an existing content repository.
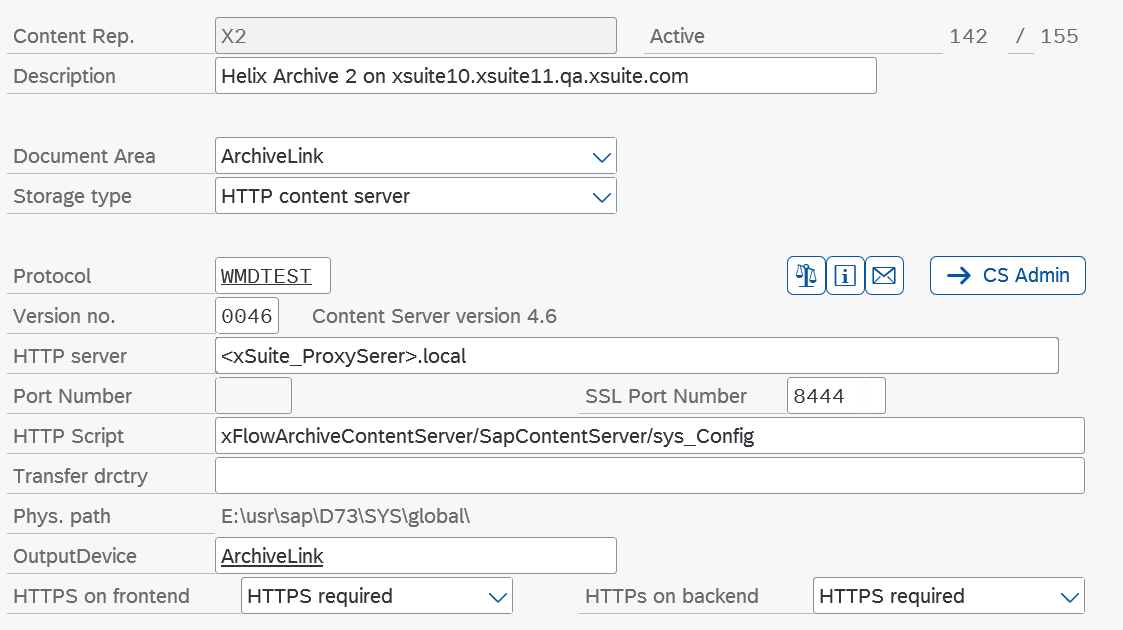
In the field HTTPS on frontend and HTTPS on backend, select the value
HTTPS required.Enter the fully qualified URL of your xSuite Helix client in the field HTTP server to configure the SSL connection.
In the SSL Port Number field, enter an appropriate port.
In the field HTTP Script, enter the following value for the standard configuration:
xFlowArchiveContentServer/ContentServer/{helixclient@helixclient}.Example for the SAP Content Server default settings:
/SapContentServer/sys_ConfigCaution
Be sure to use the correct uppercase and lowercase letters when specifying the HTTP script.
To perform a connection test, click the button
 Test connection.
Click the button
 Send certificate to send the SAP certificate to the archive.
Click
 Save.
Save.Execute the transaction STRUST.
➣ The Trust Manager will open.
Double-click on the host name in the entry SSL client (Standard).
Click the button
 Import certificate and import the SSL certificate from the file in binary format.
Notice
The SSL server certificate must be issued by a CA (Certificate Authority) that the SAP system also trusts.
Click the button
 Add to Certificate List.
Click
Save.
Configuring the indexing of ArchiveLink documents (V2)
To configure the indexing of ArchiveLink documents, you must make settings in the SAP system and in xSuite Helix.
Configuration in SAP
Notice
Before performing the configuration, make sure that the System Requirements have been met.
Execute the transaction /WMD/XFA_SPRO.
➣ The xSuite Archive Indexer configuration will open.
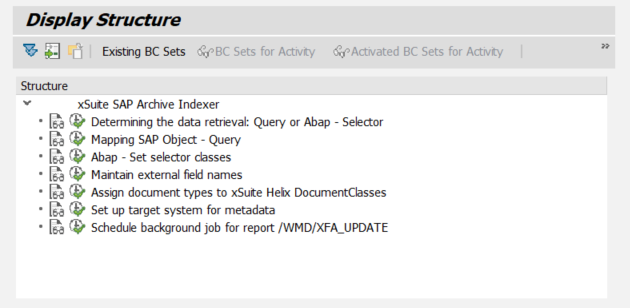
Open the entry Determining the data retrieval: Query or ABAP - Selector and determine which class is used to select the index data.
Data acquisition
Class
Selector class
/WMD/CL_GET_IDX_SELECTOR
Open the entry ABAP - Set selector classes and define the selector classes for the business objects used.
The following classes are delivered as part of the standard package:
Obj. Type
Reference to
Description
BKPF
/WMD/CL_XFA_BKPF_SELECTOR
Reads FI documents.
BUS2012
/WMD/CL_XFA_EKKO_SELECTOR
MM orders
BUS2081
/WMD/CL_XFA_RBKP_SELECTOR
MM Vendor Invoices
LIKP
/WMD/CL_XFA_LIKP_SELECTOR
SD deliveries
VBAK
/WMD/CL_XFA_VBAK_SELECTOR
SD customer orders
VBRK
/WMD/CL_XFA_VBRK_SELECTOR
SD invoices
Open the entry Maintain external field names and store the external field names. The external field names correspond to the technical names of the document-type fields in xSuite Helix.
Open the entry Assign document types to xSuite Helix and assign the document types to the document types of the xSuite Helix archive.
Open the entry Set up target system for metadata and enter the identifier of the target system and the URL of the xSuite Cloud Connector.
Execute the transaction SM36.
➣ The Define Job view will open.
Schedule a job for the /WMD/XFA_UPDATE program to run at regular intervals.
Recommended setting: Once or twice a day at times when there is no workload.
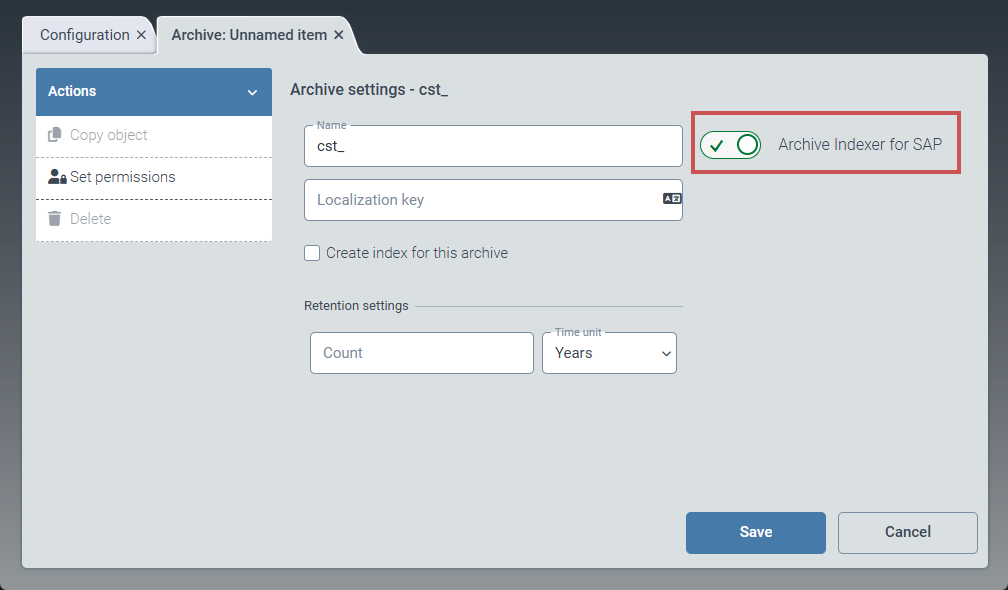
Configuration in xSuite Helix
Under the Archives menu item in the archive settings, activate the Archive Indexer for SAP toggle button.
➣ The use of the Archive Indexer is now enabled for this archive.
Under the Schemas menu item, create a schema of the type
External Archive Document.The names of custom schemas must follow this pattern:
cst_SAP_{SAP_Object_Name}_DOC_ARC({additional text})Notice
When updating the documents, the system checks whether the SAP business object has an associated schema of type
External Archive Document. If no custom schema matches this name pattern, the system uses a delivered schema with the name patternsys_SAP_<SAP_Object_Name>_DOC_ARC.If you use your own class for data retrieval in SAP (e.g., to add additional fields), you must create a customer-specific version of a schema with the specified name pattern.