Workflow hit lists (V2)
 |
The Hit lists menu item provides options for creating, editing and deleting hit lists.
Hit lists are used to compile data on specific work items and make it accessible to users or systems. When configuring hit lists, search restrictions are used to define which work‑item data is collected in the individual hit lists.
By default, the hit lists are divided into the following folders:
Tip
You can create new folders by clicking on the Add folder button. You can move the folders using drag and drop.
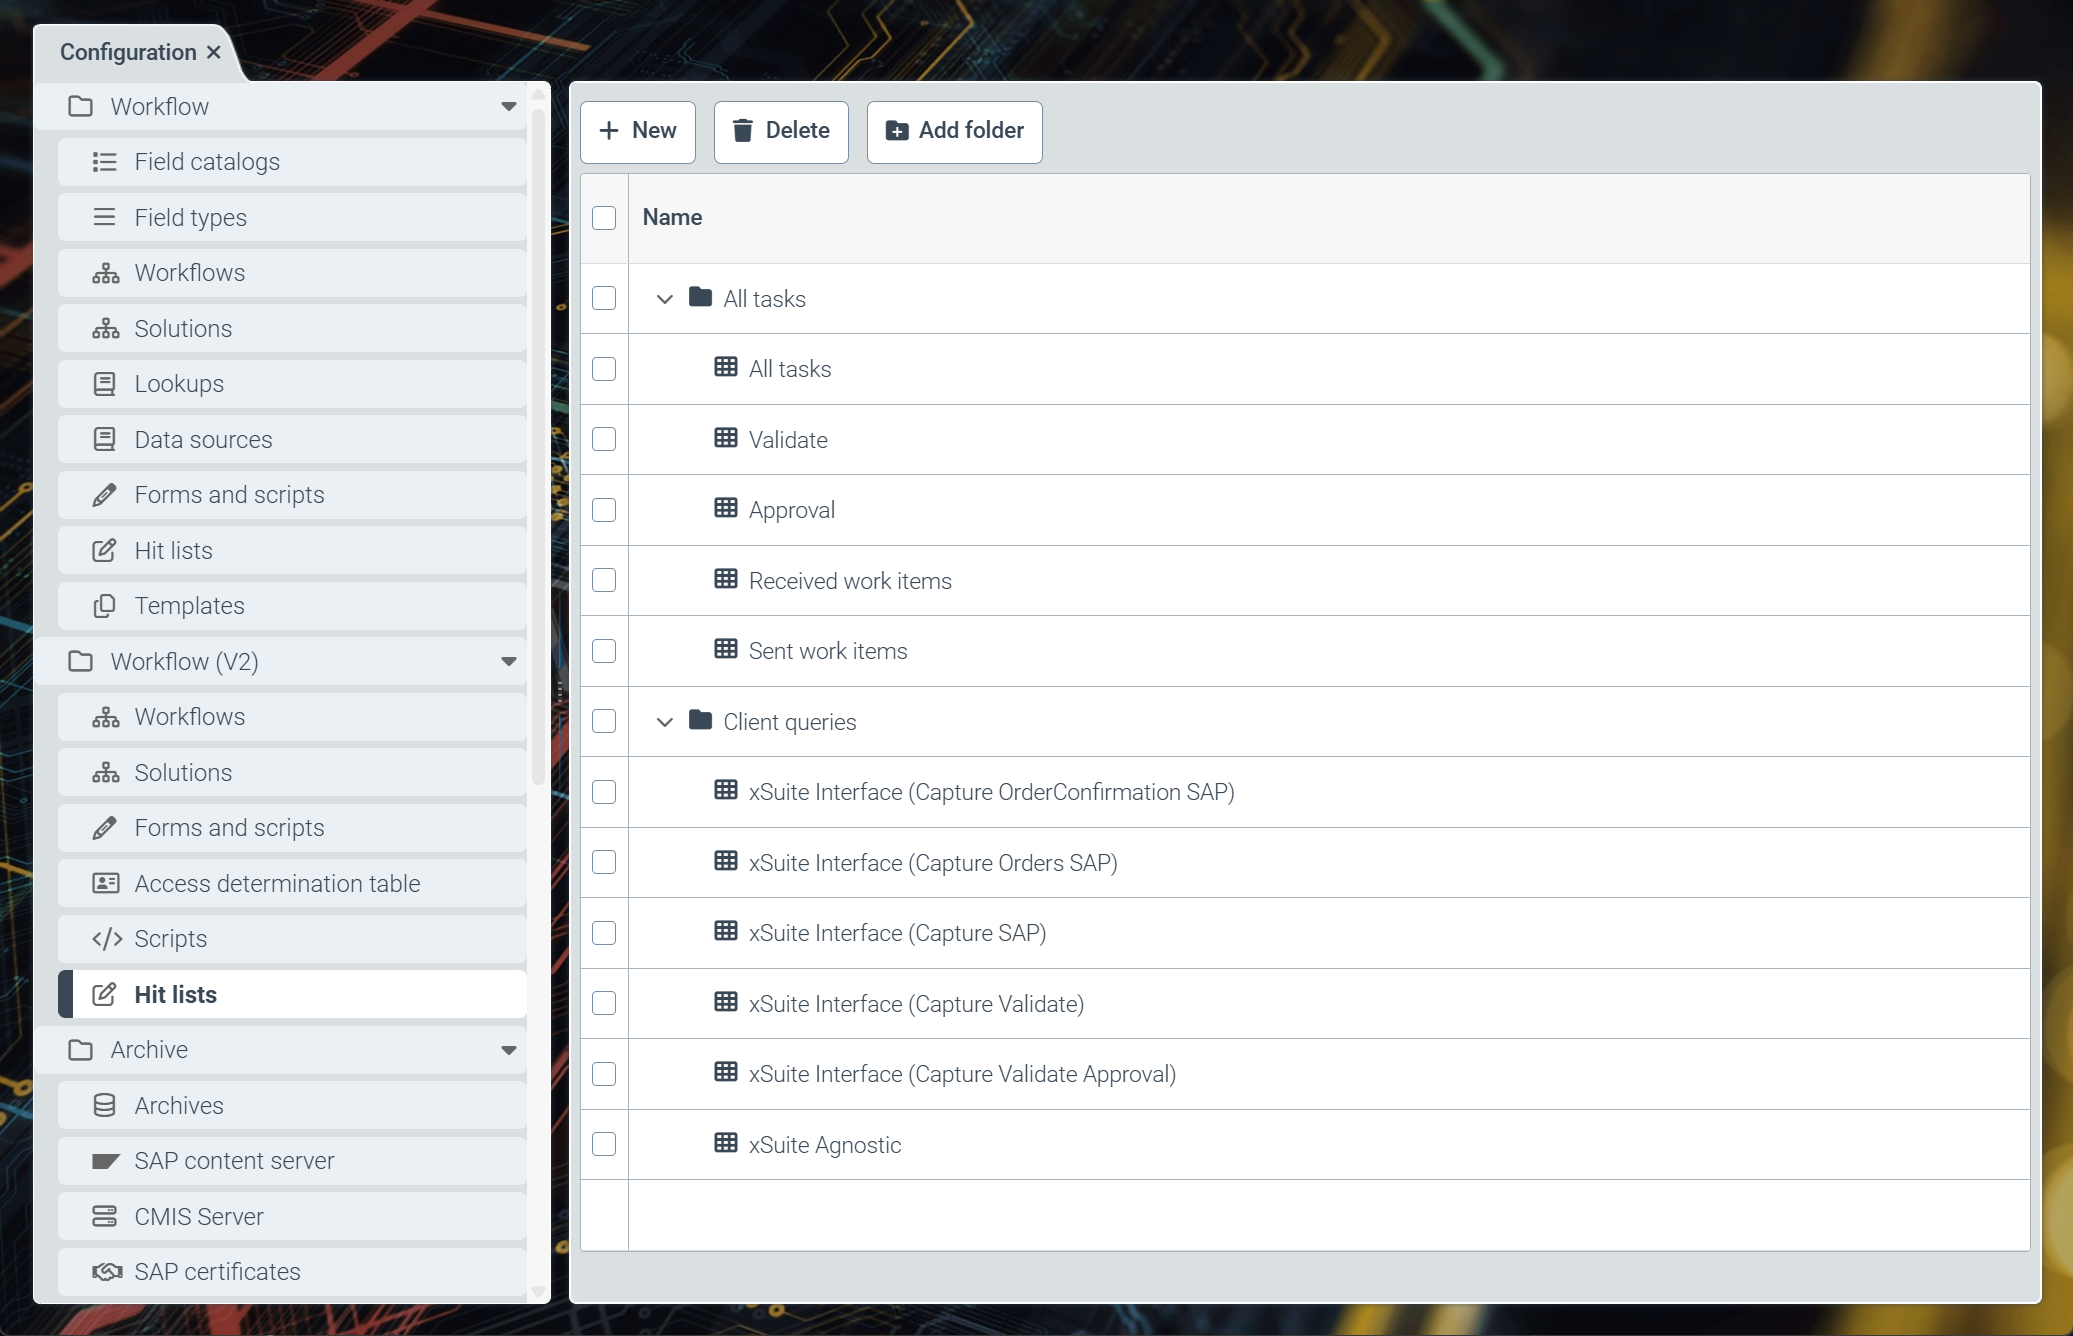
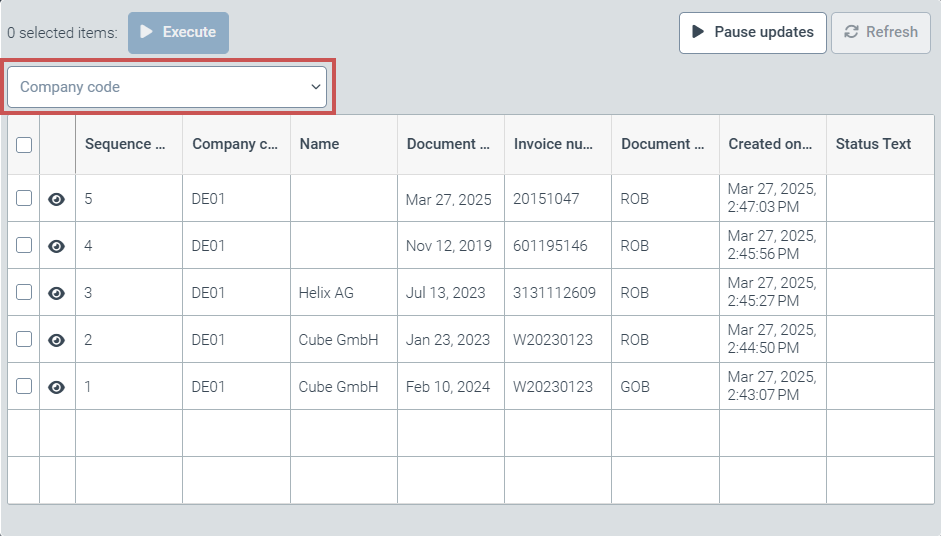
All tasks: Here, the hit lists for the individual workflow tasks are displayed. These hit lists are visible to users on the workstation. The following hit lists come with the software:
All tasks: Hit list for all existing work items
Validate: Hit list for all work items that are in the "Validation" workflow step
Approval: Hit list for all work items that are in the "Release" workflow step
Received work items: Hit list for all received work items
Sent work items: Hit list for all sent work items
Client queries: Here, the hit lists for data transfer to external systems are displayed (e.g., for data transfer to xSuite Interface Prism or xSuite Invoice Sphere). These hit lists are not visible to the user and are used exclusively for data transfer. The following hit lists come with the software:
xSuite Interface (Capture OrderConfirmation SAP)
xSuite Interface (Capture Orders SAP)
xSuite Interface (Capture Validate)
xSuite Interface (Capture Validate Approval)
xSuite Agnostic
Notice
The Client queries folder is displayed only if you have the
sys_ConnectivityAdminrole.
Creating a workflow hit list (V2)
Select the Hit Lists menu item, then click New.
➣ The Hit list: Unnamed item tab will open.
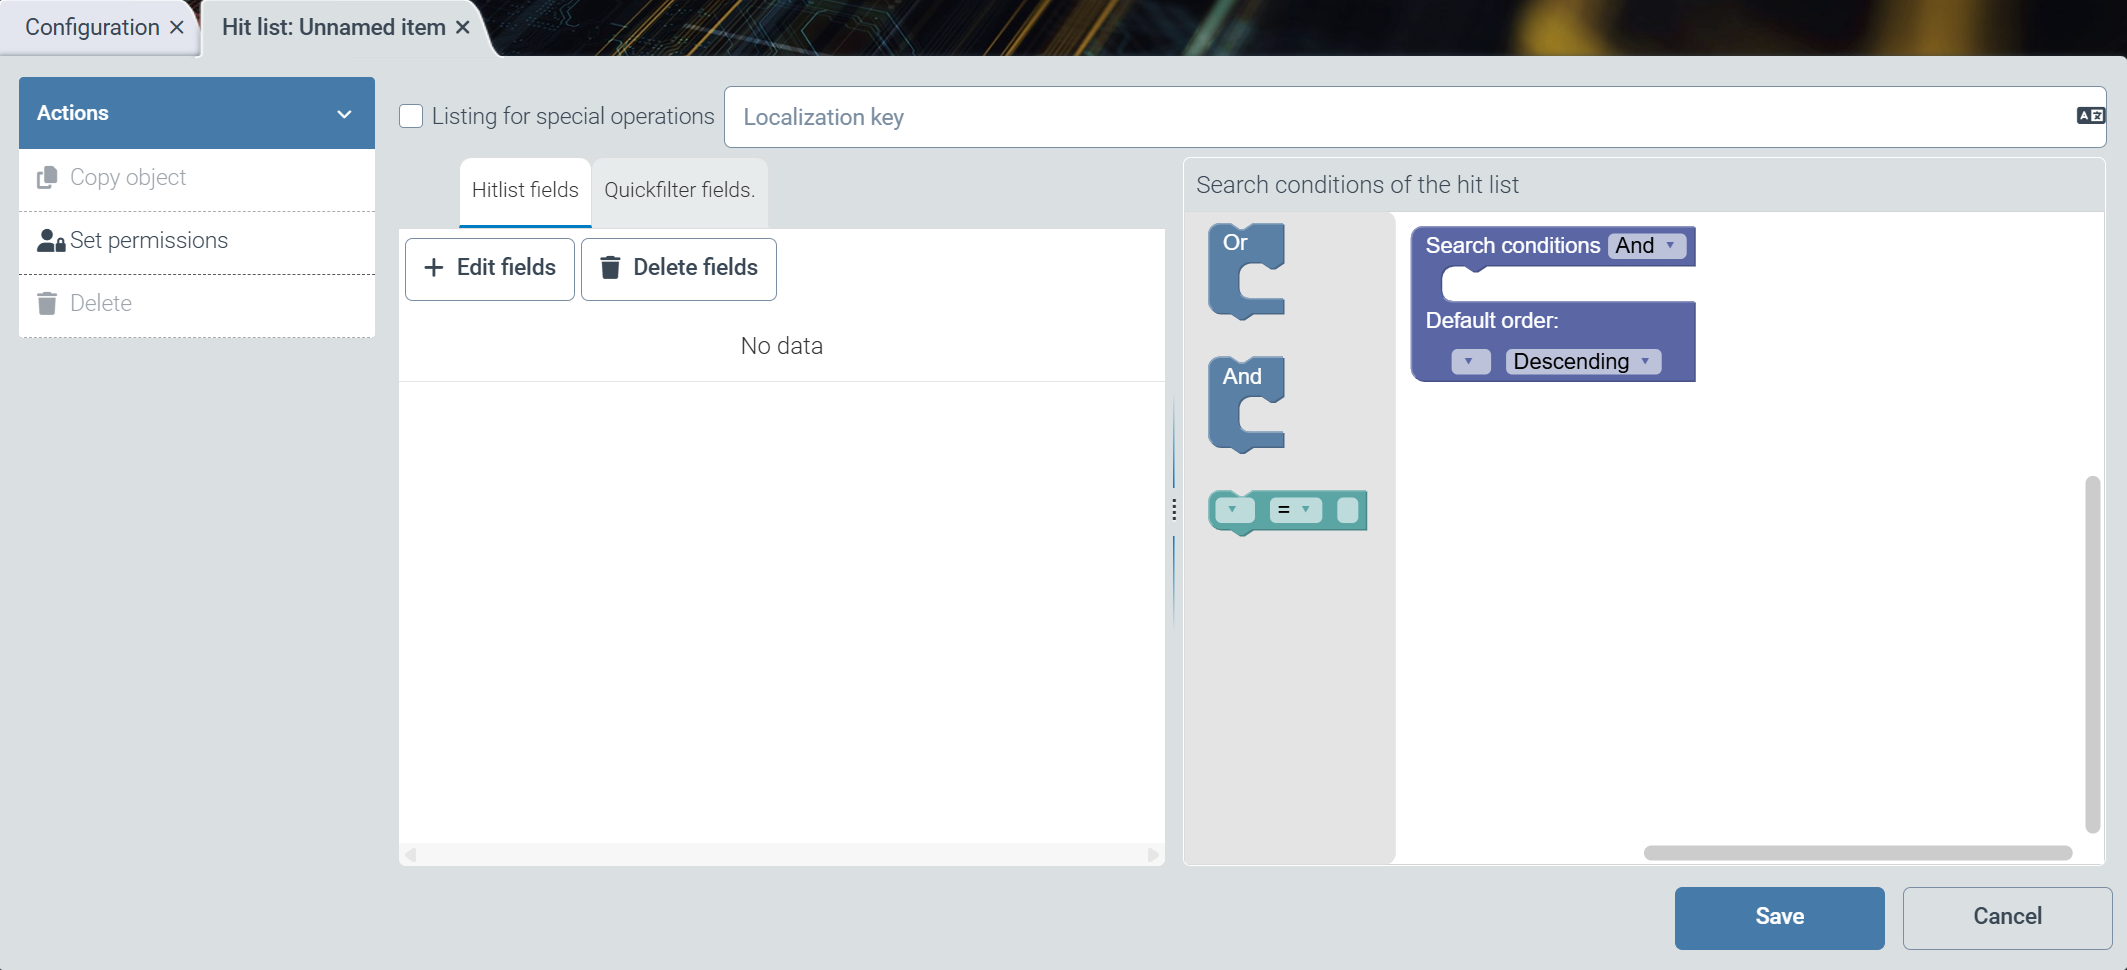
In the Localization key field, enter the localization key for the hit-list name to be displayed.
Notice
To open the Select localization dialog box, click the
 button.
For more information, see Selecting a localization.
In the action menu, click Set permissions and configure the authorizations Read, Update, Delete, and Authorize for user and administrator roles.
Click Save.
➤ The workflow hit list has been created. To use the hit list, you need to add fields and define search restrictions.
Caution
Newly created hit lists are automatically saved in the Client queries folder. If you want the hit list to be visible to the user, drag and drop the hit list into the All tasks folder.
Notice
External access to data in a hit list (e.g., via xSuite Interface Prism or xSuite Invoice Sphere) always takes place using the technical name of the hit list.
The technical name of the hit list is displayed as a tab label once the hit list has been called up. The technical names of the hit lists that come with the software always begin with
sys_. The technical names of custom hit lists always consist of a GUID (i.e., a series of numbers and letters separated by hyphens (-)).
Adding fields to a workflow hit list
Select Hit list fields, then click Edit fields.
➣ The Edit Fields dialog box will open. Here, all available fields are displayed, sorted by workflow schema.
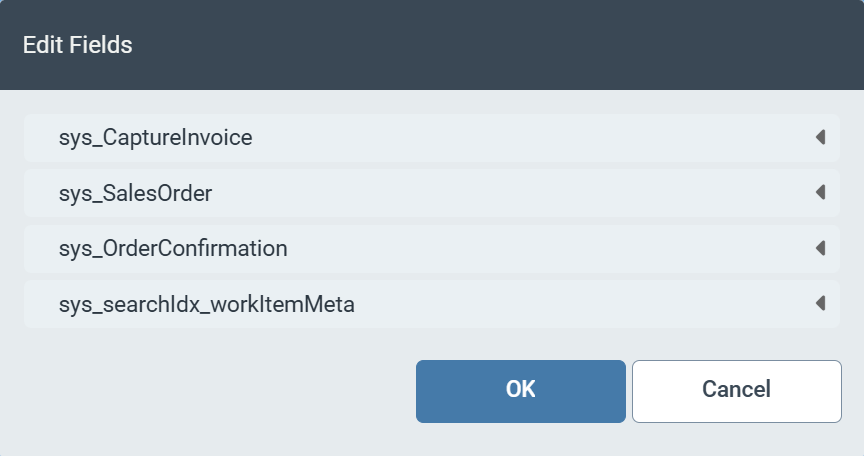
Select the checkboxes for the fields you want to add to the hit list.
Tip
To add technical metadata fields, click the sys_searchIdx_workItemMeta schema and select the checkboxes for the desired metadata fields (e.g., sequenceNumber or created).
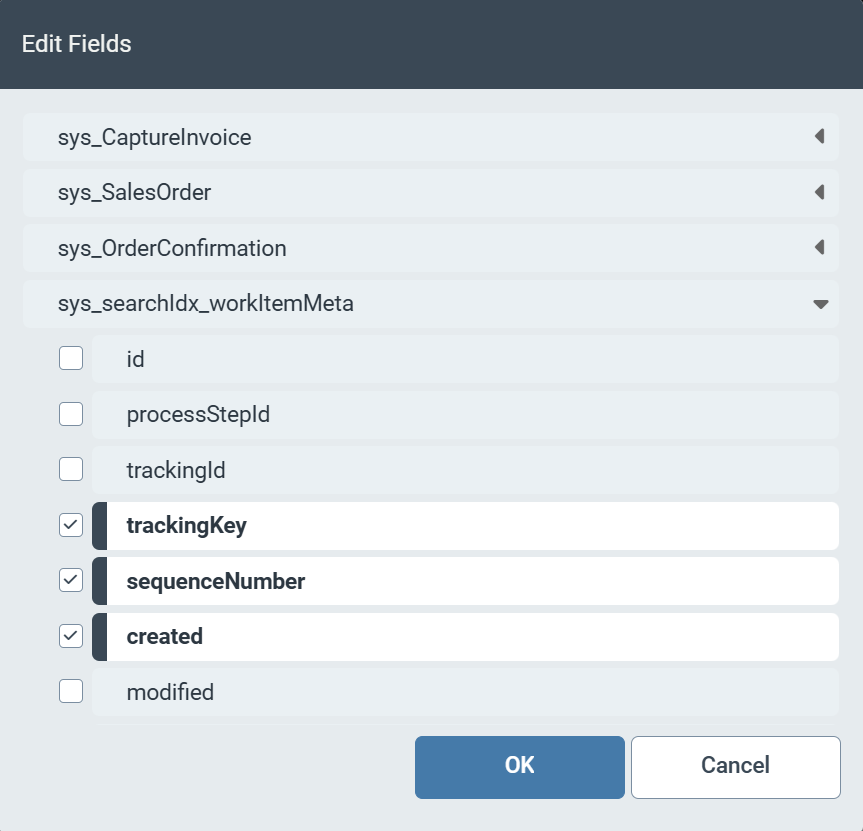
Click OK.
➣ The selected fields will be displayed under Hit list fields.
Tip
Use drag and drop to change the arrangement of the fields.
The order of the fields determines the order in which the columns of the hit list appear.
Click Save.
➤ The fields have been added to the hit list.
Adding fields for the quick search
If you set up a quick search for the hit list, an extra search field will be displayed above the hit list for the user. The user can enter a search term in this field to narrow down the results even further. After entering a search term, the hit list is updated and a second search field appears, in which the user can enter another search term. In total, the quick search offers up to three filter levels for narrowing down the hit list.

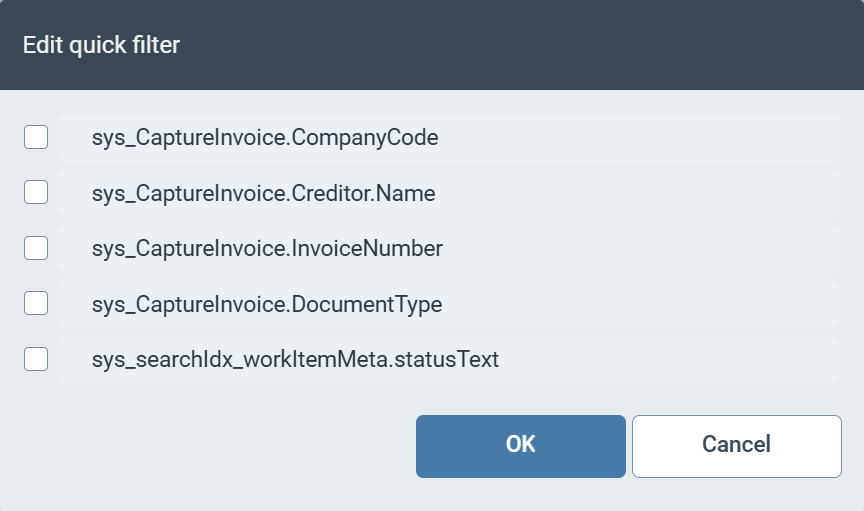
Select Quickfilter fields, then click Edit fields.
➣ The Edit quick filter dialog box will open.
Notice
For the quick search, all fields that are added to the hit list and have the field type "String" are available. You can select up to three fields for the quick search.
Select the checkboxes for the fields you want to add to the quick search.
Click OK.
➣ The selected fields will be displayed under Quickfilter fields.
Tip
Use drag and drop to change the arrangement of the fields.
The order of the searches (search priority) is tied to the sequence of the fields.
Click Save.
➤ The fields have been added for the quick search.
Defining search restrictions for a workflow hit list
The search restrictions of a hit list allow you to define which data is collected and displayed in the hit list. The sorting of the data in the hit list can also be defined.
If no search restrictions are set, the data of all work items is displayed in the hit list.
Select one of the following values from the Search conditions drop-down list:
And: Combines several search restrictions with an AND.Or: Combines several search restrictions with an OR.
Drag and drop a search restriction into the Search conditions editing area.
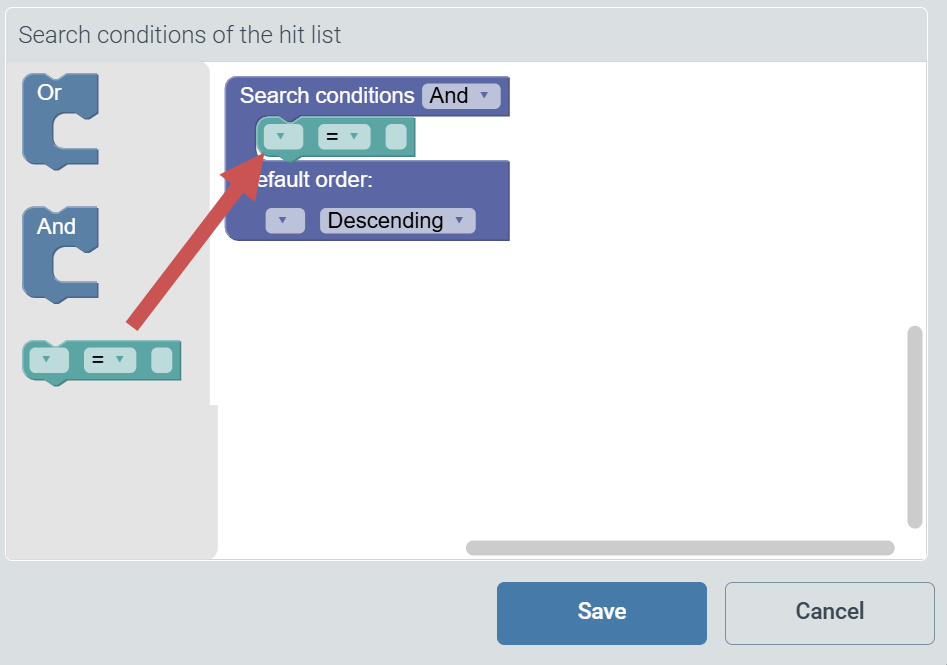
From the drop-down list on the left, select the field to be used for search restriction.
In the field on the right, enter the corresponding value.
In the middle drop-down list, select one of the following operators that links the field and the field value:
=: equals<: less than<=: less than or equal to>: greater than>=: greater than or equal to~: containsTip
Wildcards may be used to specify the field value. The following wildcards are permitted:
Asterisk (
*): Placeholder for any stringQuestion mark (
?): Placeholder for one character
To add additional search restrictions, repeat Step 2 to Step 5.
Example 1. Search restrictions of a workflow hit list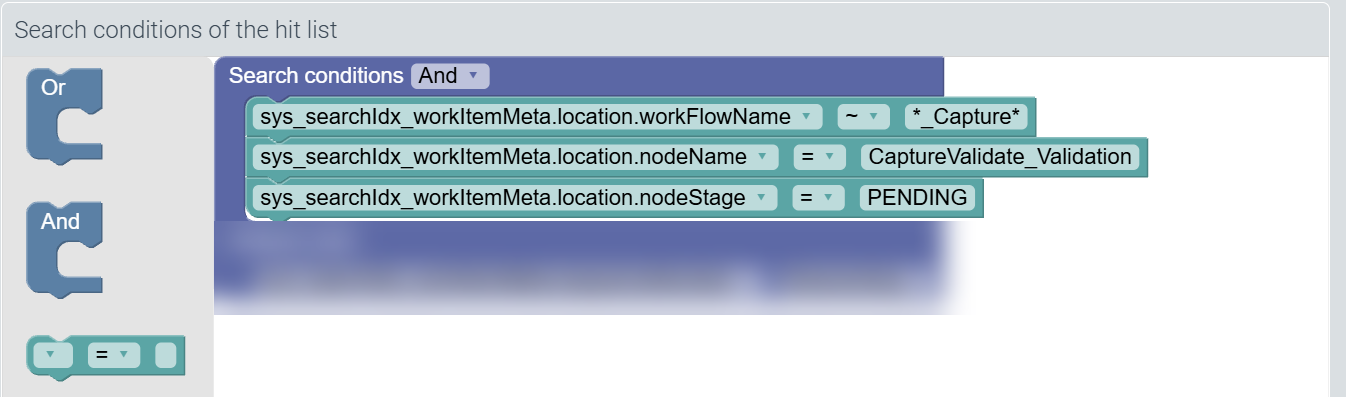
In this example, three AND-linked search restrictions have been added.
If these search restrictions are applied, the hit list will display all work items that meet all of the following criteria:
The work items are in a workflow whose name includes the substring
Capture.The work items are located in the
CaptureValidate_Validationworkflow node.The work items have the status "Pending".
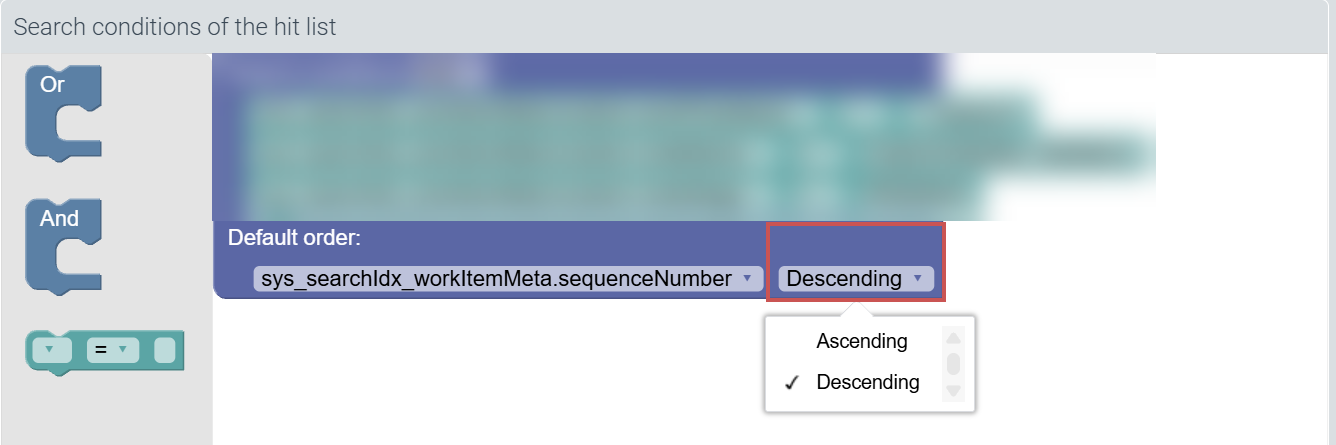
From the Default order drop-down list, select a field to use for sorting the hit list.
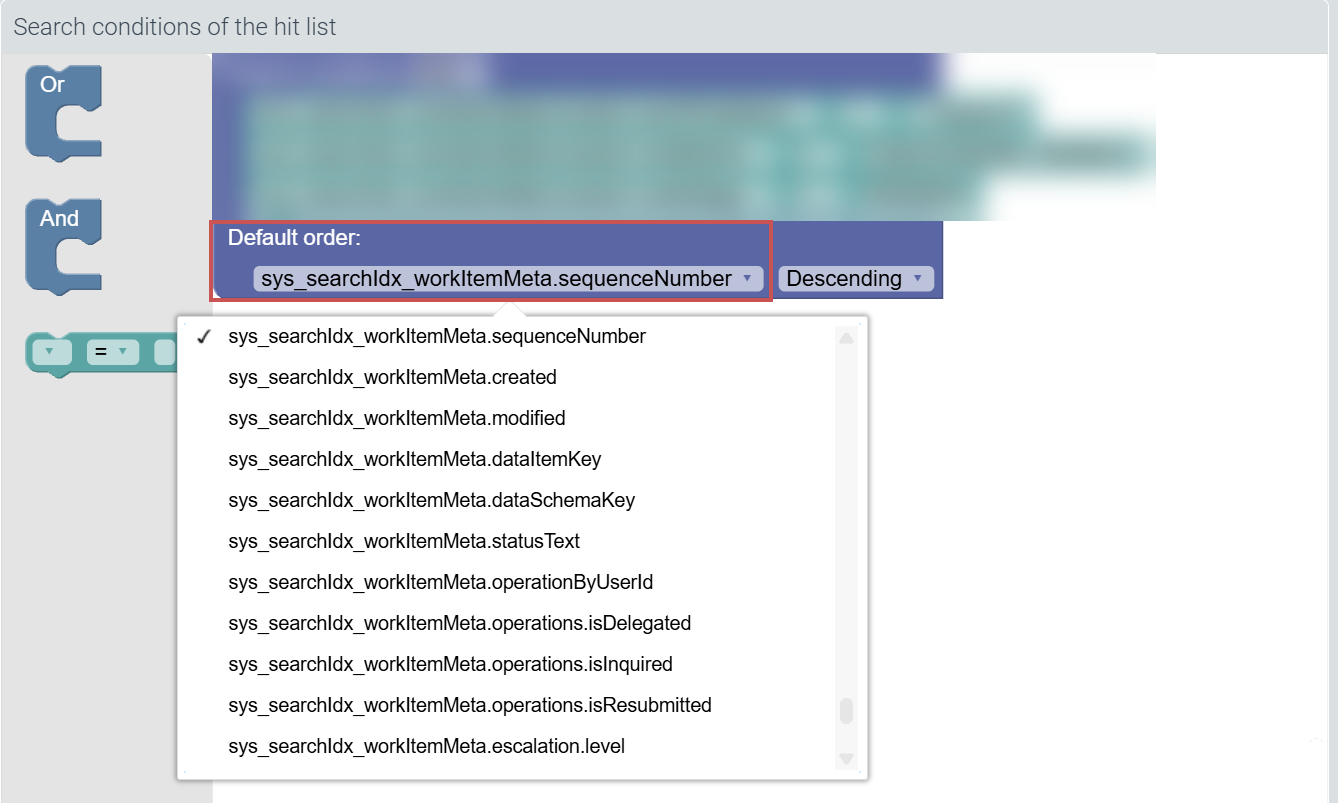
Select one of the following sort orders:
Ascending: ascending sortingDescending: descending sorting
Click Save.
➤ The search restrictions of the hit list have been defined.