Templates
 |
The Templates menu item offers options to create text templates for sending emails. These text templates are used when sending e-invoices (outbound) via email.
You can insert text variables as placeholders in the text templates. When sending an email, xSuite eDNA Helix uses these text variables to dynamically insert invoice data, such as the invoice date or invoice amounts.
A template set can be used either globally for all companies or only for one or more specific companies. Each template set contains at most one template for the email body (MailBody) and one template for the email subject (MailSubject).
Caution
To use email templates and send emails, you need a configured Office365 connector with an associated outbox.
Creating a template set
When creating a new template set, enter the companies for which the template set will be used. You can either create a template set that is used globally for all companies or a template set that is used only for selected companies. After creating the template set, you can add a template to it.
Creating a global template set
Under the Customization → Templates menu item, click Create Template Set.
➣ The Create Template Set dialog box will open.
Select the Global option.
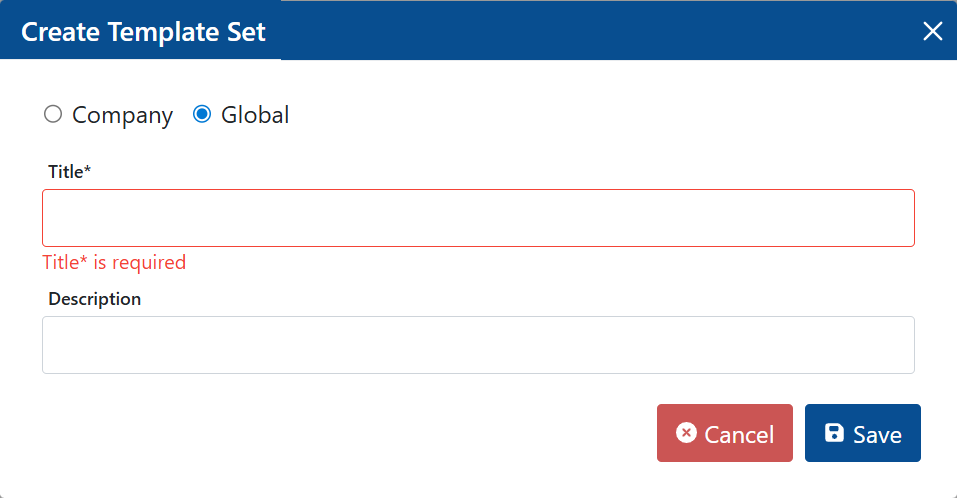
In the Title field, enter a display name for the template set.
If necessary, enter a brief description of the template set in the Description field.
Click Save.
➤ The template set has been created. You can now add a template.
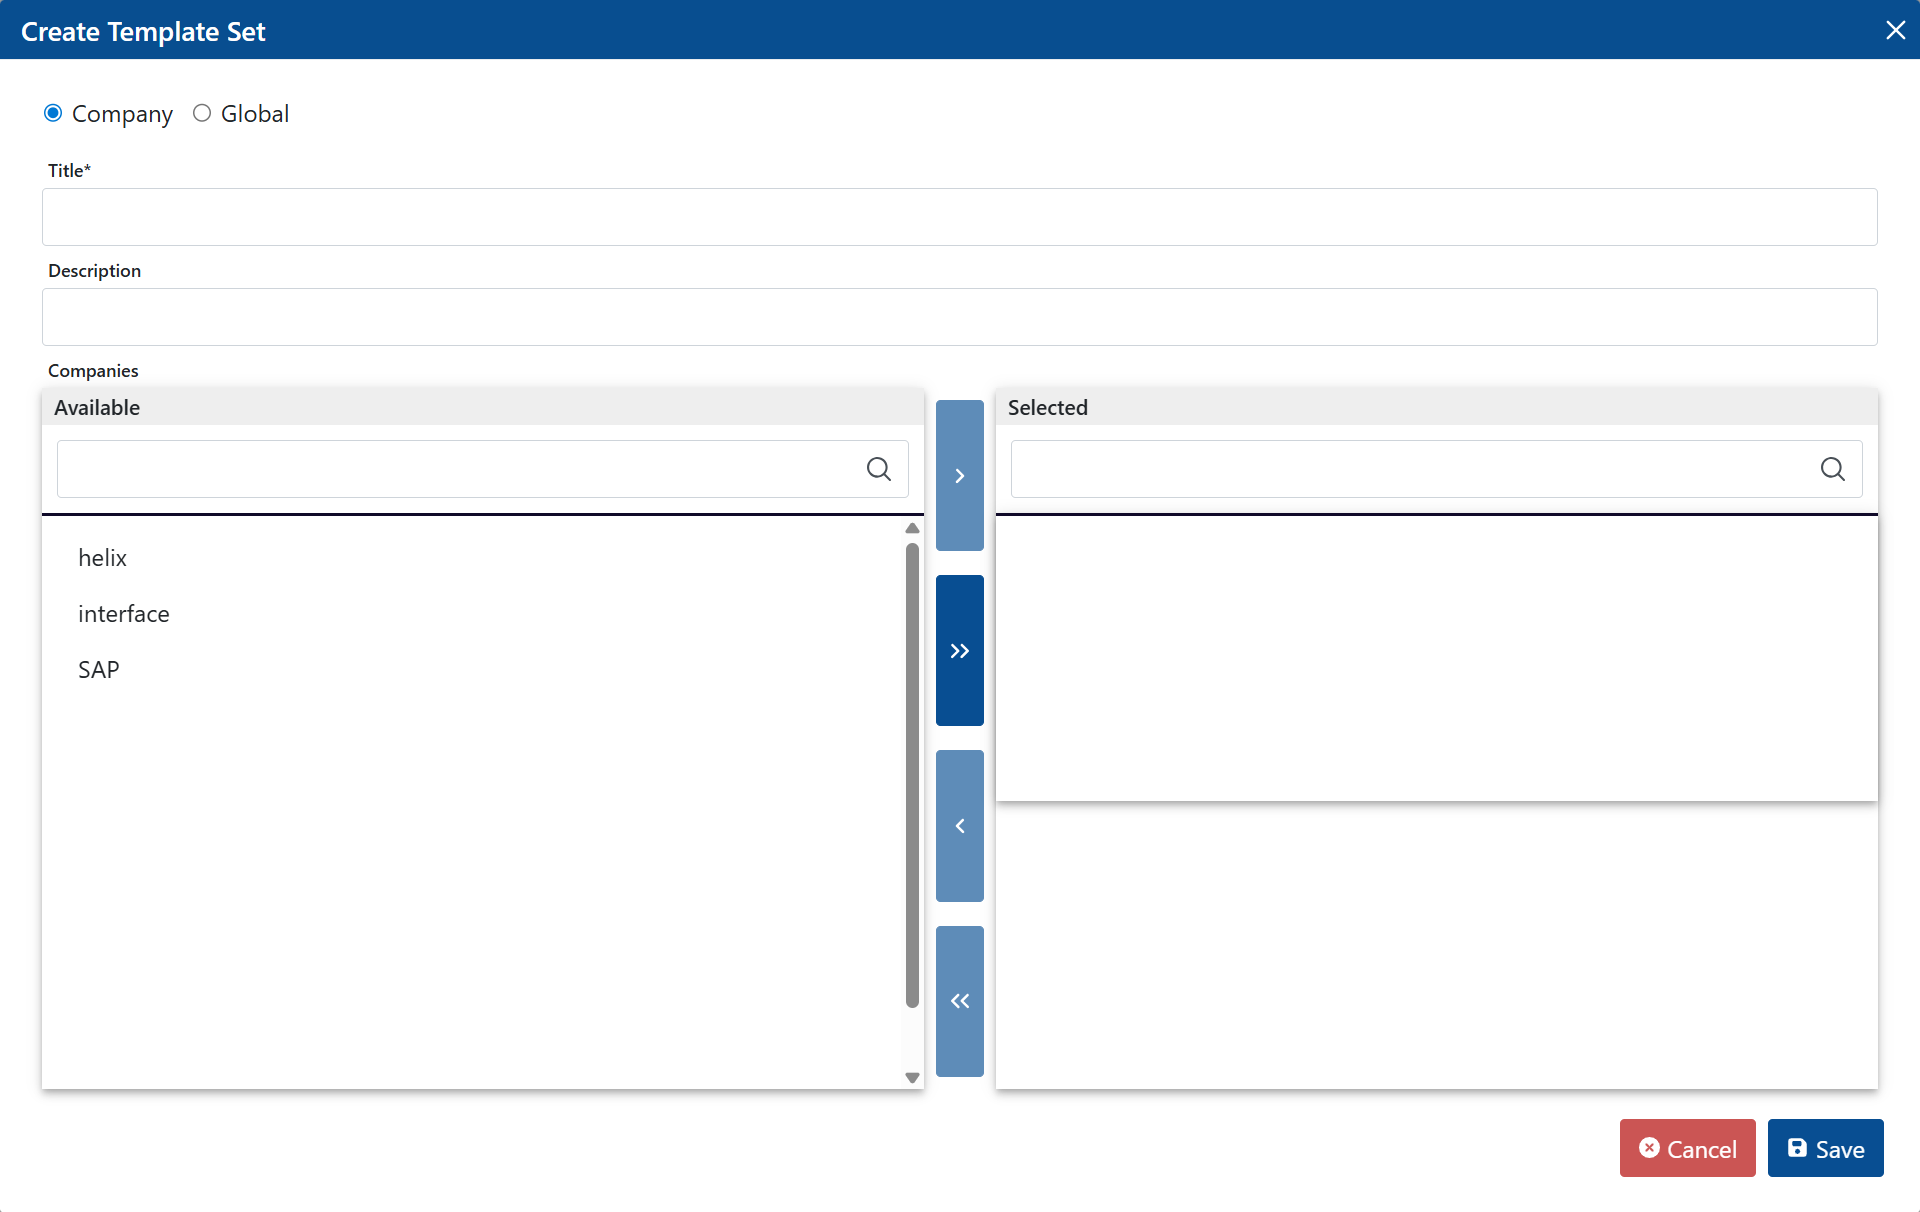
Creating a template set for selected companies
Under the Customization → Templates menu item, click Create Template Set.
➣ The Create Template Set dialog box will open.
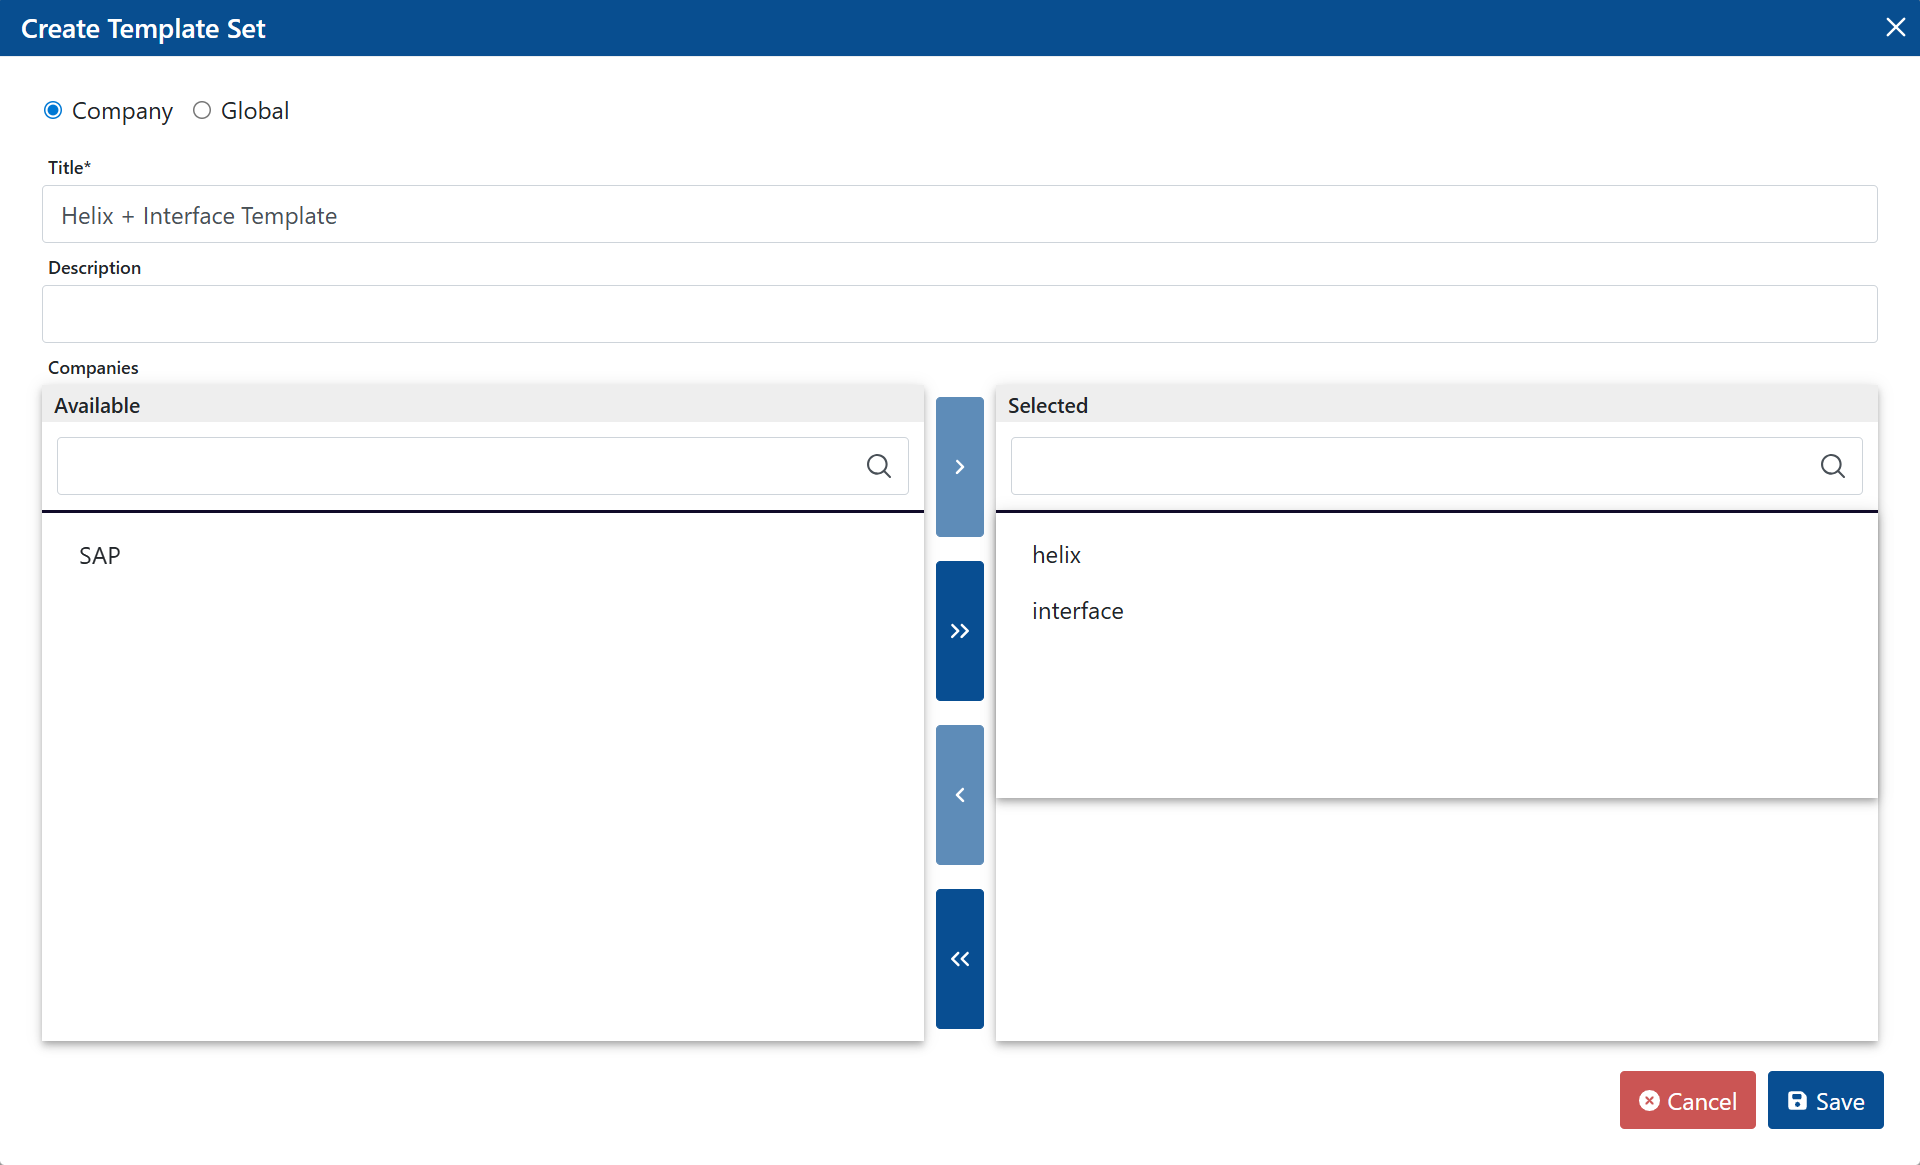
Select the Company option.
In the Title field, enter a display name for the template set.
If necessary, enter a brief description of the template set in the Description field.
In the Companies section, click the companies in the Available list for which the template set is used.
Tip
To select multiple companies at once, hold the Ctrl key.
To move all companies to the Selected list at once, click the button
 .
.➣ The companies are highlighted in the Available list.

Click the button
 .
.➣ The highlighted companies will be moved to the Selected list.
Tip
To remove a company from the Selected list, click on the company and then click the button
 . The company will be moved back to the Available list.
Click Save.
➤ The template set has been created. You can now add a template.
Adding a template
Within a template set, you can add a maximum of one template for the email body (MailBody) and one template for the email subject (MailSubject). You can customize the text of the template as you wish. If necessary, you can insert text variables as placeholders. For an overview of the available text variables, see Text variables for email templates.
Notice
Only the text format is supported for text templates. Other file formats, such as HTML, are not supported.
Go to the Customization → Templates menu item.
➣ A list of available template sets will be displayed.
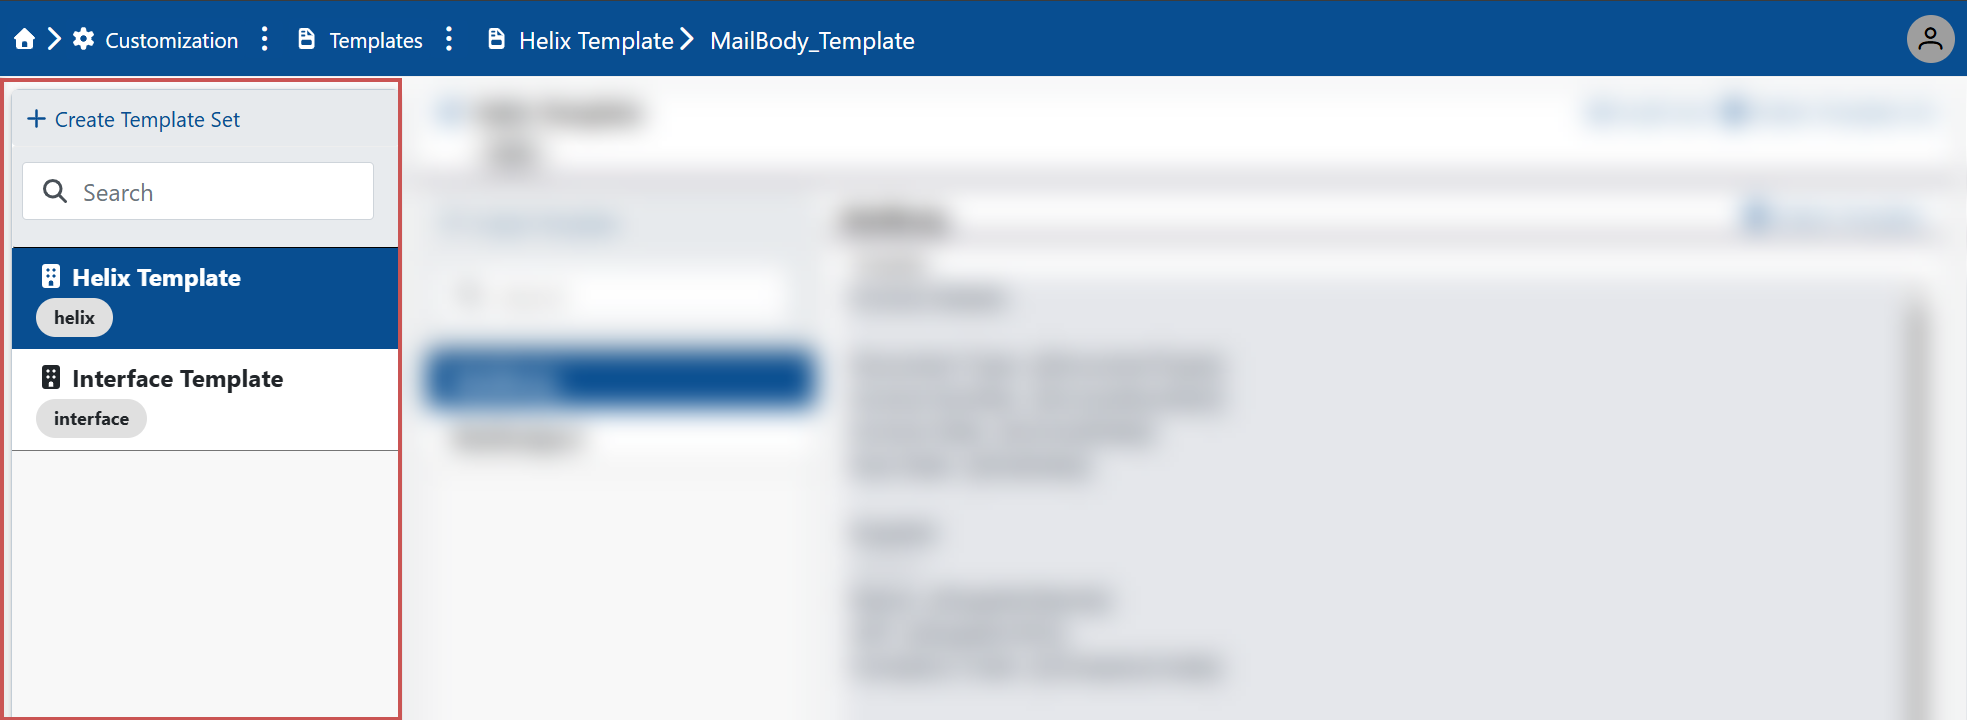
Click on a template set in the list.
Click Create Template and select one of the following options from the drop-down list:
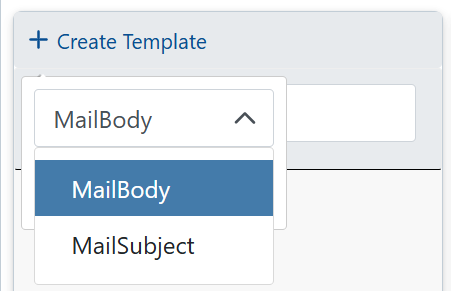
MailBody: Adds a template for the email text.MailSubject: Adds a template for the email subject line.
Enter the text for the template.
To view the available text variables, type two curly brackets (
{{) or press Ctrl + Space.➣ The available text variables willbe displayed in a drop-down list.
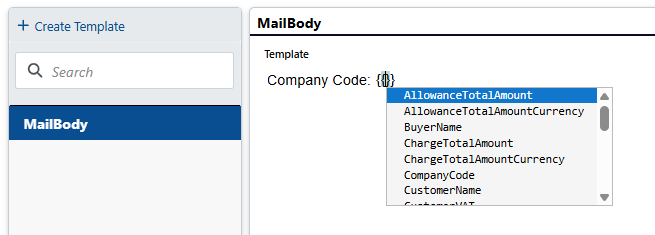
To insert a text variable, click on a text variable in the drop-down list.
➣ The selected text variable will be inserted. The two closing curly brackets (
}}) at the end of the text variable will be inserted automatically.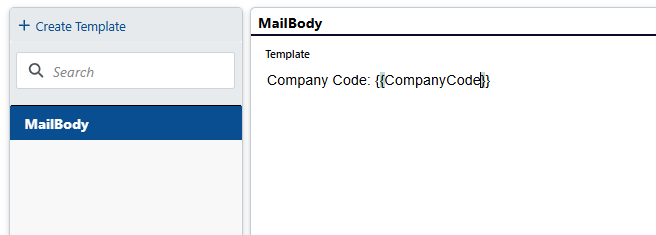
Click Save.
➤ The template has been added. The template will now be automatically used when sending emails for the companies in the corresponding template set.
Text variables for email templates
Variable | Description |
|---|---|
| Amount of the discount/surcharge |
| Total allowance amount |
| Buyer's name |
| Total surcharge |
| Currency of the total surcharge |
| Company code |
| Customer name |
| Customer's VAT number |
| Document type |
| Due date |
| Invoice date |
| Invoice number |
| Total of the net amounts of the invoice line items |
| Currency of the total net amount of the invoice line items |
| Amount to be paid |
| Currency for the amount to be paid |
| Prepaid amount |
| Currency of the prepaid amount |
| Vendor |
| Vendor's VAT number |
| Net amount |
| Currency of the net amount |
| Gross amount |
| Currency of the gross amount |