Connectors
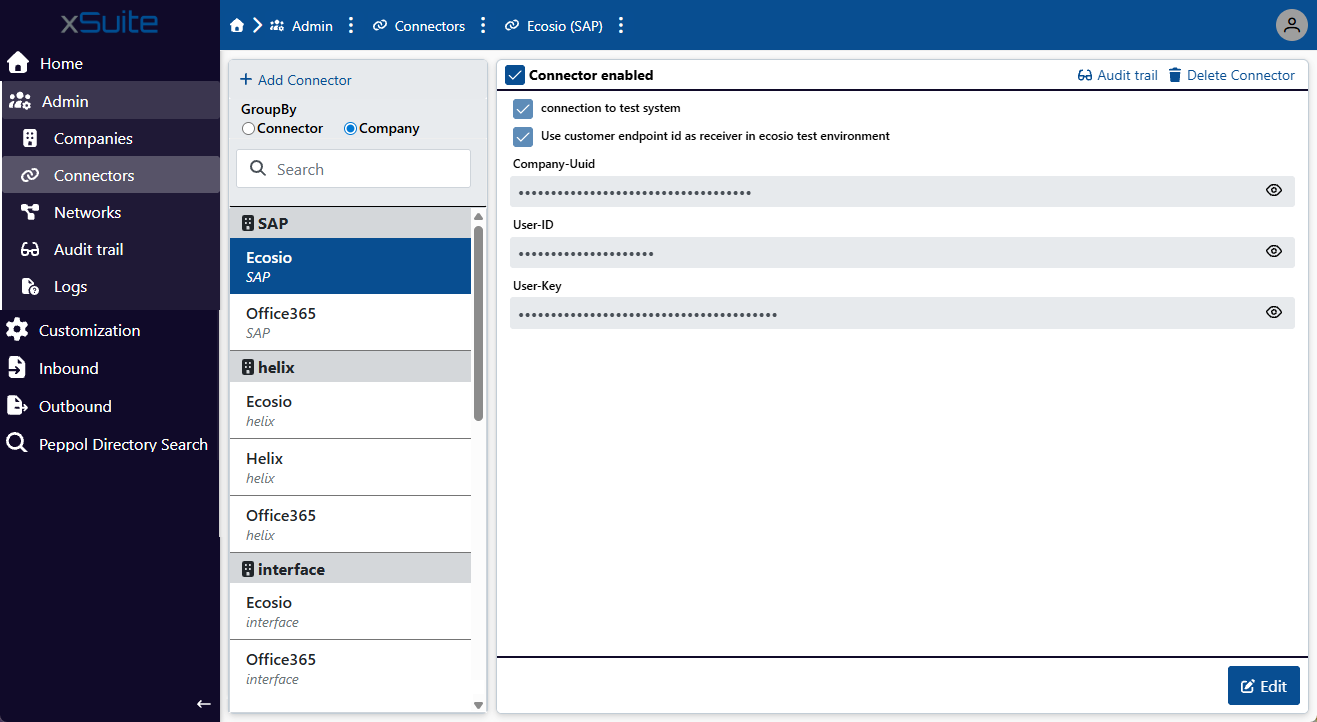 |
Under the Connectors menu item, you can add new connectors, edit existing connector data, and delete connectors.
Connectors are standardized components that connect xSuite eDNA Helix to external data sources. The external data sources can be used either to receive or send data. Each connector is assigned to one company.
All created connectors are displayed in a list. The name of the company to which this connector is assigned is displayed under the connector title. Using the GroupBy Connector or GroupBy Company filters, you can group the list either by connector or by company.
The following connectors are available:
Ecosio
Helix
Office365
OZG-RE
Ecosio connector
The connection between xSuite eDNA Helix and Ecosio enables the legally compliant sending and receiving of electronic invoices and other tax-relevant documents via national and international e-invoicing networks. These networks include Peppol, SDI, KSeF, ANAF, and NAV.
xSuite eDNA Helix serves as the central level for processing and validating electronic documents. As a connected network provider, Ecosio handles communication with the government or private target platforms. Data is exchanged exclusively via standardized interfaces.
The following files are transferred from Ecosio to xSuite eDNA Helix:
File name | Description |
|---|---|
| Conversion of the original electronic document into Ecosio's internal base format |
| Conversion of the original electronic document into Ecosio's internal base format with country-specific extensions |
| Proof of transmission of the original document |
| Original document received by Ecosio from the sender |
Adding an Ecosio connector
Caution
Before adding an Ecosio connector, make sure that the associated company has been created and that the company data is correct.
The xSuite consultant must submit the company data to Ecosio before adding the connector.
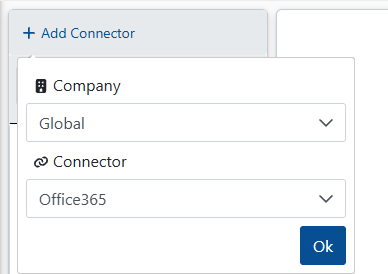
In the Admin menu item, click on Connectors → Add Connector.
➣ A dialog will open.

From the Company drop-down list, select the company to which the connector is assigned.
Tip
To assign a connector to all existing companies, select the value
Global.From the Connector drop-down list, select the value
Ecosio.Click OK.
➣ The connector is added to the list of connectors and the connector's data is displayed. The fields Company-Uuid and User ID are filled automatically.
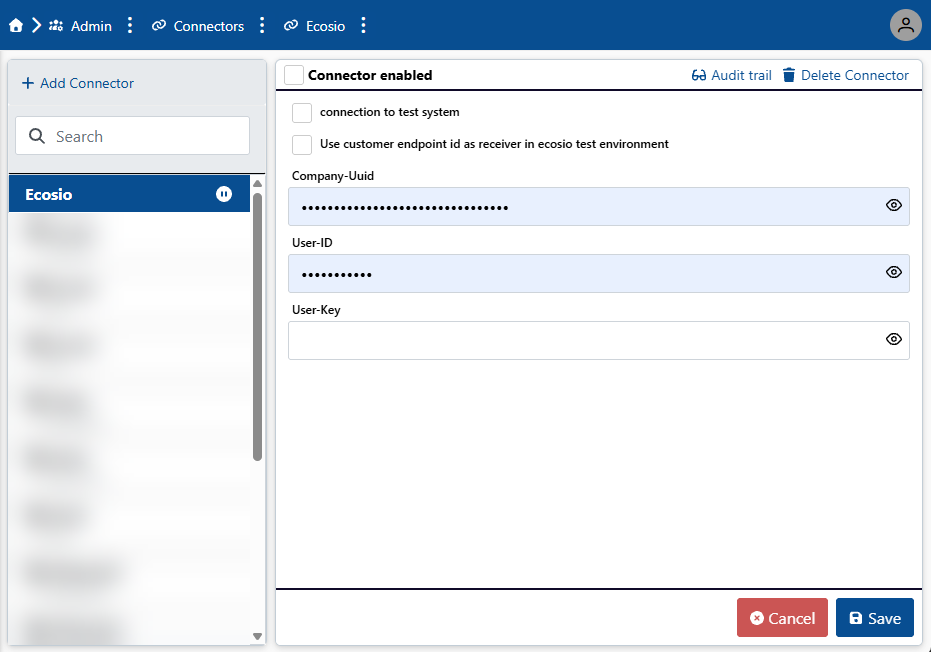
Enter values in the fields Company-Uuid and User id.
The xSuite consultant receives these values from Ecosio.
In the User key field, enter a user key.
The xSuite consultant receives the user key from Ecosio.
If you only want the connector to be used for testing purposes, activate the checkbox Connection to test system.
Caution
Do not activate the checkbox Connection to test system when the connector is to be used in production.
To activate the connector, activate the checkbox Connector enabled.
Caution
You can only activate the connector if the data you have entered is correct. When you activate the checkbox, the system will attempt to connect to Ecosio using the specified login details. If the connection attempt is successful, the connector will be activated.
Click Save.
➤ The connector is added.
Helix connector
You can connect the xSuite eDNA system to an xSuite Helix system using a Helix connector. xSuite Helix can extract data from incoming invoices and then transfer it to an SAP on-premises system (xSuite Invoice Cube) or the SAP Business Technology Platform (xSuite Invoice Sphere), for example. You can store the invoice data in an audit-proof archive via xSuite Helix.
Notice
When an e-invoice is sent to the xSuite Helix system, no OCR recognition or data extraction is performed for this invoice. The invoice data is available as index data.
In the xSuite Helix system, the property Is-eInvoice = true on the work item indicates that the invoice was transmitted as an e-invoice.
Adding a Helix connector
In the Admin menu item, click on Connectors → Add Connector.
➣ A dialog will open.

From the Company drop-down list, select the company to which the connector is assigned.
Tip
To assign a connector to all existing companies, select the value
Global.Wählen Sie in der Dropdown-Liste Connector den Wert
Helix.Click OK.
➣ The connector is added to the list of connectors and the connector's data is displayed.
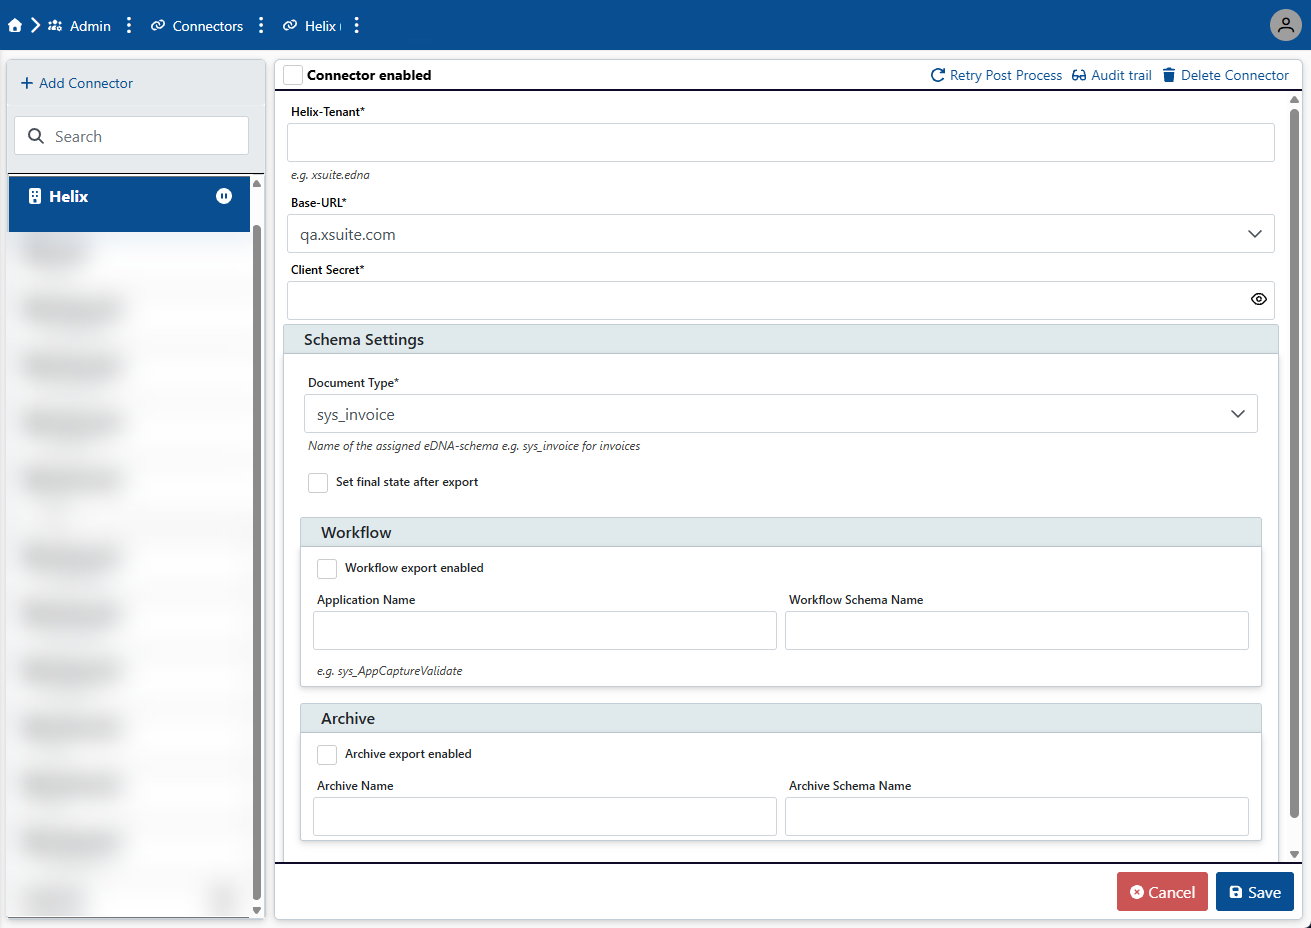
Enter the connection details in the following fields:
Field
Description
Helix Tenant
Enter the Helix tenant in the form
Customer.Tenant, e.g.,xsuite.P01.Base URL
Select a base URL for xSuite Helix from the drop-down list.
Client Secret
Enter a client secret to connect to xSuite Helix.
In the Schema Settings section, enter the following data and activate the following checkboxes:
Field
Description
Document Type
Enter the name of the xSuite Helix schema used for xSuite eDNA Helix.
For invoices, the xSuite Helix schema is
sys_invoice.Set final state after export
Activate the Set final state after export checkbox.
If this checkbox is activated, the processed invoices in the incoming invoices table will receive the status

Processed. If this checkbox is deactivated, processed invoices in the incoming invoices table will not be marked as completed, but will only receive the status
Received.Notice
We recommend activating the Set final state after export checkbox.
Workflow export enabled
If this checkbox is activated, xSuite eDNA sends the invoice data, i.e., the eDNA data format and PDF visualization, to xSuite Helix for workflow processing.
Application Name
Enter the name of the xSuite Helix workflow, e.g.,
sys_AppCaptureSAP.Workflow Schema Name
Enter the value
sys_helix_capture_invoice.This is the Suite Helix workflow schema used for data transfer from xSuite eDNA to the xSuite Helix system.
In the area Archives, enter the following data and activate the following checkboxes:
Notice
The archive settings in the Archive section do not yet have any function in the current version of xSuite eDNA Helix.
Field
Description
Archive export enabled
If this checkbox is activated, the invoice data is archived in an xSuite Helix archive in an audit-proof manner. xSuite eDNA transmits the original e-invoice with all attachments and PDF visualization to Helix for archiving.
Archive Name
Enter the name of the xSuite Helix archive.
Archive Schema Name
Enter the xSuite Helix schema
sys_helix_capture_invoice. This is the schema used for archiving.To activate the connector, activate the checkbox Connector enabled.
Click Save.
➤ The connector is added.
Office365 connector
xSuite eDNA Helix supports incoming emails via Microsoft 365 Exchange. The processing logic for incoming emails is independent of the email connector.
Email retrieval
xSuite eDNA Helix calls the mailbox defined via the Office365 connector using the Microsoft 365 Graph API. The system only retrieves emails that meet the following criteria:
The email contains exactly one XML file.
The email contains exactly one PDF file.
Any emails that do not meet these criteria cannot be processed by xSuite eDNA Helix. These emails are set to the status Rejected in the Inbound Monitor and moved to the Invalid folder. You can define the folder in the settings of the Office365 connector.
Classification of emails
xSuite eDNA Helix recognizes the following e-invoice formats via incoming email:
XRechnung (from Version 2.x)
ZUGFeRD (from Version 2.x)
BIS Billing 3.0
Files in these formats are classified as e-invoices and processed by xSuite eDNA Helix. Emails classified as PDF invoices are transferred to the Inbound Monitor without being processed.
Adding an Office365 connector
An Office365 connector allows you to connect the xSuite eDNA system to Microsoft 365 mailboxes. Per company, you can define any number of mailboxes for incoming invoices and a maximum of one mailbox for outgoing invoices.
In the Admin menu item, click on Connectors → Add Connector.
➣ A dialog will open.
From the Company drop-down list, select the company to which the connector is assigned.
Tip
To assign a connector to all existing companies, select the value
Global.From the Connector drop-down list, select the value
Office365.Click OK.
➣ The connector is added to the list of connectors and the connector's data is displayed.
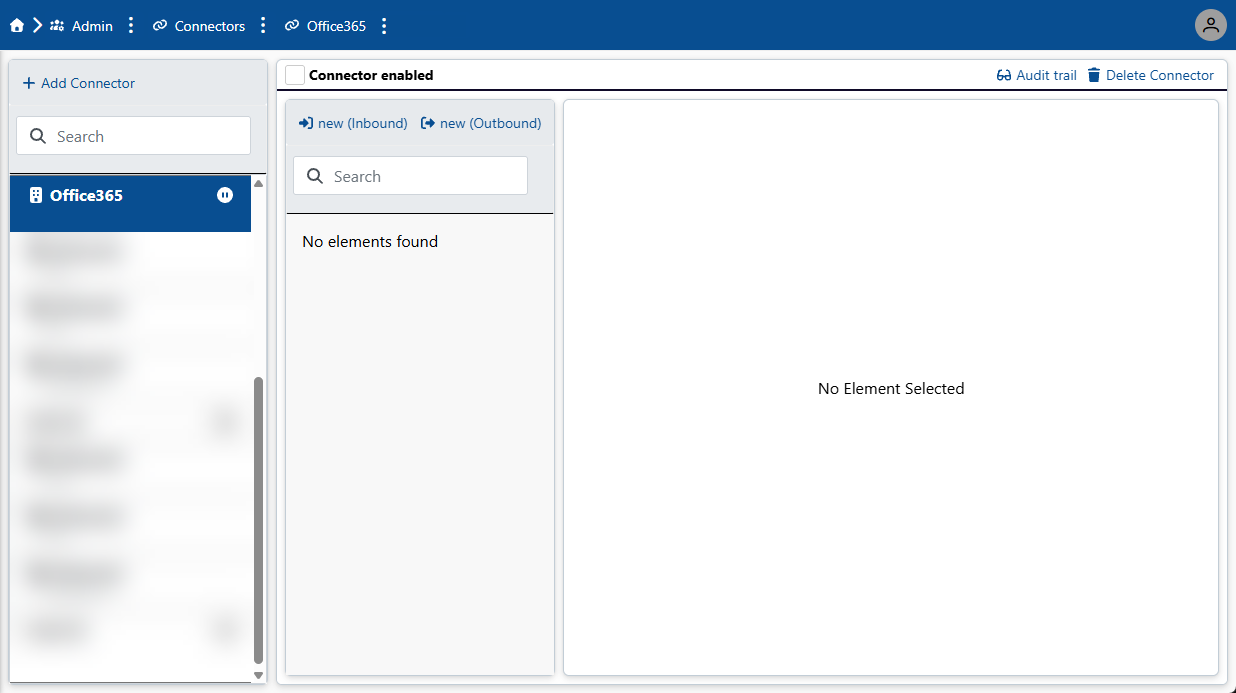
To activate the connector, activate the checkbox Connector enabled.
Click Save.
➤ The connector has been added. To use the Office 365 connector, add one or more mailboxes.
Adding an inbox for an Office365 connector
xSuite eDNA Helix requires "Read" and "Write" permissions for the mailbox. The customer's internal IT must grant these permissions via Microsoft PowerShell for the specific mailbox. Only when these permissions are in place can xSuite eDNA Helix access the mailbox via the Office365 connector.
Caution
The permissions for the mailbox must be set via PowerShell. Only PowerShell can be used to define permissions for individual mailboxes. Otherwise, the permissions apply to all available mailboxes
Under the Admin menu item → Connector, click on an Office365 connector.
➣ The connector data will open.
Click on new (Inbound).
➣ The data of the inbox will open.
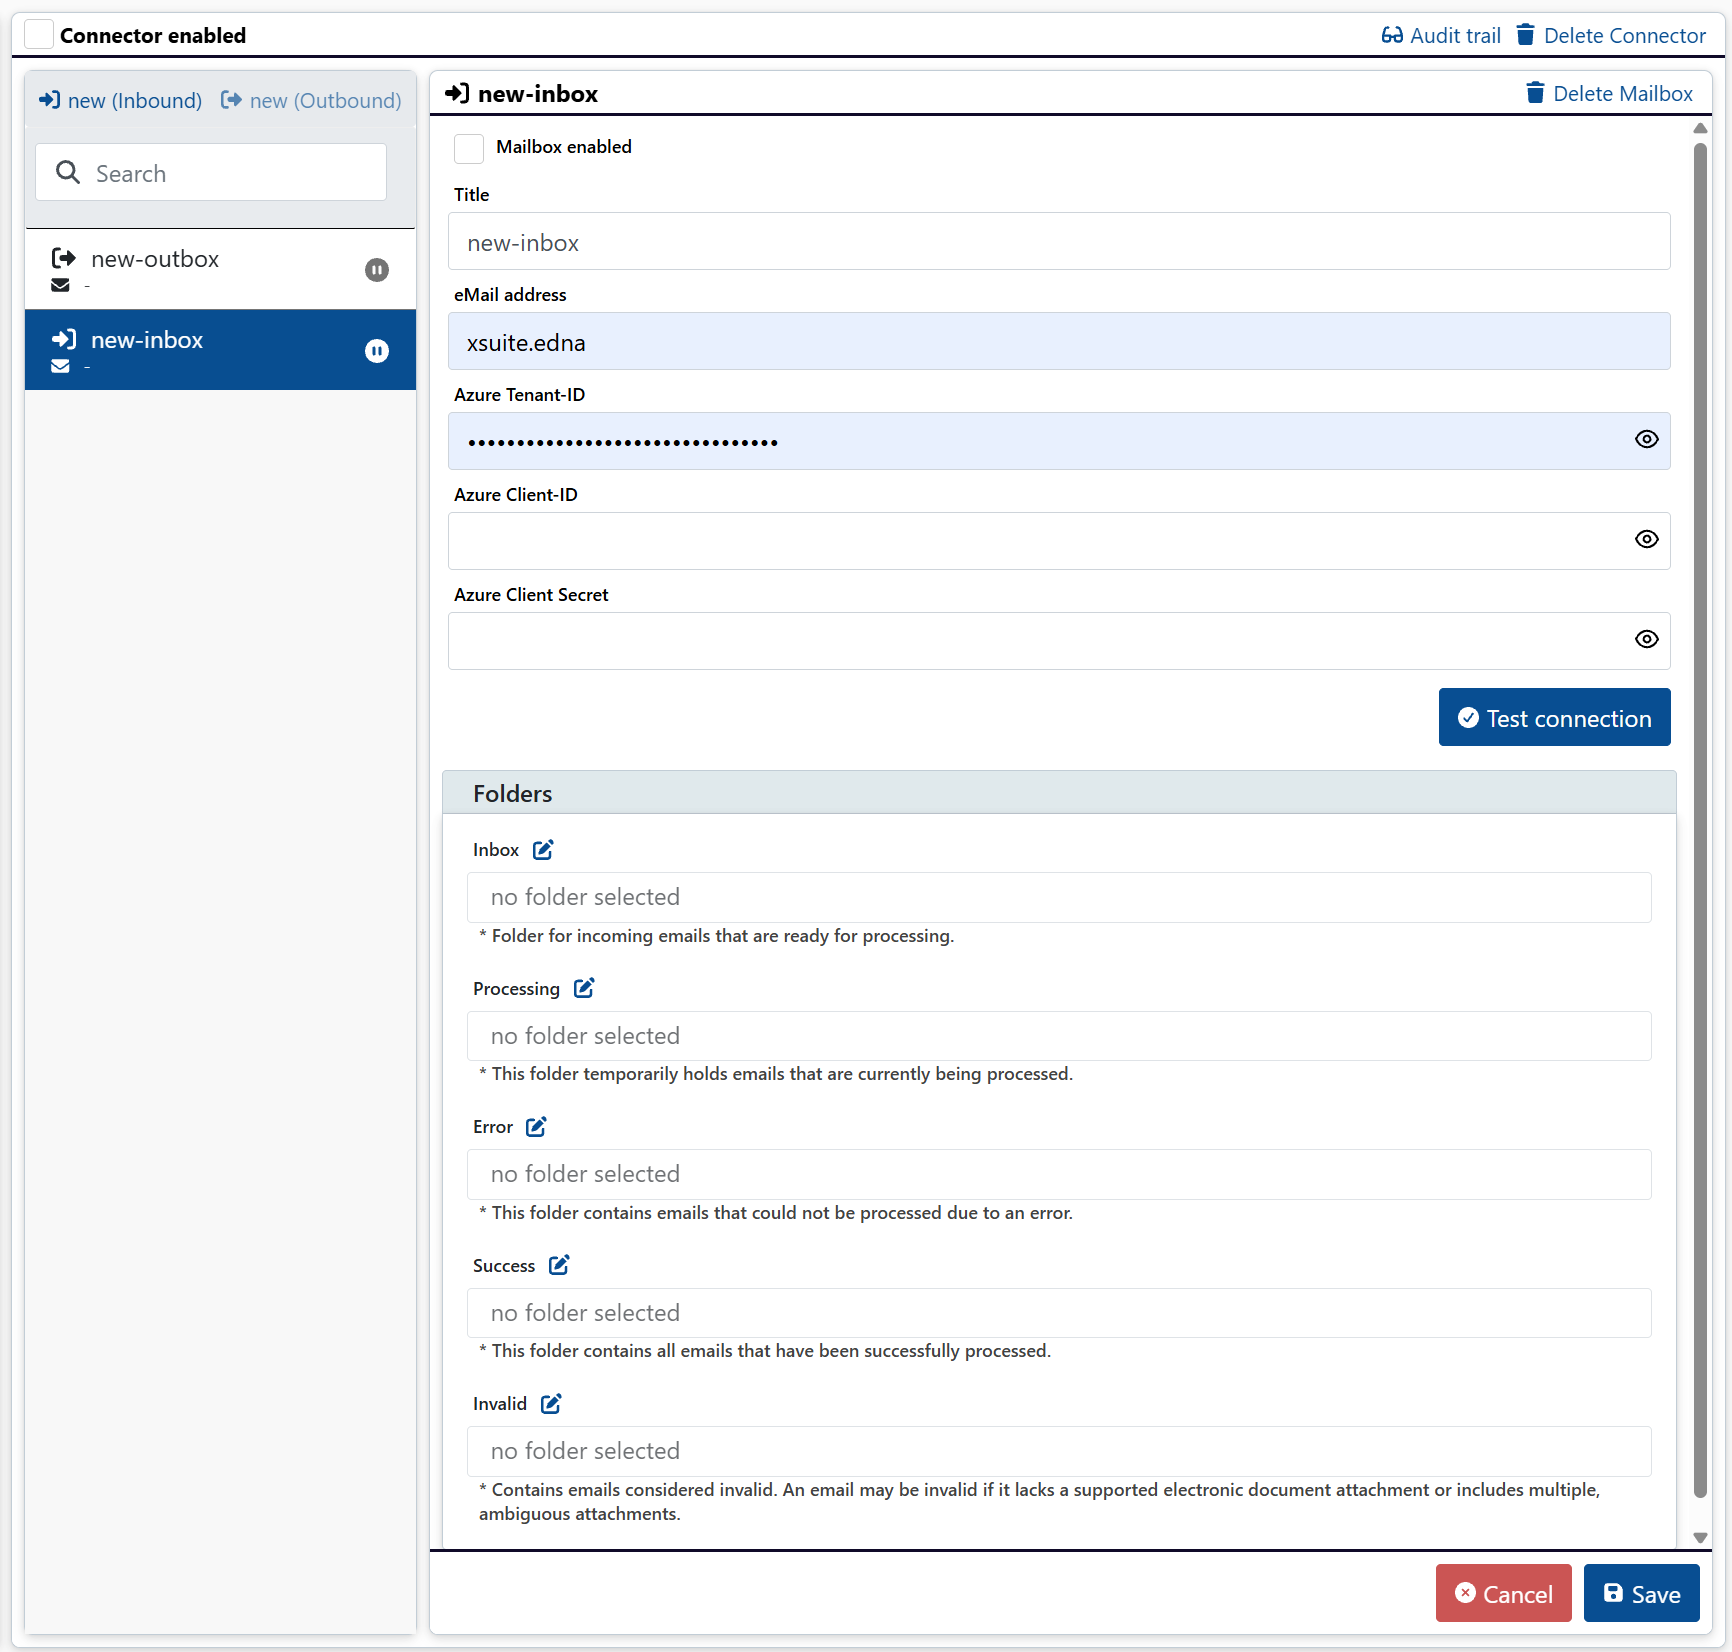
In the Title field, enter any display name for the mailbox.
In the Email address field, enter the email address of the mailbox.
In the Azure Tenant ID, Azure Client ID and Azure Client Secret fields, enter the credentials for Microsoft Azure.
To verify the connection to the mailbox, click Test connection.
In the Folders section, click on
 Edit folders and select the following folders:
Notice
You can only edit the folders once you have established a connection to the mailbox.
Inbox: Folder for incoming emails that are to be processed.
Processing: Folders for emails that are currently being processed.
Error: Folders for emails that could not be processed due to an error.
Success: Folder for emails that have been successfully processed.
Invalid: Folder for emails that the system has classified as invalid.
Notice
An email may be invalid if a supported electronic attachment is missing or contains ambiguous attachments.
Click Save.
➤ The inbox has been added.
Adding an outbox for an Office365 connector
xSuite eDNA Helix requires "Read" and "Write" permissions for the mailbox. The customer's internal IT must grant these permissions via Microsoft PowerShell for the specific mailbox. Only when these permissions are in place can xSuite eDNA Helix access the mailbox via the Office365 connector.
Caution
The permissions for the mailbox must be set via PowerShell. Only PowerShell can be used to define permissions for individual mailboxes. Otherwise, the permissions apply to all available mailboxes
Under the Admin menu item → Connector, click on an Office365 connector.
➣ The connector data will open.
Click on new (outbound).
➣ The data of the outbox will open.
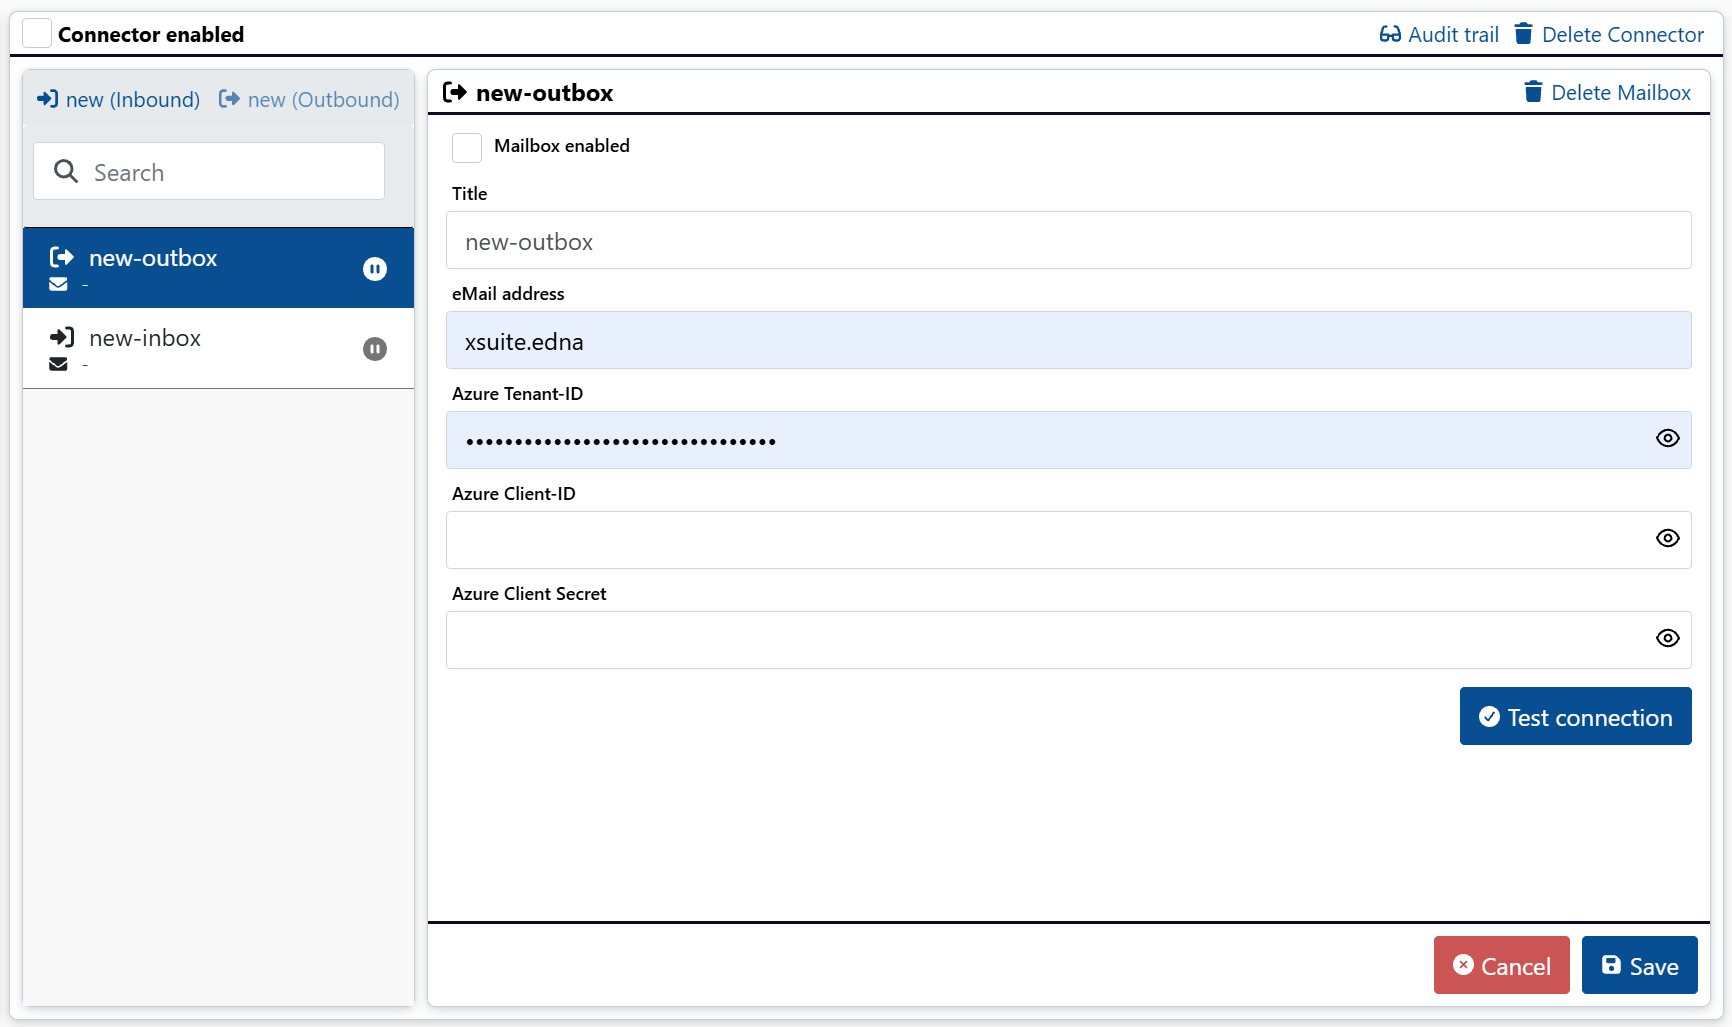
In the Title field, enter any display name for the mailbox.
In the Email address field, enter the email address of the mailbox.
In the Azure Tenant ID, Azure Client ID and Azure Client Secret fields, enter the credentials for Microsoft Azure.
To verify the connection to the mailbox, click Test connection.
Click Save.
➤ The outgoing mailbox is added.
OZG-RE connector
The OZG RE connector enables the legally compliant receipt of electronic invoices via the OZG invoice receipt platform (OZG-RE).
The OZG-RE connector is used to connect public contracting authorities in Germany. The connection to OZG-RE ensures that electronic invoices (especially in the XRechnung format) are processed, validated, and made available in accordance with legal requirements.
xSuite eDNA Helix serves as the central layer for processing and validating electronic invoices. The OZG-RE connector is used for technical communication with the OZG invoice receipt platform.
Caution
The OZG-RE connector has not yet been approved for productive use. The transferred data formats will be described once this connector has been approved.
Adding an OZG-RE connector
The OZG-RE connector is used to connect to the OZG-compliant invoice receipt platform (OZG-RE for short) provided by the German federal government for receiving electronic invoices for public institutions in individual federal states. The connection is established via an account set up by the customer in the OZG-RE.
In the Admin menu item, click on Connectors → Add Connector.
➣ A dialog will open.
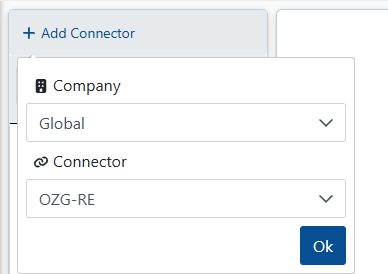
From the Company drop-down list, select the company to which the connector is assigned.
Tip
To assign a connector to all existing companies, select the value
Global.From the Connector drop-down list, select
OZG-RE.Click OK.
➣ The connector is added to the list of connectors and the connector's data is displayed.
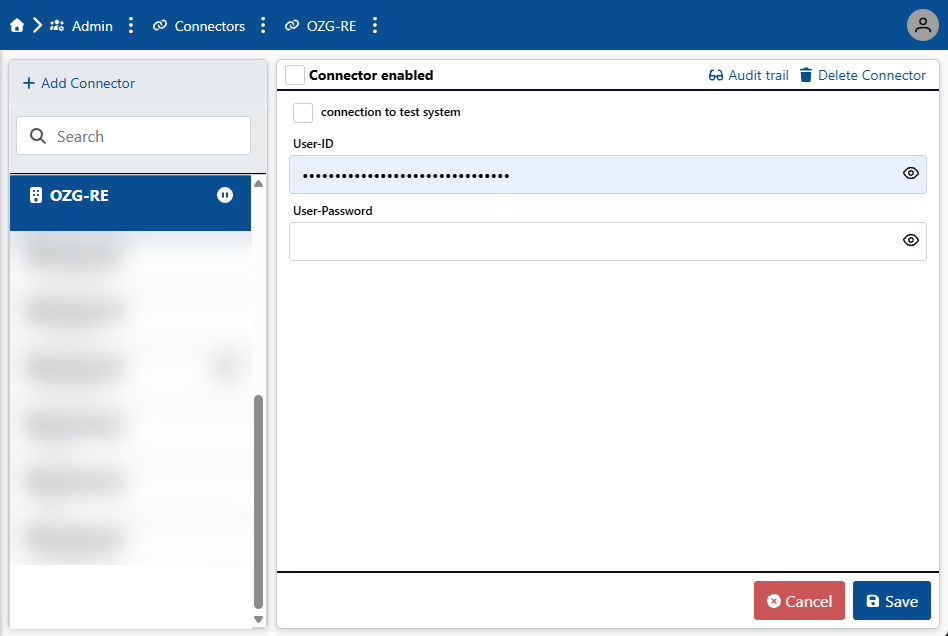
In the User ID and User Password fields, enter the user name and corresponding password.
To activate the connector, activate the checkbox Connector enabled.
Click Save.
➤ The connector is added.