Extraction
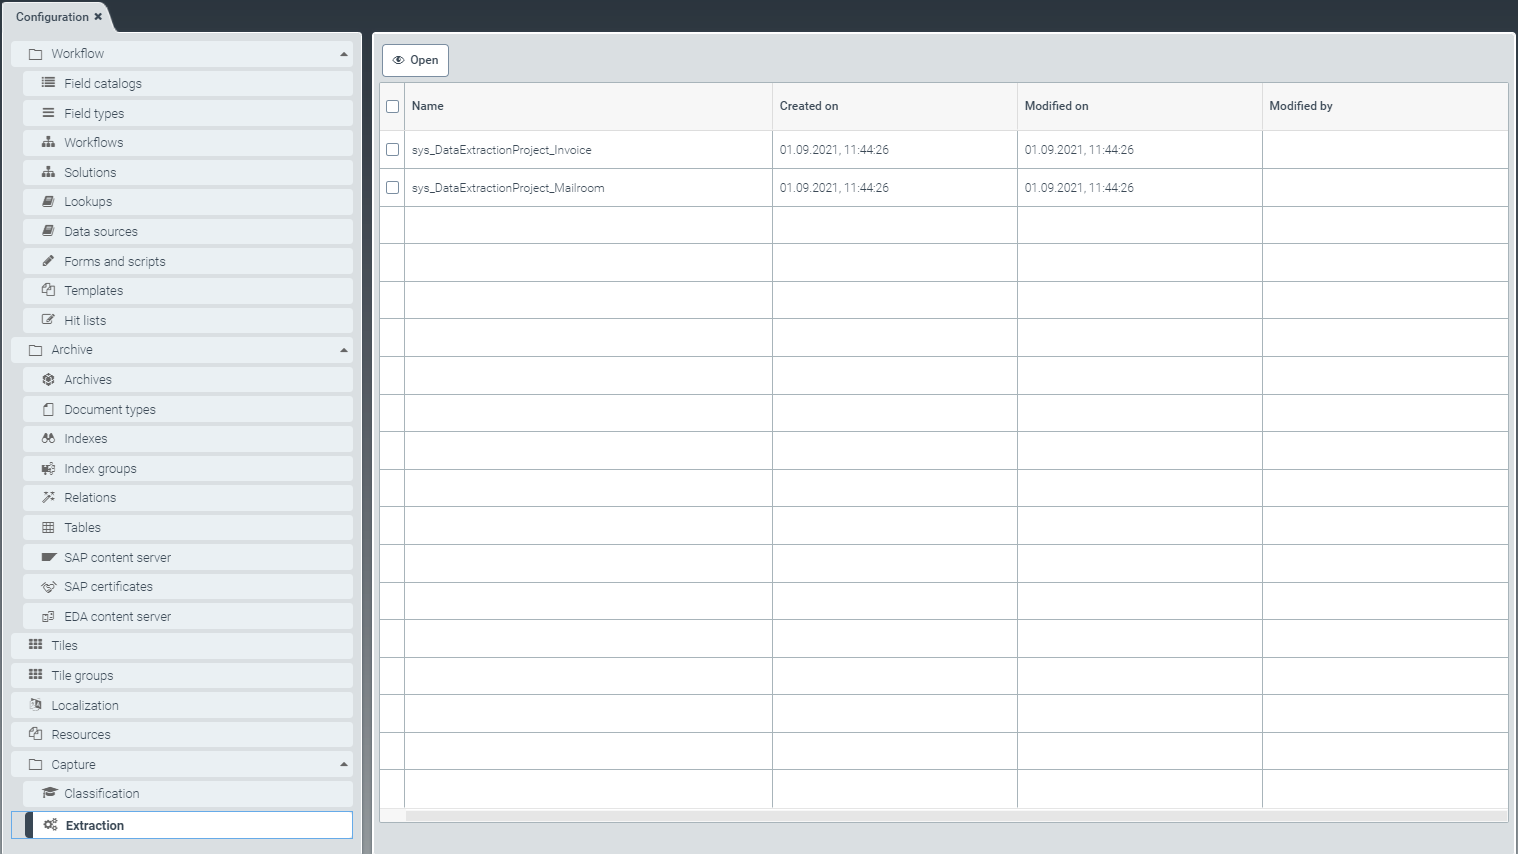 |
In the menu item Extraction, extraction projects for Invoice and Mailroom can be viewed and edited.
The extraction service can extract different field contents from documents.
Implicit training is used to improve extraction results. The user's validation of the results trains the system with the corrected values.
The following fields are included in implicit training:
Creditor ID (When the search did not lead to a result)
Currency
Custom 1
Custom 2
Custom 3
Custom 4
Custom 5
Custom 6
Document date
Invoice number
In the screen Custom search masks, you can define the anchor words and search masks as alphanumeric strings or regular expressions for header and, in some cases, item data.
Notice
You can only define anchor words and search masks for item data fields for your Invoice project.
For more information on extraction of xSuite Invoice projects (Invoice), see Basic configuration – Invoice, Defining anchor words and search masks – Invoice and Define anchor words and search masks – With your own purchase-order number ranges: PurchaseOrderNumber.
For more information on extraction of xSuite Mailroom projects, see Basic configuration – Mailroom and Defining anchor words and search masks – Mailroom.
Extraction – Invoice
Basic configuration – Invoice
 |
Select the view Basic configuration (1).
In the Basis configuration view, you can make the extraction settings as needed for your Invoice project:
Notice
Table recognition is currently in beta status. You can use it for testing and evaluating data. However, at this time we cannot commit to any specific quality standard.
To activate table recognition for your Invoice documents, select the checkbox (3) next to Table-recognition (beta).
➣ Data extraction will then identify tables in the extracted documents. The tables most likely contain the item data of the respective invoice document.
In the initial state, table recognition is not activated.
The extraction service can search your master data for creditors using the lookup table sys_LKP_Creditor.
The search is based on the following fields (7):
In the Enabled column, click to select the following search criteria:
CreditorIBAN: IBAN of the creditor (priority 1)
CreditorSalesTaxID: Sales tax ID of the creditor (Priority 2)
CreditorTaxID: Tax number of the creditor (Priority 3)
CreditorCommercialRegisterNumber: Commercial register number of the creditor (Priority 4)
CreditorPhone: Telephone number of the creditor (Priority 5)
CreditorEmailAddress, Creditor Website: Domain of an e-mail address or website of the creditor (Priority 6)
CreditorCustom1: Value of the field CreditorCustom1 as free text, e.g., project number (Priority 7)
➣ All fields flagged with Enabled will be included in the search.
➣ All fields that are not flagged with Enabled will be skipped in the search.
Using the table, define the order (6) of the fields according to which the master data will be searched in the extraction.
Notice
This sequence corresponds to the factory settings.
Prioritize fields that occur infrequently over fields that occur frequently. This makes the extraction service faster and more precise in the search.
For this, select the checkbox in the first column of the table (5) and click the button
 or
or  (4) to move the selected table line row by row.
To save your list of search priorities, click the button Save (9) or click Cancel if you do not wish to save the basic configurations.
If you wish to restore factory settings, click Reset (2) in the action menu.
Notice
The button will only appear if you have previously made changes to the factory settings.
Notice
Only if the search has found one single creditor will this creditor be preselected in the validation.
If extraction identifies more than one creditor, a value of more than one will appear in the field overview of the validation step in the column Alt.
To find alternatives in the extracted document, the user needs to click on the number in the column Alt.
The click opens a dialog with a list of alternatives.
You can highlight the relevant text passages in the viewer document by clicking on the icon  .
.
The creditor search does not necessarily provide a result, and if it does, the result is not always clear. In this case, the extraction service automatically trains a prediction model.
For more information, see Background information: Prediction model – Creditor and company code.
Defining anchor words and search masks – Invoice
Notice
The following explanations refer to all sub-items in the menu, starting with the second level, aside from those in the sub-items PurchaseOrderNumber and DocumentTypeValue.
For more information on defining anchor words and search masks for the section PurchaseOrderNumber, see Define anchor words and search masks – With your own purchase-order number ranges: PurchaseOrderNumber.
For more information on defining the search mask for the DocumentTypeValue submenu item, see Defining search masks – extension of document types: "DocumentTypeValue".

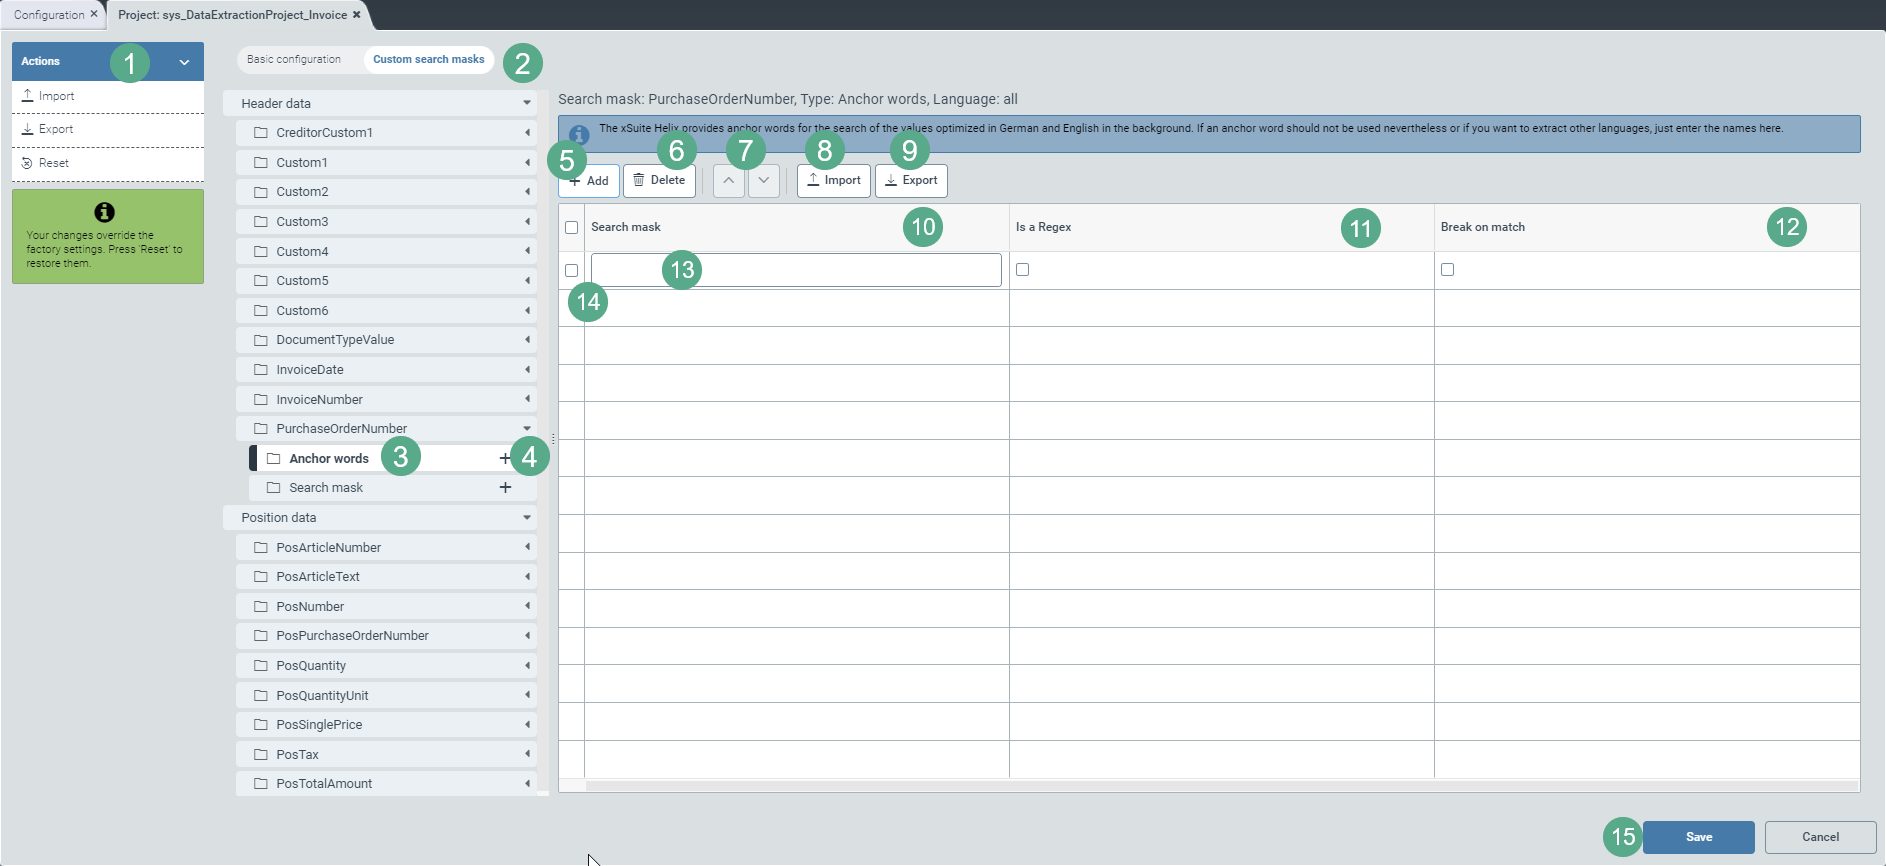
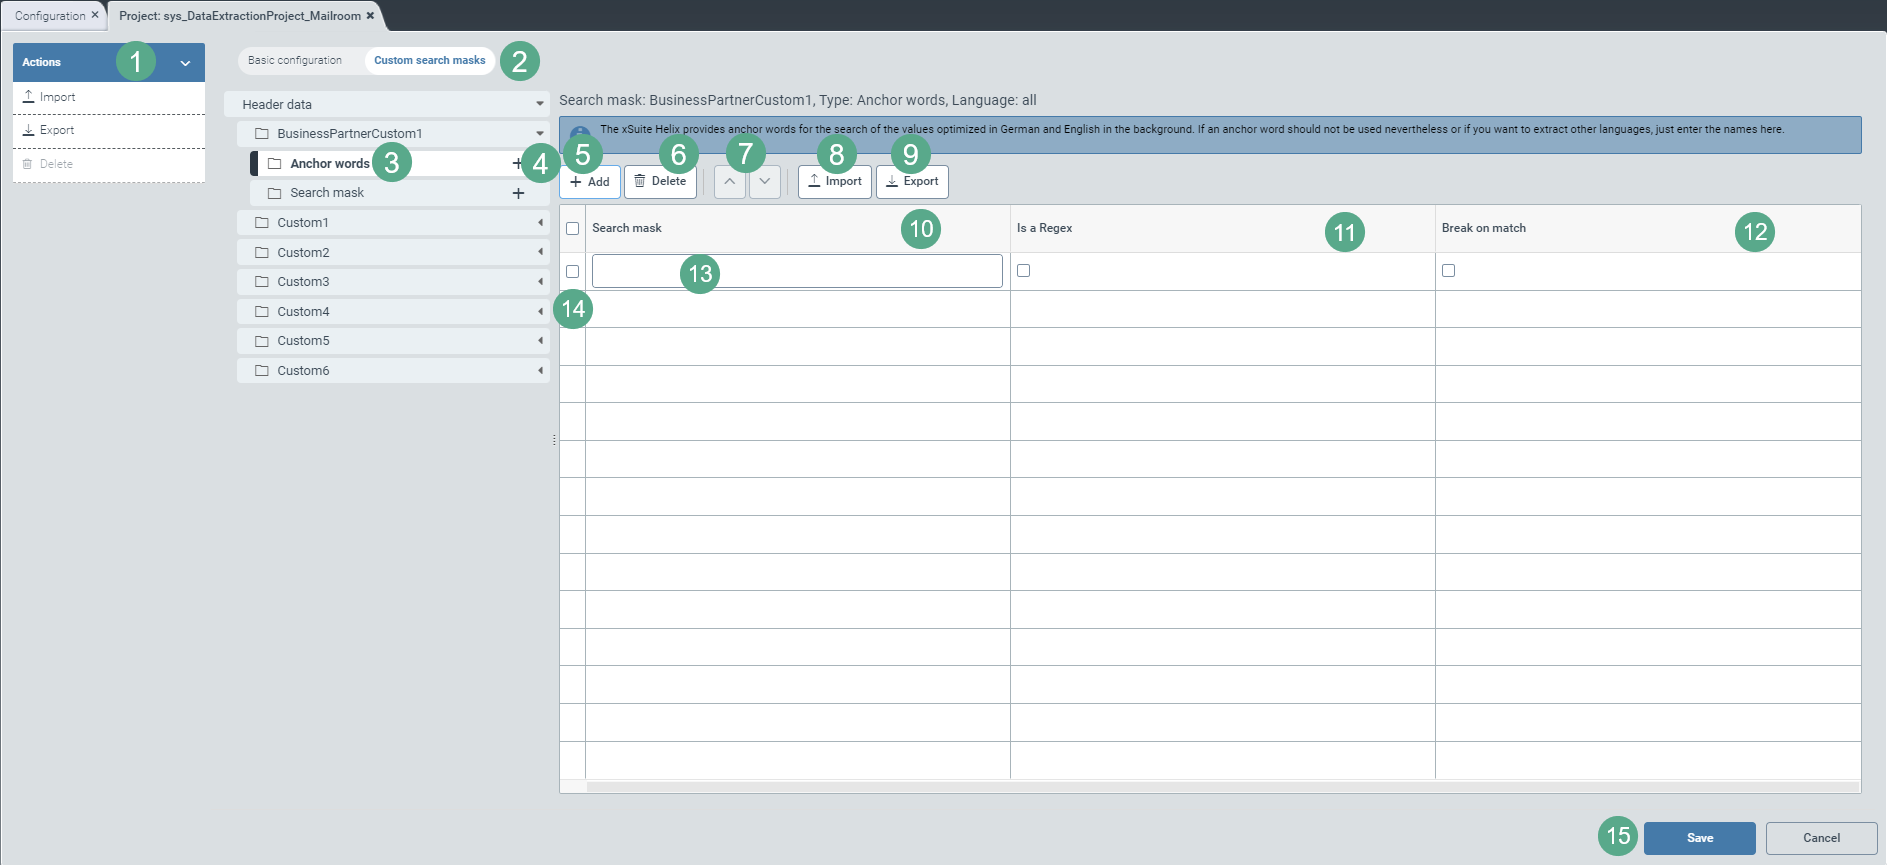
Select the view Custom search masks (2).
Click on the
 icon on the right side of a header-data or item-data field.
➣ The sub-entries Anchor words and Search mask will become visible in the header data.
➣ The sub-entry Search mask table header will be visible in the area with the item data.
Notice
An anchor word refers to a specific text section in the document or a field in the validation interface such as "invoice number".
A search mask is the concrete text section that is searched for in the document or that appears as field content (alphanumeric string) in the validation interface, e.g. "RE50000210". In this example, it is a concrete invoice number. However, you can also define search masks using regular expressions.
Click on
 (4) in the subsidiary menu item Anchor words.
➣ A drop-down menu for language selection will appear on the right side of the menu structure.

Select the language(s) of the anchor word(s).
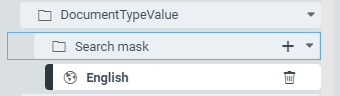
➣ For each language selected, a sub-entry will be created, e.g. English:
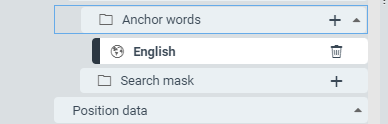
If you do not make a selection, you will not be able to assign the anchor words to a specific language later. You will only be able to create entries that are independent of language.
Click on the menu item Anchor words, on an entry for the selected language, or on Search mask (3).
➣ On the right side of the menu structure, a table will appear. This is where you can define the Anchor words or the Search mask.

You can use the table to define anchor words as well as user-specific search masks and regular expressions, either by previously selected language or independent of language.
Add the desired number of rows (13) to the configuration table using the Add button (5). By default, the table is blank.
Enter the search mask in the Search mask column (10) either as an alphanumeric string or as a regular expression.
If it is a regular expression, select the checkbox in the Is a Regex column (11).
Select the checkbox in the Break on match column (12) to exclude inaccurate search results and thus make the search more efficient.
➣ As soon as an anchor word or a search mask with activated checkbox is found during the search, the extraction service will stop the search process.
If you wish to provide search masks for another field of this tenant so that you do not need to enter the search masks manually, click Export (9).
➣ A dialog box for language selection will open.
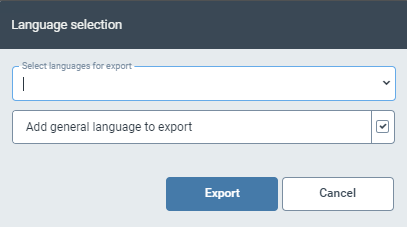
Select one or more languages from the drop-down menu for which you have previously created lists.
The list for the language-independent entries is preselected by default. If you do not wish to export the list with the language-independent entries, uncheck the check box.
If you want to export the list of only one language, click directly on a language in the menu structure on the left, e.g. English, and then click Export (9).
➣ A JSON file with the selected search masks will be downloaded locally.
If you wish to use search masks from another field of this tenant or of another tenant without having to enter the search masks manually, click Import (8).
➣ An import dialog will open.
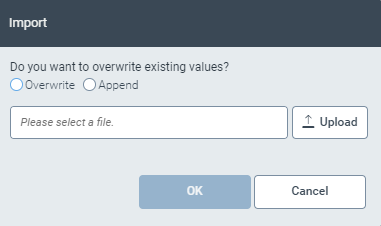
Choose whether you want to overwrite the custom search masks with the JSON import or append the search masks from the import to the list of existing search masks by checking the corresponding checkbox.
Select the JSON file for import and click OK.
If you want to export or import search masks collectively for all fields of a tenant, click Import or Export in the action menu (1), as needed.
Notice
You can only import files that are stored as JSON files locally on your computer.
When importing, the names of the fields are not relevant, so matching is not necessary. Only the values are imported.
All the search mask specifications in Step 7, 8 and 9 also apply to anchor words if they can be specified for a field.
Save your new entries by clicking the Save button (15).
If you have already filled your table with regular expressions and/or user-specific search masks in the form of alphanumeric strings, remove any unnecessary entries by clicking the Delete button (6).
If you want to reorder the search priorities, arrange the table rows according to the prioritization order from highest to lowest priority, i.e. from top to bottom.
For this, select the checkbox in the first column of the table (14) and click the button
or (7) to move the selected table line (13) row by row.
Define anchor words and search masks – With your own purchase-order number ranges: PurchaseOrderNumber
 |
Select the view Custom search masks (2).
Click on the
icon on the right side of a header-data or item-data field.➣ The sub-entries Anchor words and Search mask will become visible in the header data.
➣ The sub-entry Search mask table header will be visible in the area with the item data.
Notice
An anchor word refers to a specific text section in the document or a field in the validation interface such as "invoice number".
A search mask is the concrete section of text that is searched for in the document or that appears as field content (alphanumeric string) in the validation interface, e.g. "PO50000210". In this example, it is a concrete purchase-order number. However, you can also define search masks using regular expressions.
Click on
(4) in the subsidiary menu item Anchor words.➣ A drop-down menu for language selection will appear on the right side of the menu structure.

Select the language(s) of the anchor word(s).
➣ For each language selected, a sub-entry will be created, e.g. English:
If you do not make a selection, you will not be able to assign the anchor words to a specific language later. You will only be able to create entries that are independent of language.
Click on the menu item Anchor words, on an entry for the selected language, or on Search mask (3).
➣ On the right side of the menu structure, a table will appear. This is where you can define the Anchor words or the Search mask.
The table for the Anchor words is analogous in structure to those described in Defining anchor words and search masks – Invoice and Defining anchor words and search masks – Mailroom.
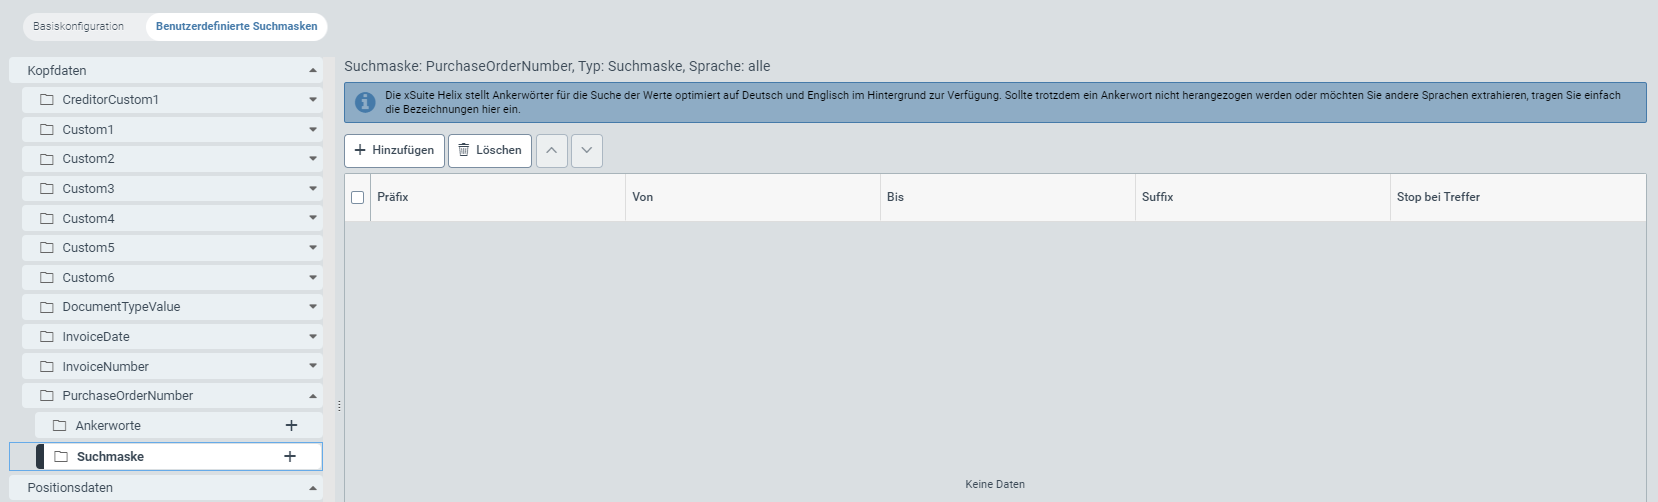
The table for the search mask of the purchase-order number (PurchaseOrderNumber) looks like this:
You can use the table to define anchor words as well as user-specific search masks and regular expressions, either by previously selected language or independent of language.
With the button Add (5), add the desired number of rows (13) to the configuration table. The table is empty by default.
If you are looking for a purchase-order number with a specific prefix, e.g. "PO", enter it in the Prefix column.
Specify the number range for the searched purchase-order number, as follows: In the From column, enter the purchase-order number from which you want to search in ascending order; in the To column, enter the purchase-order number up to which you want the extraction service to search.
If you are looking for a purchase-order number with a specific suffix, e.g. "J22", enter it in the Suffix column.
Select the checkbox in the Break on match column (12) to exclude inaccurate search results and thus make the search more efficient.
➣ As soon as an anchor word or a search mask with activated checkbox is found during the search, the extraction service will stop the search process.
If you wish to provide search masks for another field of this tenant so that you do not need to enter the search masks manually, click Export (9).
➣ A dialog box for language selection will open.
Select one or more languages from the drop-down menu for which you have previously created lists.
The list for the language-independent entries is preselected by default. If you do not wish to export the list with the language-independent entries, uncheck the check box.
If you want to export the list of only one language, click directly on a language in the menu structure on the left, e.g. English, and then click Export (9).
➣ A JSON file with the selected search masks will be downloaded locally.
If you wish to use search masks from another field of this tenant or of another tenant without having to enter the search masks manually, click Import (8).
➣ An import dialog will open.
Choose whether you want to overwrite the custom search masks with the JSON import or append the search masks from the import to the list of existing search masks by checking the corresponding checkbox.
Select the JSON file for import and click OK.
If you want to export or import search masks collectively for all fields of a tenant, click Import or Export in the action menu (1), as needed.
Notice
You can only import files that are stored as JSON files locally on your computer.
When importing, the names of the fields are not relevant, so matching is not necessary. Only the values are imported.
Save your new entries by clicking the Save button (15).
If you have already filled your table with regular expressions and/or user-specific search masks in the form of alphanumeric strings, remove any unnecessary entries by clicking the Delete button (6).
If you want to reorder the search priorities, arrange the table rows according to the prioritization order from highest to lowest priority, i.e. from top to bottom.
For this, select the checkbox in the first column of the table (14) and click the button
or (7) to move the selected table line (13) row by row.
Defining search masks – extension of document types: "DocumentTypeValue"

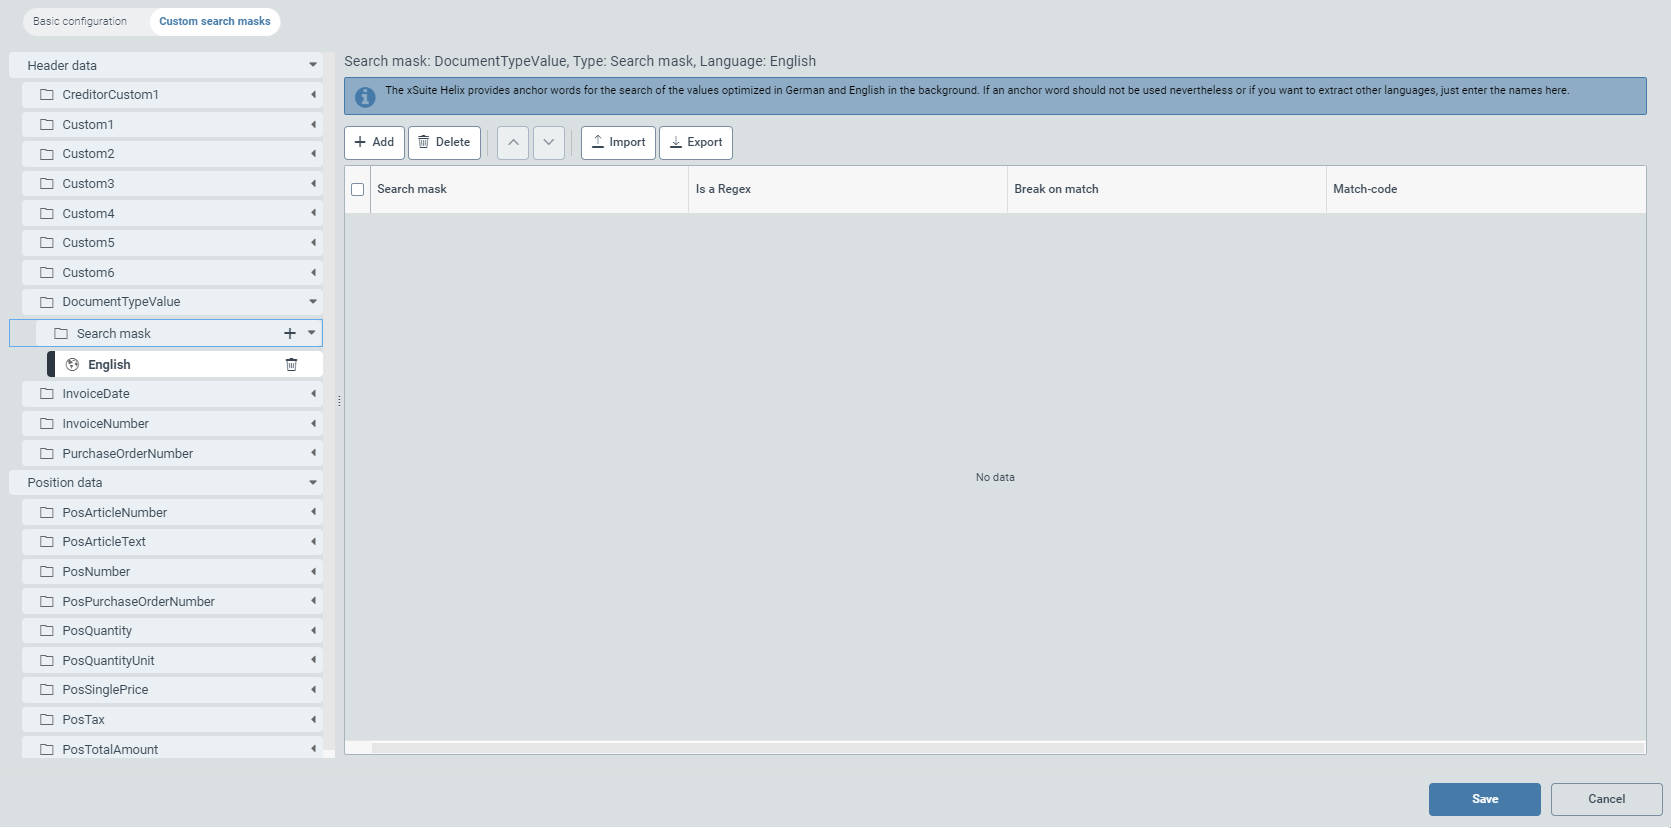
Select the view Custom search masks (2).
Click on the icon
on the right side of the DocumentTypeValue header data field.➣ The subentry Search mask becomes visible in the area with the header data.
Notice
A search mask is the concrete section of text that is searched for in the document or that appears as field content (alphanumeric string) in the validation interface, e.g. "PO50000210". In this example, it is a concrete purchase-order number. However, you can also define search masks using regular expressions.
Click on
(4) in the menu item Search mask (3).➣ A drop-down menu for language selection will appear on the right side of the menu structure.

Select the language(s) of the search mask(s).
➣ For each language selected, a sub-entry will be created, e.g. English:
If you do not make a selection, you will not be able to assign the search masks to a specific language later. You will only be able to create entries that are language-independent.
Click on a subentry for the selected language or on Search mask (3) if you wish to define language-independent search masks.
➣ On the right side of the action menu, a table will appear. This is where you can define the Search mask.
The table for the search mask of the document-type value (DocumentTypeValue) looks like this:
You can use the table to define user-specific search masks and regular expressions, either by previously created language or independent of language.
Add the desired number of rows (14) to the configuration table using the Add button (5). By default, the table is blank.
Enter the search mask in the Search mask column (10) either as an alphanumeric string or as a regular expression.
If you use a regular expression, select the checkbox in the Is a Regex column.
Select the checkbox in the Break on match column (12) to exclude inaccurate search results and thus make the search more efficient.
➣ As soon as a search mask with activated checkbox is found during the search, the extraction service will stop the search process.
In the Hit Code field, type one of the following two letters, depending on the document type:
Code
Explanatory notes
G
G stands for "credit note" and marks a document as a credit note document regardless of the language in which you enter the search mask text or regular expression.
R
G stands for "Invoice" and marks a document as an invoice document regardless of the language in which you enter the search mask text or regular expression.
Example entries:

Notice
The hit code always refers to the search mask individually entered on the same line.
By entering the document type (G or R) in the Hit Code field, the extraction service can, in the first step, assign a document to either the credit notes or the invoices in conjunction with the search mask read.
Example: If the French word "Crédit" from the search mask is marked with the hit code G, the extraction service will assign all documents in which the word "Crédit" was recognized to the credit notes.
In the second step, the extraction service will search for a valid purchase order number on the document in conjunction utilizing the valid purchase order number range and the corresponding master data.
If a valid purchase order number can be determined in the document, it is marked in the system with
RMBorGMB. "MB" stands for "With purchase order reference". "MB" is appended to G or R accordingly.If no valid purchase order number can be determined on the document, it is marked in the system with
ROBorGOB. "OB" stands for "Without purchase order reference". "OB" is appended to G or R accordingly.If you wish to provide search masks for another field of this tenant so that you do not need to enter the search masks manually, click Export (9).
➣ A dialog box for language selection will open.
Select one or more languages from the drop-down menu for which you have previously created lists.
The list for the language-independent entries is preselected by default. If you do not wish to export the list with the language-independent entries, uncheck the check box.
If you want to export the list of only one language, click directly on a language in the menu structure on the left, e.g. English, and then click Export (9).
➣ A JSON file with the selected search masks will be downloaded locally.
If you wish to use search masks from another field of this tenant or of another tenant without having to enter the search masks manually, click Import (8).
➣ An import dialog will open.
Choose whether you want to overwrite the custom search masks with the JSON import or append the search masks from the import to the list of existing search masks by checking the corresponding checkbox.
Select the JSON file for import and click OK.
If you want to export or import search masks collectively for all fields of a tenant, click Import or Export in the action menu (1), as needed.
Notice
You can only import files that are stored as JSON files locally on your computer.
When importing, the names of the fields are not relevant, so matching is not necessary. Only the values are imported.
Save your new entries with a click on the button Save (16).
If you have already filled your table with regular expressions and/or user-specific search masks in the form of alphanumeric strings, remove any unnecessary entries by clicking the Delete button (6).
If you want to reorder the search priorities, arrange the table rows according to the prioritization order from highest to lowest priority, i.e. from top to bottom.
For this, select the row by activating the checkbox in the first table column (15) and move the marked table row (14) by clicking the button
or (7) up or down by item in the table.
Background information: Prediction model – Creditor and company code
If the creditor search does not return a unique result (or any result, for that matter), creditor training is automatically activated.
The extraction service trains a prediction model using the following address data:
Name (Name or Name 2)
Country
Zip
City
Street
Location
Pob
If the prediction model identifies a possible company code, the address data from the lookup entry sys_DS_CompanyCode will be checked against the full text of the first 3 document pages.
If the address is not found in the first 3 document pages, the address data from the second data source will be checked against the lookup entry sys_DS_CompanyCodeAddresses.
This procedure allows creditors of the same company code but with different addresses (e.g. two locations of the same company) to be uniquely identified on the basis of the address difference.
Notice
The fact that one or more address details of the creditor are not entered is not taken into account when building a training model for creditor training. Empty fields will be ignored and will not generate an error.
However, to train a creditor, at a minimum, the name, street and postal code or city must be entered. No prediction model will be trained for a creditor missing the minimum of information.
For documents that have the same layout, up to 10 creditors can be trained. If the training exceeds the maximum number of creditors, the training with the highest number of manual corrections will be removed from the prediction model.
Extraction – Mailroom
Basic configuration – Mailroom
 |
Select the view Basic configuration (1).
In the Basic configuration view, you can make the extraction settings as needed for your Mailroom project:
The extraction service can search your master data for business partners using the lookup table sys_LKP_BusinessPartner.
The search is based on the following fields (6):
In the Enabled column, click to select the following search criteria:
BusinessPartnerIBAN: IBAN of the business partner (Priority 1)
BusinessPartnerSalesTaxID: VAT ID of the business partner (Priority 2)
BusinessPartnerTaxID: Tax number of the business partner (Priority 3)
BusinessPartnerCommercialRegisterNumber: Business partner's commercial register number (Priority 4)
BusinessPartnerPhone: Telephone number of the business partner (Priority 5)
BusinessPartnerEmailAddress, BusinesspartnerWebsite: Domain of an e-mail address or website of the business partner (Priority 6)
BusinessPartnerCustom1: Value of the BusinessPartnerCustom1 field as free text, e.g. project number (Priority 7)
➣ All fields flagged with Enabled (7) will be included in the search.
➣ All fields that are not flagged with Enabled will be skipped in the search.
Using the table, define the order (5) of the fields according to which the master data will be searched in the extraction.
Notice
This sequence corresponds to the factory settings.
Prioritize fields that occur infrequently over fields that occur frequently. This makes the extraction service faster and more precise in the search.
For this, select the checkbox in the first column of the table (4) and click the button
or (3) to move the selected table line row by row.To save your list of search priorities, click the button Save (8) or click Cancel, if you do not wish to save the basic configurations.
If you wish to restore factory settings, click Reset (2) in the action menu.
Notice
The button will only appear if you have previously made changes to the factory settings.
Notice
Only if the search has found one single business partner will it be preselected in the validation.
If extraction identifies more than one business partner, an integral value of more than one will appear in the field overview of the validation step in the column Alt.
To find alternatives in the extracted document, the user needs to click on the number in the column Alt.
The click opens a dialog with a list of alternatives.
You can highlight the relevant text passages in the viewer document by clicking on the icon .
Sometimes, the business-partner search does not deliver a result, and sometimes a result is delivered but is unclear. In this case, the extraction service automatically trains a prediction model.
For more information, see Background information: Prediction model – Business partner and company code.
Defining anchor words and search masks – Mailroom
 |
Select the view Custom search masks (2).
Click on the
icon on the right side of a header-data field.➣ The sub-entries Anchor words and Search mask will become visible in the header data.
Notice
An anchor word refers to a specific text section in the document or a field in the validation interface such as "invoice number".
A search mask is the concrete text section that is searched for in the document or that appears as field content (alphanumeric string) in the validation interface, e.g. "RE50000210". In this example, it is a concrete invoice number. However, you can also define search masks using regular expressions.
Click on
(4) in the subsidiary menu item Anchor words.➣ A drop-down menu for language selection will appear on the right side of the menu structure.
Select the language(s) of the anchor word(s).
➣ For each language selected, a sub-entry will be created, e.g. English:
If you do not make a selection, you will not be able to assign the anchor words to a specific language later. You will only be able to create entries that are independent of language.
Click on the menu item Anchor words, on an entry for the selected language, or on Search mask (3).
➣ On the right side of the menu structure, a table will appear. This is where you can define the Anchor words or the Search mask.
You can use the table to define anchor words as well as user-specific search masks and regular expressions, either by previously selected language or independent of language.
With the button Add (5), add the desired number of rows (13) to the configuration table. The table is empty by default.
Enter the search mask in the Search mask column (10) either as an alphanumeric string or as a regular expression.
If it is a regular expression, select the checkbox in the Is a Regex column (11).
Select the checkbox in the Break on match column (12) to exclude inaccurate search results and thus make the search more efficient.
➣ As soon as an anchor word or a search mask with activated checkbox is found during the search, the extraction service will stop the search process.
If you wish to provide search masks for another field of this tenant so that you do not need to enter the search masks manually, click Export (9).
➣ A dialog box for language selection will open.
Select one or more languages from the drop-down menu for which you have previously created lists.
The list for the language-independent entries is preselected by default. If you do not wish to export the list with the language-independent entries, uncheck the check box.
If you want to export the list of only one language, click directly on a language in the menu structure on the left, e.g. English, and then click Export (9).
➣ A JSON file with the selected search masks will be downloaded locally.
If you wish to use search masks from another field of this tenant or of another tenant without having to enter the search masks manually, click Import (8).
➣ An import dialog will open.
Choose whether you want to overwrite the custom search masks with the JSON import or append the search masks from the import to the list of existing search masks by checking the corresponding checkbox.
Select the JSON file for import and click OK.
If you want to export or import search masks collectively for all fields of a tenant, click Import or Export in the action menu (1), as needed.
Notice
You can only import files that are stored as JSON files locally on your computer.
When importing, the names of the fields are not relevant, so matching is not necessary. Only the values are imported.
All the search mask specifications in Step 7, 8 and 9 also apply to anchor words if they can be specified for a field.
Save your new entries with a click on the button Save (16).
If you have already filled your table with regular expressions and/or user-specific search masks in the form of alphanumeric strings, remove any unnecessary entries by clicking the Delete button (6).
If you want to reorder the search priorities, arrange the table rows according to the prioritization order from highest to lowest priority, i.e. from top to bottom.
For this, select the checkbox in the first column of the table (14) and click the button
or (7) to move the selected table line (13) row by row.
Background information: Prediction model – Business partner and company code
If the business partner search does not return a unique result (or any result, for that matter), business-partner training will automatically be activated.
The extraction service trains a prediction model using the following address data:
Name
Country
Zip
City
Street
If the prediction model identifies a possible company code, the address data from the lookup entry sys_DS_CompanyCode will be checked against the full text of the first 3 document pages.
If the address is not found in the first 3 document pages, the address data from the second data source will be checked against the lookup entry sys_DS_CompanyCodeAddresses.
This procedure allows business partners of the same company code but with different addresses (e.g. two locations of the same company) to be uniquely identified based on the differences in the addresses.
Notice
The fact that one or more address details are not entered for the business partner is not taken into account when building a training model for business partner training. Empty fields will be ignored and will not generate an error.
However, to train a business partner, at a minimum, the name, the street, and the postal code or city must be entered. The prediction model is not trained for business partners with missing minimum information.
For documents that have the same layout, up to 10 business partners can be trained. If the training exceeds the maximum number of business partners, the training with the highest number of manual corrections will be removed from the prediction model.