Creating a Payment Request in xSuite Web
Open the xSuite Web Business Workplace. For more information, see Opening Your xSuite Web Business Workplace.
Click the button Back to dashboard.
➣ Your dashboard will open.
Click on the Payment Request tile.
➣ The Payment Request view will open.
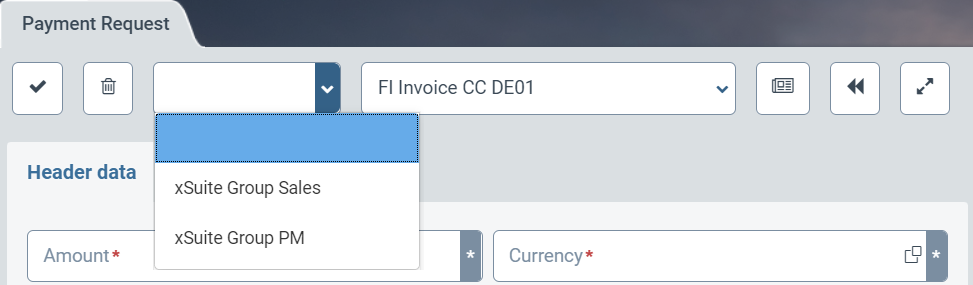
From the drop-down list on the left, select a company code.
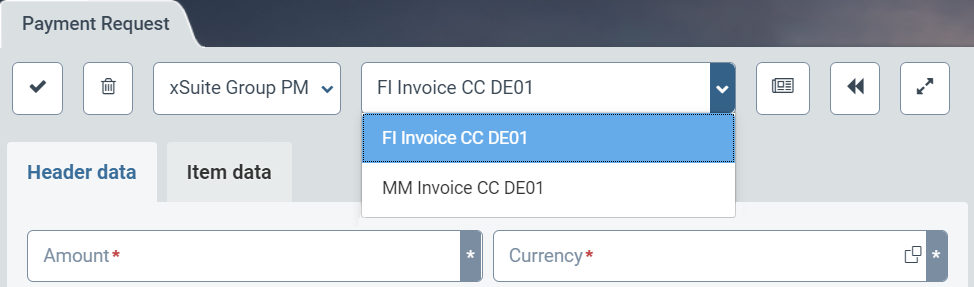
In the drop-down list on the right, select a document type.
Notice
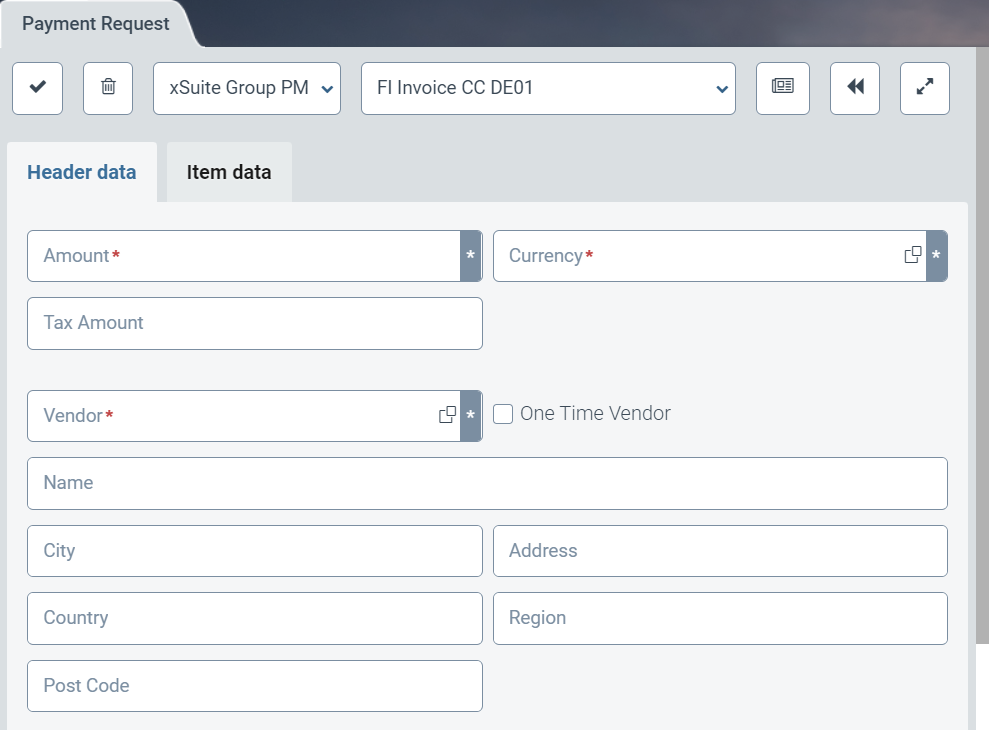
Depending on the document type selected, different fields will be available in the Header data area.
In the Header data tab, specify the general data for the payment request.
Notice
The following fields must be populated: Amount, Currency and Vendor
If necessary, click the button in the Item Data tab
 Plus to add a new item.
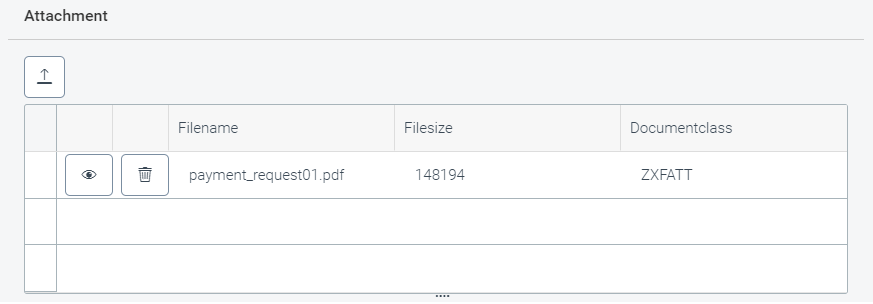
If necessary, click the Choose file button in the Attachment section of the Header data tab and the Attach
 button to upload attachments.
➤ The added attachments will appear in the following list:
Click
 Create.
➤ The payment request will be created and transferred to the Invoice Monitor.