Workflow task "Manual posting"
An invoice ends up in the "Manual posting" workflow task if automatic posting has failed. This might happen if the posting period is over, for example.
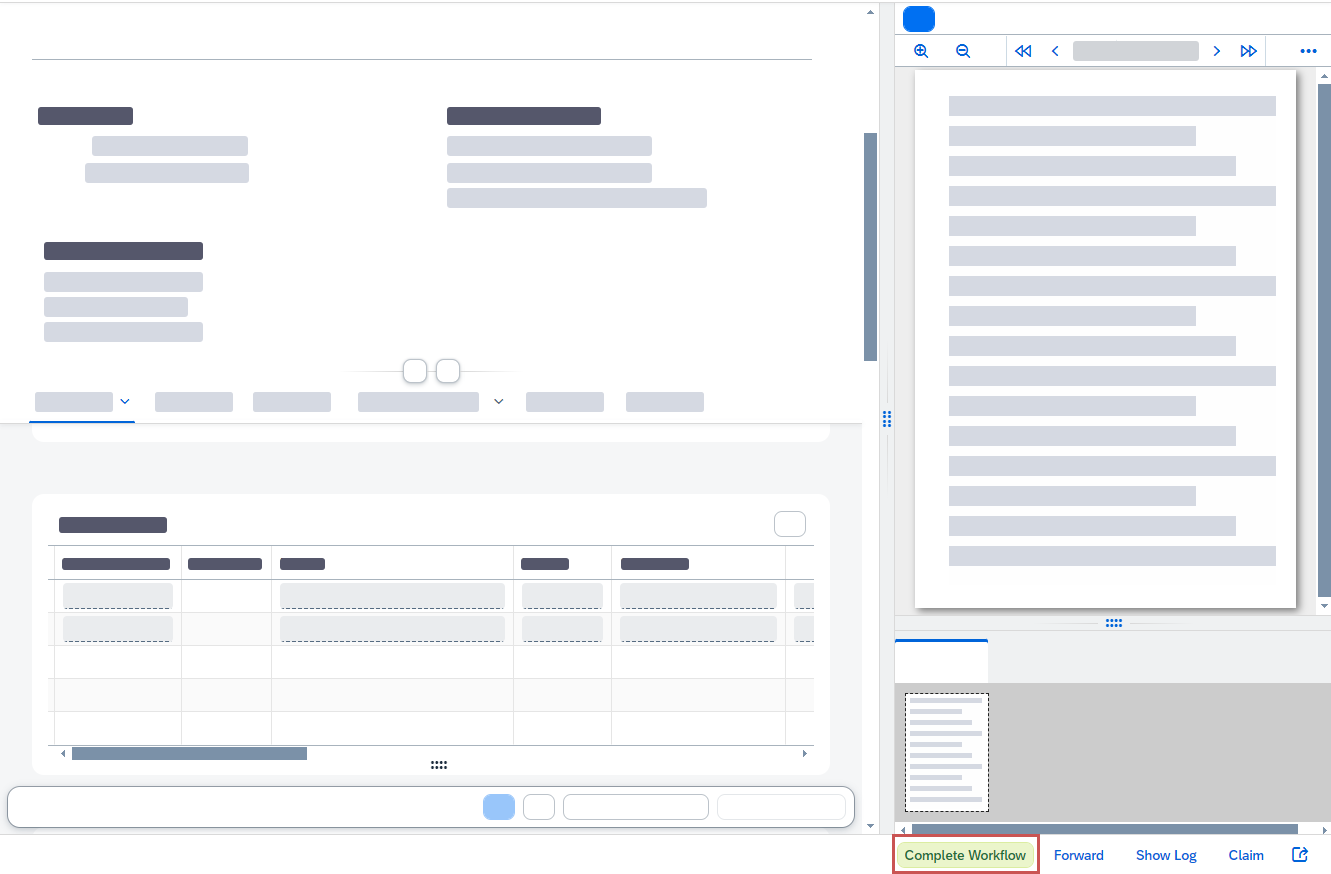
The workflow task "Manual posting" is for editing invoice data and posting the invoice. Post with the button Complete Workflow.
Notice
An invoice can only be posted if it is free of errors.
 |
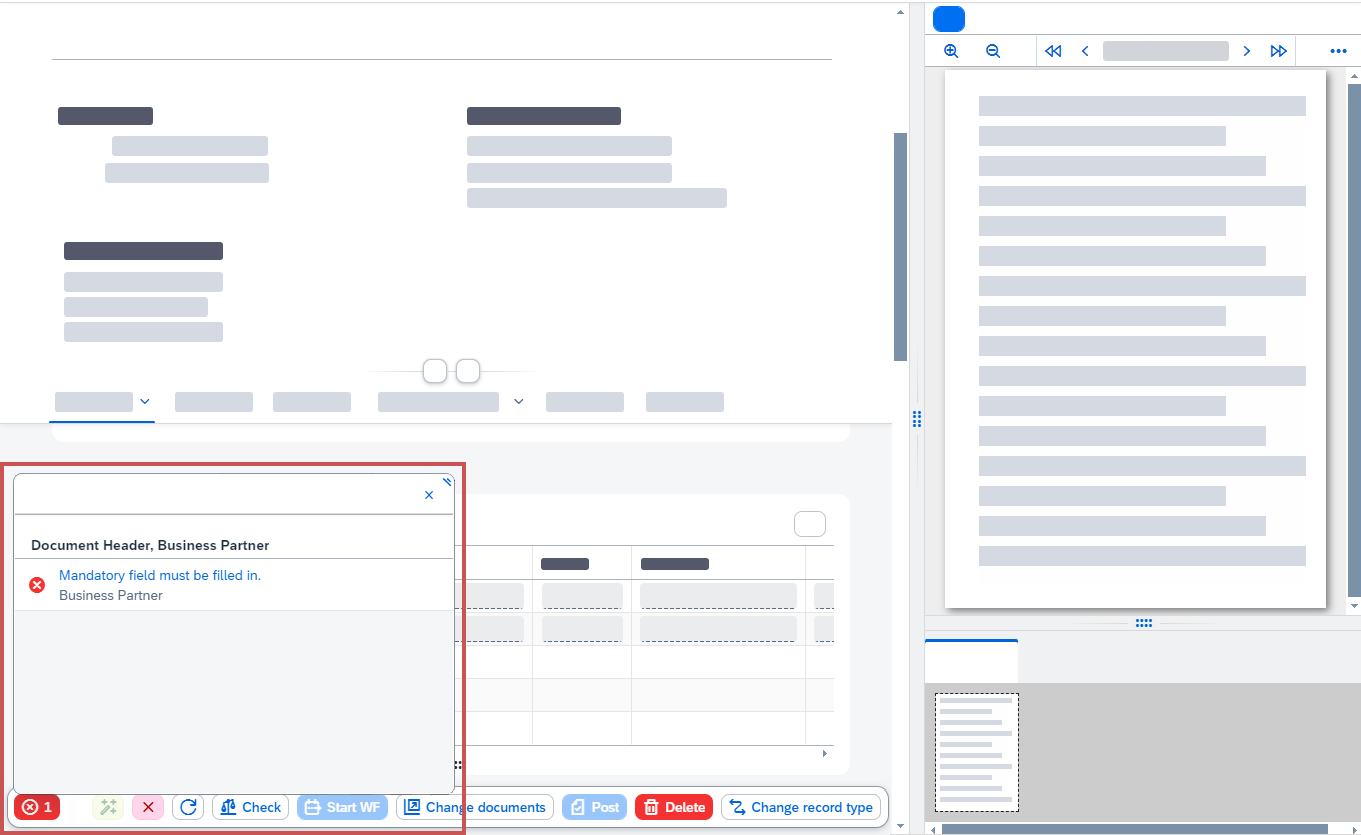
Errors such as unfilled mandatory fields can be found with the check function. To check for errors, use the button Check. How many errors have been found is indicated in the lower left-hand corner. To see details, click the number.
The detail pane shows where (e.g., fields and work spaces) errors are located. To go directly to a field with an error, click on the respective error message header (in the example this would be Mandatory field must be filled in).
 |
 |
[de] Klicken Sie im geöffneten Beleg auf den Button
 Bearbeiten.
[de] ➣ Der Bearbeitungsmodus öffnet sich.
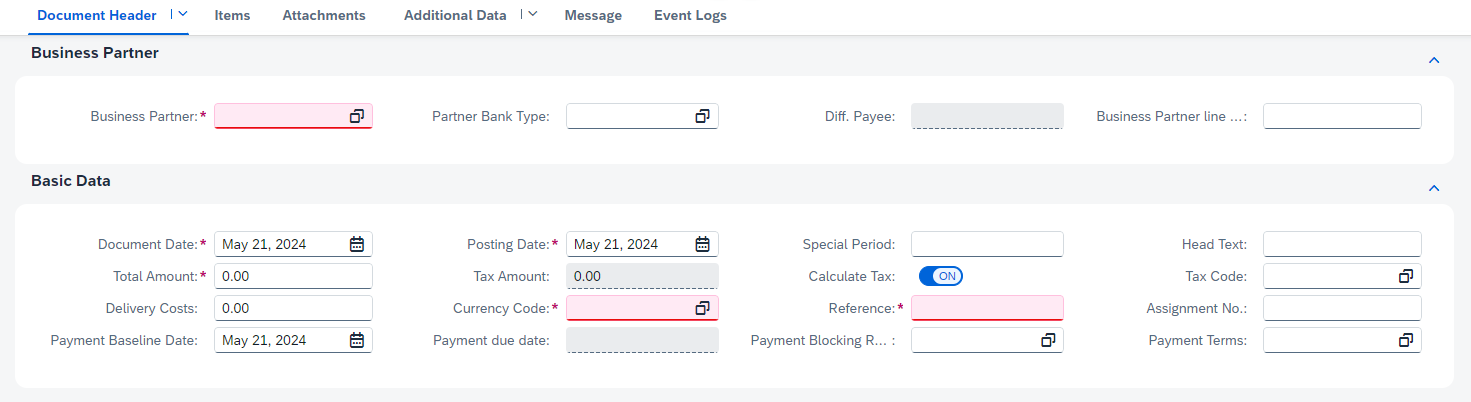
In the field Business Partner, select the number of the business partner.
Enter values in the remaining mandatory fields.
Notice
An asterisk after the field name indicates that a field is mandatory. If a mandatory field is empty, it will be highlighted in red. In order to continue, all mandatory fields must be completed.
Notice
In some fields, you can select the necessary values with input help. To open input help, click on the
 icon in the field.
If required, enter values in the other fields.
Click
 Activate draft.
➤ The data is now saved.
Line items and account-assignment information such as amount, G/L account, and cost center can be added in the Items area. Which fields and buttons are available will depend on whether the invoice has a PO reference.
Adding an item to an invoice without a PO reference
[de] Klicken Sie im geöffneten Beleg auf den Button
Bearbeiten.[de] ➣ Der Bearbeitungsmodus öffnet sich.
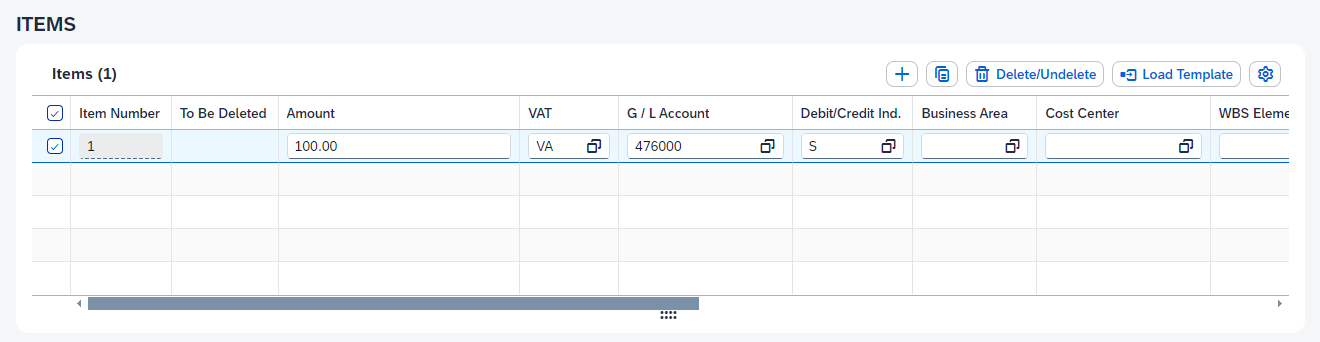
In the Items area, click
 Create Item.
➣ An empty item line will be added to the item table.
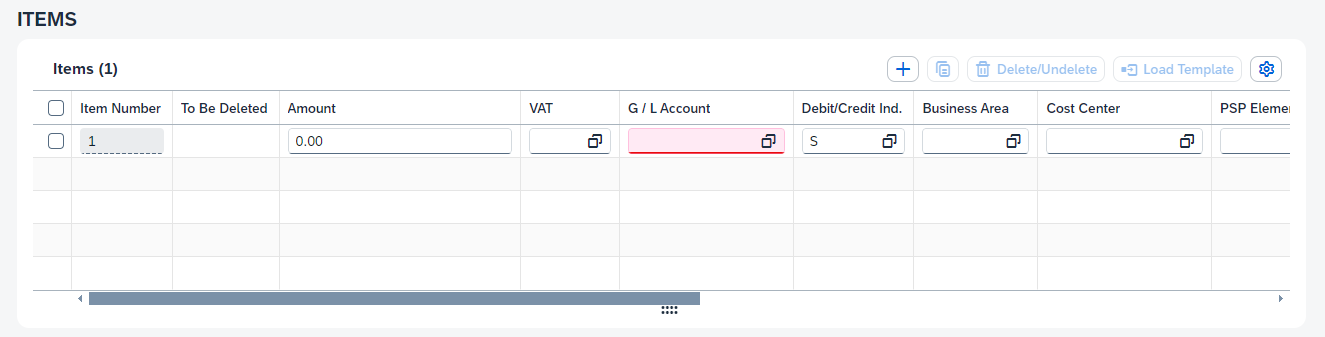
In the field Amount, enter the amount of the item.
Enter values in the remaining mandatory fields.
Notice
An asterisk after the field name indicates that a field is mandatory. If a mandatory field is empty, it will be highlighted in red. In order to continue, all mandatory fields must be completed.
Notice
In some fields, you can select the necessary values with input help. To open input help, click on the
icon in the field.If required, enter values in the other fields.
Click
Activate draft.➤ The data is now saved.
Adding an item to an invoice with PO reference
[de] Klicken Sie im geöffneten Beleg auf den Button
Bearbeiten.[de] ➣ Der Bearbeitungsmodus öffnet sich.
In the Items area, click Order Data Proposal.
➣ The dialog Order Data Proposal will open.
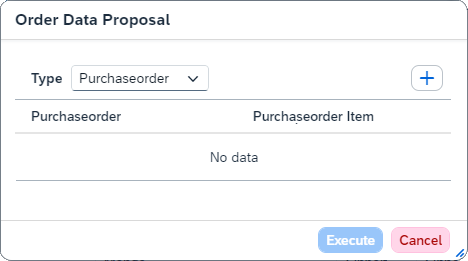
In the dropdown list Type, select the type that the proposal is based on:
Purchase orderDelivery Note
Click
Add.➣ A new line will be added.
Enter the PO number and PO item, or the delivery note number.
Notice
To search for the PO number or delivery note number, you can use input help. Click on the
icon to open input help.Click Execute.
➣ In the area Items, a new line item with the selected data will be added. You can edit data such as Amount and Quantity.
Click
Activate draft.➤ The data is now saved.
[de] Klicken Sie im geöffneten Beleg auf den Button
Bearbeiten.[de] ➣ Der Bearbeitungsmodus öffnet sich.
Activate the checkbox in the first column of the item you wish to delete.
Click Delete/Undelete.
➣ The item will be marked for deletion. The icon
 will appear in the column To Be Deleted.
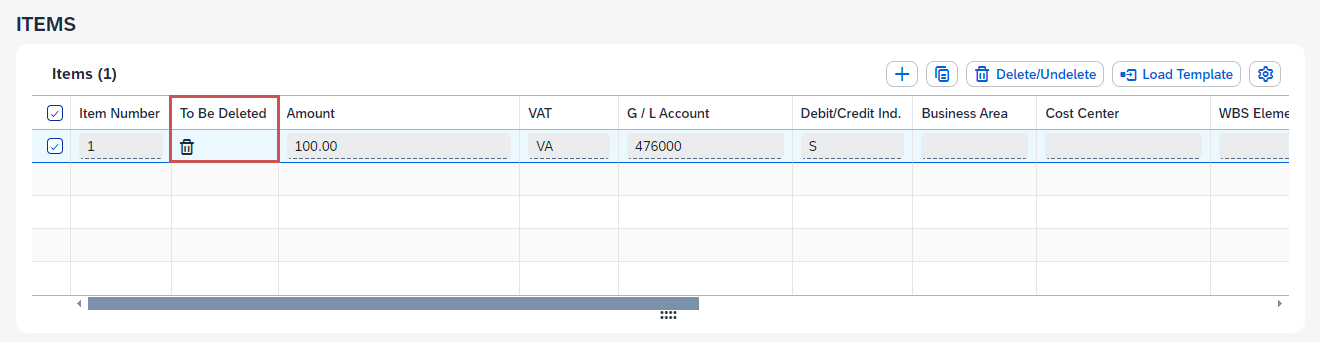
Notice
At this point, the item will not have been deleted. You can deselect the deletion action by clicking Delete/Undelete again.
Click
Activate draft.➤ The item will now be deleted.
For invoices with a purchase order reference, goods receipts can be created for line items.
Steps
[de] Klicken Sie im geöffneten Beleg auf den Button
Bearbeiten.[de] ➣ Der Bearbeitungsmodus öffnet sich.
In the Items area, in the column Actions, select
 Additional Options → Create goods movement.
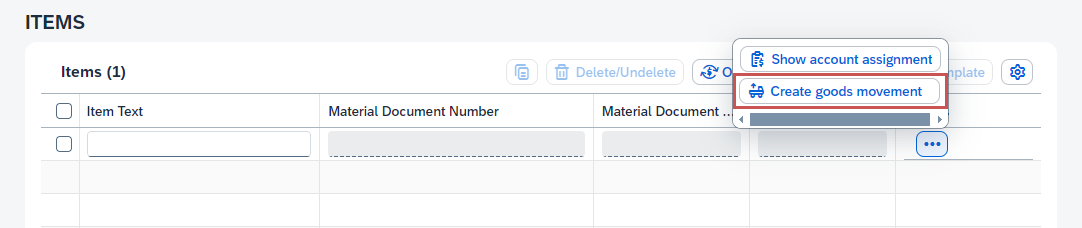
➣ The dialog Create goods movement will open.
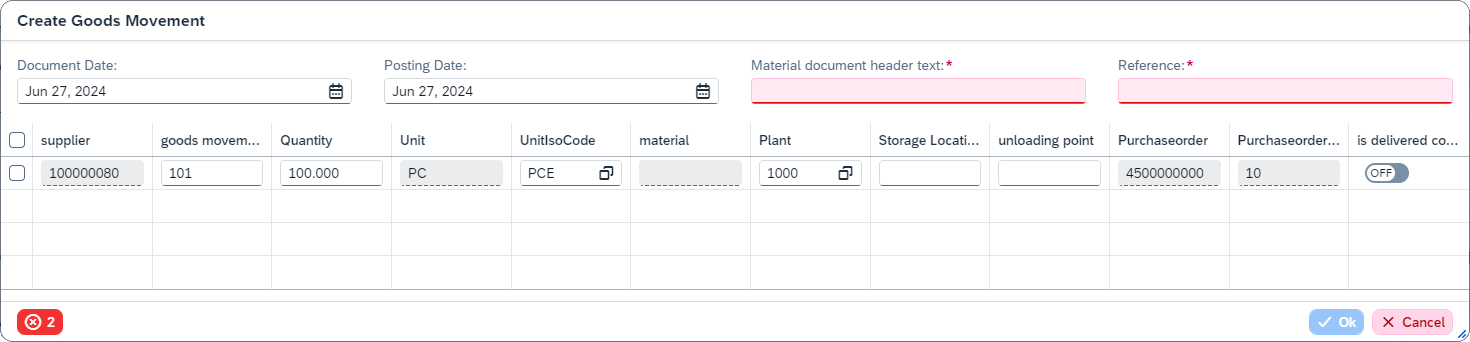
Enter the relevant data for the goods receipt (e.g., the material) and fill in all mandatory fields.
Notice
An asterisk after the field name indicates that a field is mandatory. If a mandatory field is empty, it will be highlighted in red. In order to continue, all mandatory fields must be completed.
Click OK.
Click
Activate draft.➤ The goods receipt has now been created.
Notice
To use the value help, follow these steps:
Click the value help icon
 .
.Click Reset, then click Start to display all available values.
Select the desired value.
➤ The selected value is entered into the input field.
[de] Klicken Sie im geöffneten Beleg auf den Button
Bearbeiten.[de] ➣ Der Bearbeitungsmodus öffnet sich.
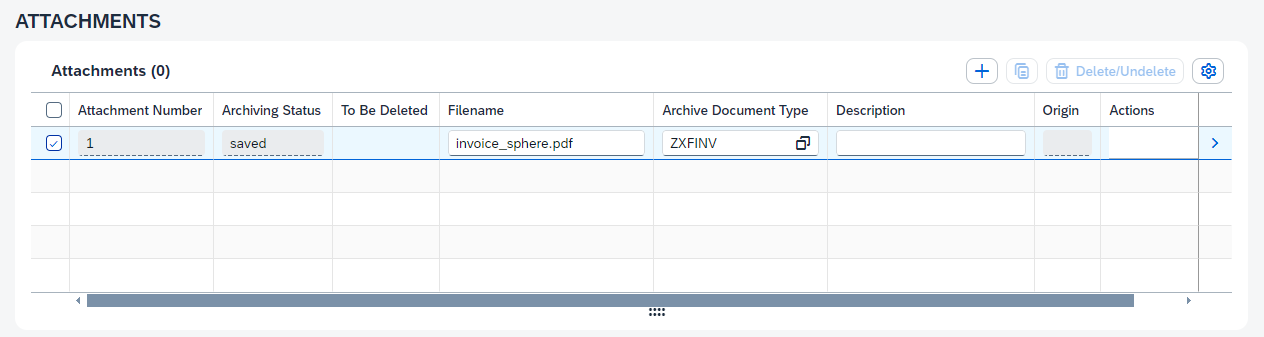
In the Attachments area, click
Create attachment.➣ The dialog Create attachment will open.
Click Upload and select the PDF file to be uploaded.
[de] ➣ Die Datei wird als Anhang hinzugefügt und erscheint in der Liste Anhänge.
[de] ➣ Das Feld Dateiname wurde automatisch gefüllt.
[de] ➣ Sie können die Felder Dateiname, Archive Dokumentart und Beschreibung nach dem Upload bearbeiten.
In the field Archive Document Type, select the document type of the attachment.
In the field Description, you can enter a short description of the attachment.
Click
Activate draft.➤ The file will be added as an attachment, to appear in the list Attachments. After upload, you can edit the fields Filename, Archive Document Type, and Description.
Notice
To view the attachment in the Viewer, click
 Details at the end of the line.
[de] Klicken Sie im geöffneten Beleg auf den Button
Bearbeiten.[de] ➣ Der Bearbeitungsmodus öffnet sich.
Activate the checkbox in the first column of the attachment you wish to delete.
Click Delete/Undelete.
➣ The attachment has now been marked for deletion, with the column To Be Deleted displaying the icon
.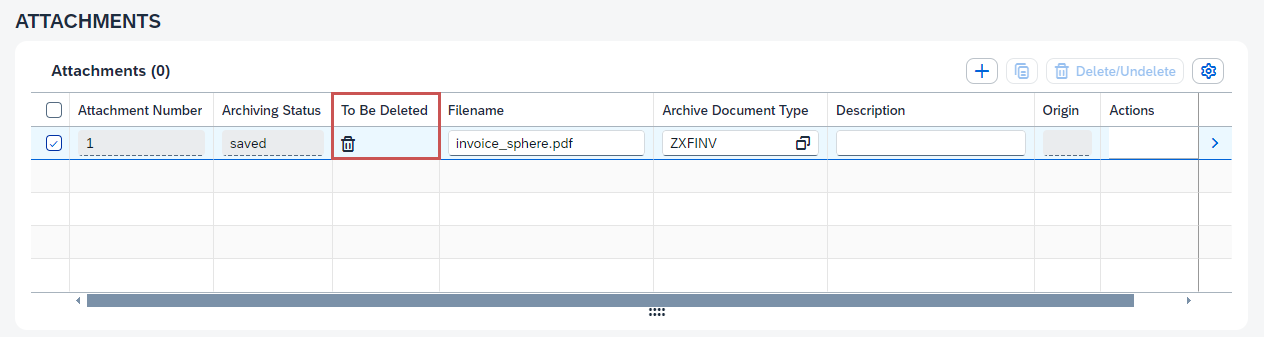
Notice
At this point, the attachment will not yet have been deleted. You can deselect the deletion action by clicking Delete/Undelete again.
Click
Activate draft.➤ The attachment has now been deleted.
[de] Klicken Sie im geöffneten Beleg auf den Button
Bearbeiten.[de] ➣ Der Bearbeitungsmodus öffnet sich.
In the Message area, click
Add.➣ The message field will open.
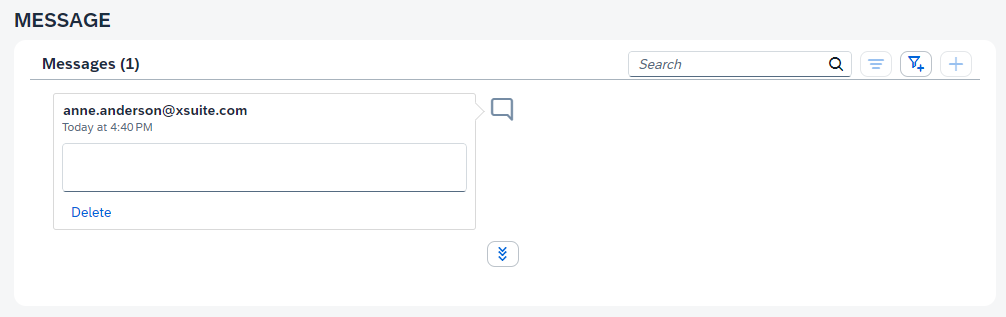
Enter text in the message field.
The text will be displayed to all other agents of the invoice.
Click
Activate draft.➤ The message will now be added.