The workflow
Once an invoice has been validated in the Invoice Monitor, it enters the workflow. In My Inbox, you can view and edit all invoices that are going through the workflow and that have been assigned to you.
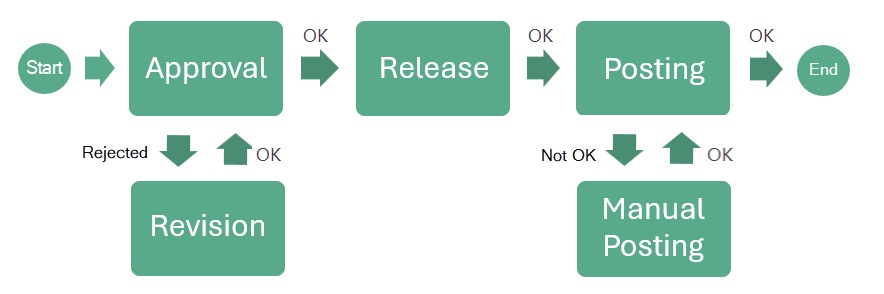
In the standard system, the workflow consists of the following workflow tasks:
 |
Workflow task | Description | |
|---|---|---|
1 | After starting the workflow, the invoice is first sent to the "Approval" workflow task, where you check the accuracy and completeness of the invoice data. If the data is correct and complete, you can confirm this and complete the workflow tasks. If you confirm, the invoice is transferred to the "Release" workflow task. If data needs to be corrected and/or supplemented, you can leave a comment for the next agent and reject the invoice. If the invoice is rejected, it will be transferred to the "Revision" workflow task. | |
2 | If the invoice was rejected in the "Approval" or "Release" workflow task, the invoice will then be sent to the "Revision" workflow task, where you can add missing invoice data and correct incorrect data. Once processing is complete, the invoice is returned to the workflow task "Approval." | |
3 | If the invoice is complete and correct, it is sent to the "Approval" workflow task, where you can either approve or reject the invoice. If data needs to be corrected and/or supplemented with more information, you can leave a comment for the next agent and reject the invoice. If the invoice is rejected, it will be transferred to the "Revision" workflow task. If you release the invoice, it will be automatically posted, which will complete the workflow. | |
4 | If the invoice has been released but the automatic posting fails, the invoice is transferred to the "Manual posting" workflow task. Here you can post the invoice manually. Once posting has been completed, the workflow is ended. | |