Opening invoices in the workflow (My Inbox)
Notice
For more details on My Inbox go to the SAP Help Portal.
All invoices that need to be processed and for which you are responsible are displayed in My Inbox. To begin working on them, click on the My Inbox tile on the start page. Then you can open the invoices in the workflow.
You can drill down to specific invoices with My Inbox's filter and sort functions. For example, you can filter for invoices within a specific workflow task, by date or priority.
Workflow tasks are edited directly in My Inbox. From this workspace, you can reserve invoices so that they cannot be edited by other users. You can also forward and share invoices and select substitutes to edit workflow tasks in your absence.
Sorting invoices
Click the button
 Sort.
Sort.Select the type of sorting:
Created By (A on Top)
Priority (Highest on Top)
Created On (Newest on Top)
Due On (Earliest on Top)
Click OK.
➤ The invoices will be sorted as specified.
Filtering invoices
Click the button
 Filter.
➣ The dialog Filter will open.
Select one of the following types of filtering:
Priority
Due on
Status
Created On
Task Type
Select one or more filter values.
Click OK.
➤ The invoices will be filtered based on your details.
Displaying invoices by category
Click the button
 Group.
➣ The dialog Group will open.
Select one of the following categories:
Priority
Task Type
Status
Reservation
Sort the category selected, as follows:
Ascending
Descending
Click OK.
➤ The invoices will be now be displayed as specified.
Reserving an invoice
Invoices can be reserved for processing. During the time that an invoice is reserved for you, other users will not see it displayed in their My Inbox.
Click on an invoice.
➣ The invoice will open.
Click Claim.
➤ The invoice has now been reserved for you.
Notice
To make the invoice available to other users again, click Release.
Notice
To display only those invoices that are reserved for you, select
Filter → Status → Reserved.
Forwarding an invoice
Invoices can be forwarded from your inbox to another user's. Once forwarded, the invoice will appear in My Inbox of the recipient and will no longer be displayed in your Inbox.
Click on an invoice.
➣ The invoice will open.
Click Forward.
➣ The dialog Forward will open.
In the field Forward To, enter the user ID of the user to whom you are forwarding the invoice.
Notice
The user ID is the user's email address. Always enter the email address in lower case.
When you enter the user ID, all available users will come up.
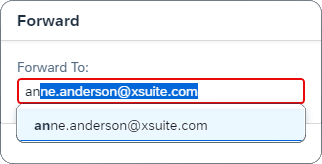
Click Forward.
➤ The invoice will be forwarded to the selected user, who can then edit it.
Sharing an invoice by email
Invoices can be shared with other users by email. The email contains a link to the invoice in My Inbox, and the following information as well:
Title
Priority
Created by
Created on
Click on an invoice.
➣ The invoice will open.
Select
 Share → Send E-Mail.
Select the email program and enter the email recipient.
Send the email.
➤ The invoice will be sent to the email recipient.
Defining a substitution
One or more substitutes can be set to take over open workflow tasks for your absences, regardless of whether they are planned or unplanned absences.
Defining a planned substitution
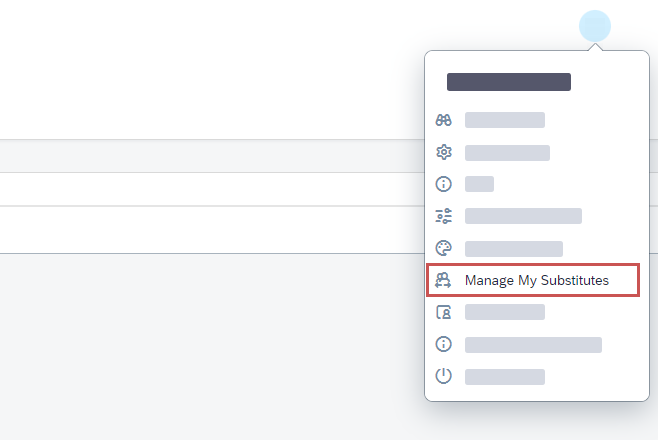
Click Manage my Substitutes.
Select the tab Planned and then click Add New Substitute.
➣ The dialog Add Substitute will open.
Enter the user ID of the desired substitute.
Notice
The user ID is the user's email address. Always enter the email address in lower case.
Select the start and end date of the substitution period.
Notice
The substitute will automatically receive your workflow tasks on the start date of the substitution period. On the final date of the substitution period, the substitute will no longer receive any workflow tasks. Workflow tasks that the substitute has reserved for themselves before the end of the substitution period will remain in the substitute's inbox.
Click Save.
➤ The planned substitution has now been set. The substitution will be automatically activated on the start date and automatically deactivated on the final date.
Defining an unplanned substitution
Click Manage my Substitutes.
Select the tab Unplanned and then click Add New Substitutes.
➣ The dialog Add Substitute will open.
Enter the user ID of the desired substitute.
Notice
The user ID is the user's email address. Always enter the email address in lower case.
Click Save.
➤ The unplanned substitution has now been set.
Notice
For an unplanned substitution to take effect, the substitute selected must accept the unplanned substitution. The substitute will not receive your workflow tasks until they have accepted the substitution request.