Creating an ITS destination
Within the Cloud Foundry subaccount, click Connectivity → Destinations.
Click the New Destination button.
Create a destination as shown in the screenshot below:
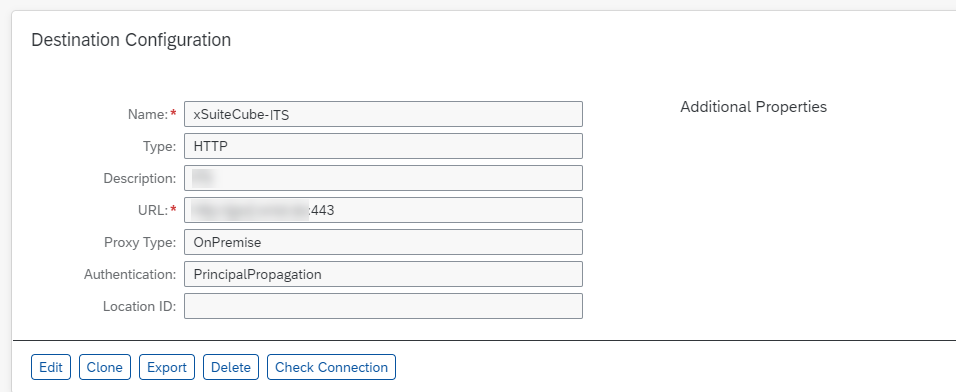
Field
Description
Name
By default, the name of the ITS destination used by xSuite Apps is xSuiteCube-ITS.
Type
The default type is HTTP, although, depending on the URL, HTTP can also map to HTTPS.
Description
The ITS destination can be described as desired.
URL
The URL is based on the ITS system and corresponds to the URL through which the ITS services can be reached.
ProxyType
The default ProxyType used is the value
OnPremisein accordance with the instructions in the Cloud Connector Guide.If the Cloud Connector is configured differently, select the appropriate value.
Authentication
Select the authentication method that was also set up for the Cloud Connector.
Click Save.
➤ The ITS destination has now been created.
Click the Check Connection button to test the connection.

➤ If a connection has been established, the message Connection to {name of destination} successful will appear.
➤ If it was not possible to establish connection, an error message will appear indicating the cause.