Installing xSuite Archive Prism
Notice
Make sure that the system requirements are met. Otherwise you will not be able to carry out the installation or at least not completely.
Open the setup file and agree to the installation.
➣ The xSuite Archive Prism setup will open.
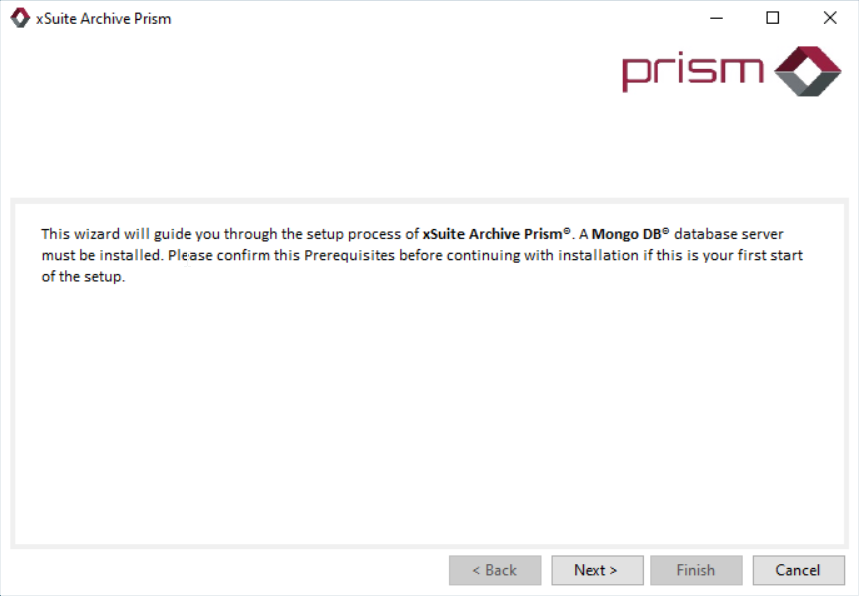
Click Next to continue with the next step.
➣ The License Agreement view will open.
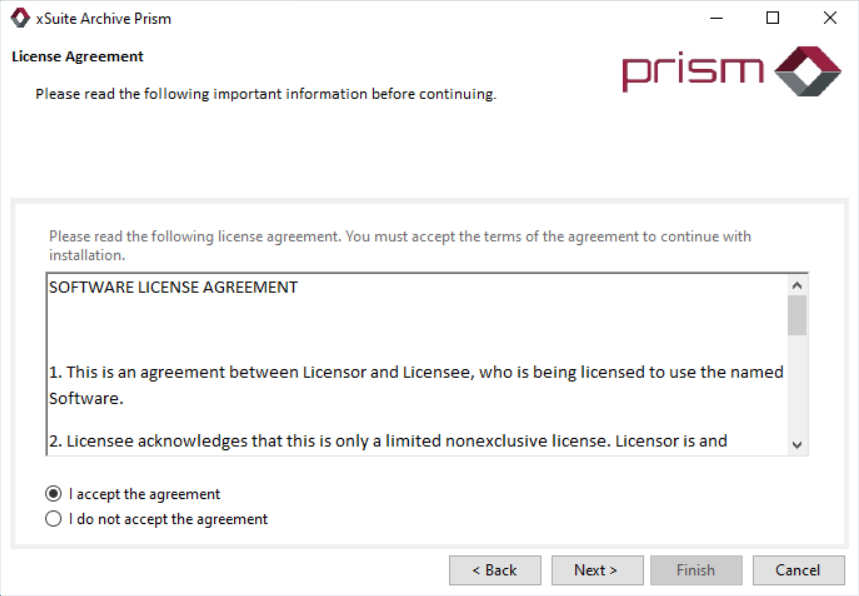
Select the I accept the agreement option and click Next.
➣ The Installation folder view for selecting the installation directory will open.
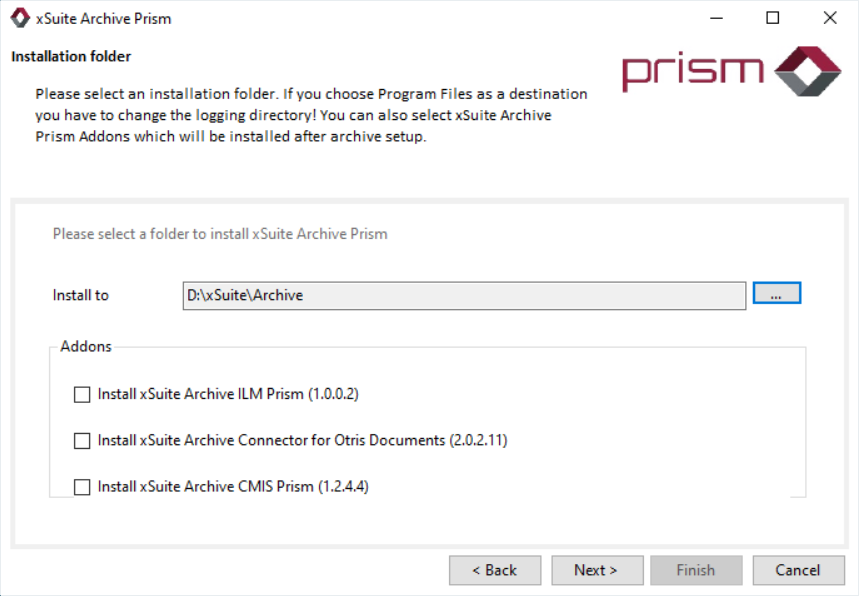
In the Install to field, select an installation directory for the installation of xSuite Archive Prism.
Notice
D:\ xSuite is recommended as the installation directory.
Notice
If required, you can install one or more add-ons. The installation of an add-on takes place after the installation of xSuite Archive Prism in a separate setup. The add-ons can be selected using the following checkboxes:
Install xSuite Archive ILM Prism
Information on installing xSuite Archive ILM Prism can be found in the publication xSuite Archive ILM Prism Installation Guide.
Install xSuite Archive Connector for Otris Documents
Information on the installation of xSuite Archive Connector for Otris Documents can be found in the publication xSuite Archive Connector for Otris Documents.
Install xSuite Archive CMIS Prism
Information on installing xSuite Archive CMIS Prism can be found in the publication xSuite Archive CMIS Prism.
Click Next to continue with the next step.
➣ The Network Setup view will open.
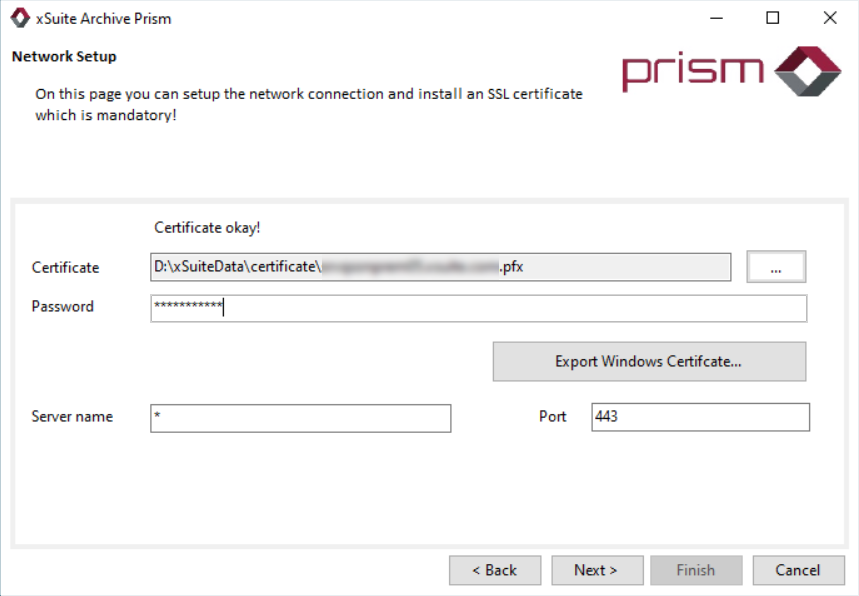
In the Certificate field, select an SSL certificate imported from the file system and enter the password.
Notice
To import an SSL certificate from the computer's certificate repository, click on Export Windows Certificate....
Click Next to continue with the next step.
➣ The Database Connection view will open with options for connecting MongoDB.
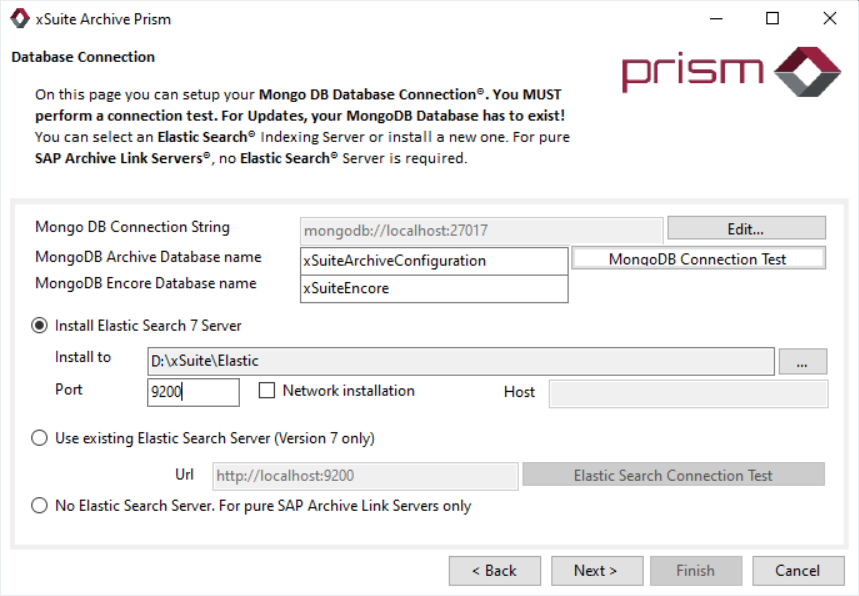
Check if the MongoDB connection string in the field Mongo DB Connection String is correct.
Notice
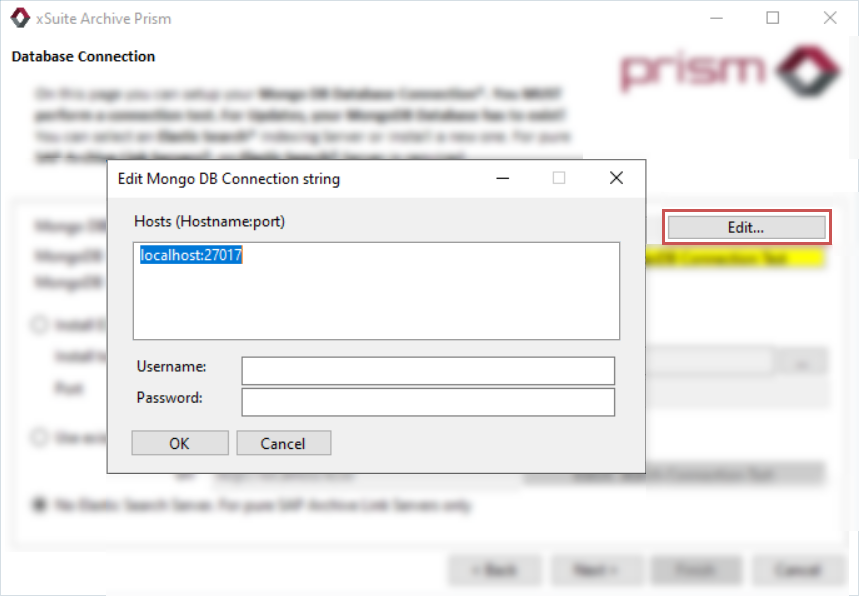
By clicking on Edit, you can set up authentication for the connection to the MongoDB database. To do this, enter a host as well as a user name and password for the authentication.
Enter the name of the Archive database in the MongoDB Archive Database name field and the name of the Encore database in the MongoDB Encore Database name field.
Click the MongoDB Connection Test button to test the connection to MongoDB.
Caution
The connection test must be carried out. If you do not test the connection to the database, you will not be able to successfully complete the installation of xSuite Archive Prism.
➣ The connection to the database is tested. If a connection to MongoDB can be established, a dialog opens with the message
Database connection was successful.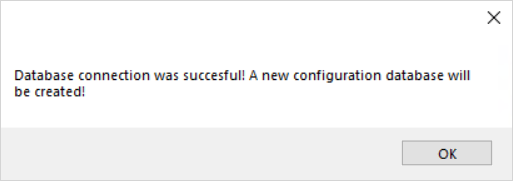
Click OK.
Select one of the following options:
Option
Description
Install Elastic Search 7 Server
Select this option to install Elasticsearch 7.
In the Install to field, select an installation directory.
Caution: Do not install Elasticsearch in the same directory as xSuite Archive Prism or xSuite Encore Prism. xSuite Group GmbH recommends the installation directory
D:\xSuite\Elastic.Enter a port in the Port field. Port
9200is used by default.For more information, see Appendix A, Elasticsearch 7 Configuration.
Use existing Elastic Search Server (Version 7 only)
To use an existing version of Elasticsearch (only version 7), select this option.
No Elastic Search Server
If you wish to use xSuite Archive Prism exclusively for SAP Archive Link, select this option.
Click Next to continue with the next step.
➣ The Archive specific Settings view for configuring archive-specific settings will open.
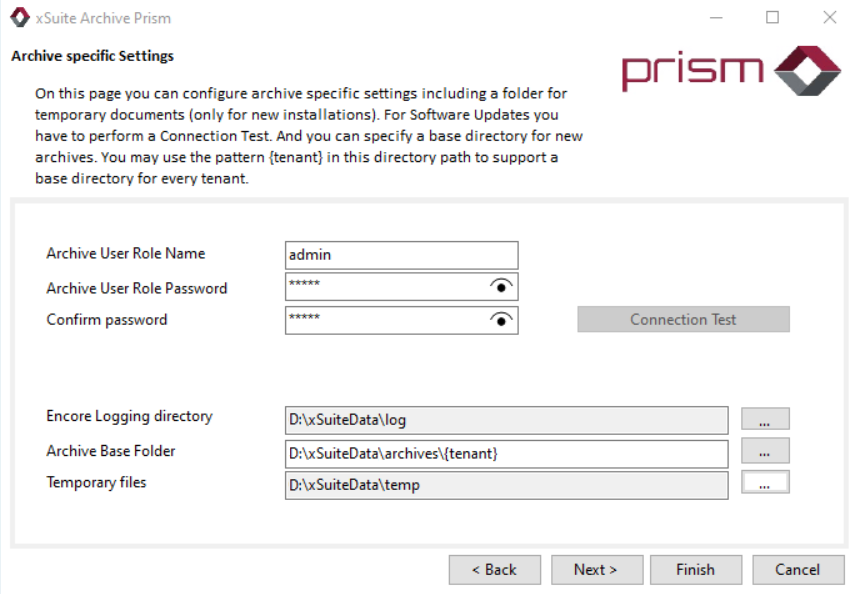
Enter a name and a password for the archive user.
Notice
During a new installation, the Connection Test button will be grayed out, indicating that there is no connection to test yet.
Select the file directories in the following fields:
Encore Logging directory: Directory for log entries
Archive Base Folder: Directory for new archives
Notice
By additionally specifying the placeholder
{tenant},the subfolders are automatically created for each tenant. If you do not specify this placeholder, all archives are created in one folder.
Temporary files: Directory for storing temporary files
Click Next to continue with the next step.
➣ The view Installation properties will open.
Carry out one of the following steps:
If you use an Active Directory, activate the Use LDAP or Active Directory Server for Authorization checkbox.
➣ The fields in the LDAP Settings and User area are automatically filled with the domain data of the logged-in user.
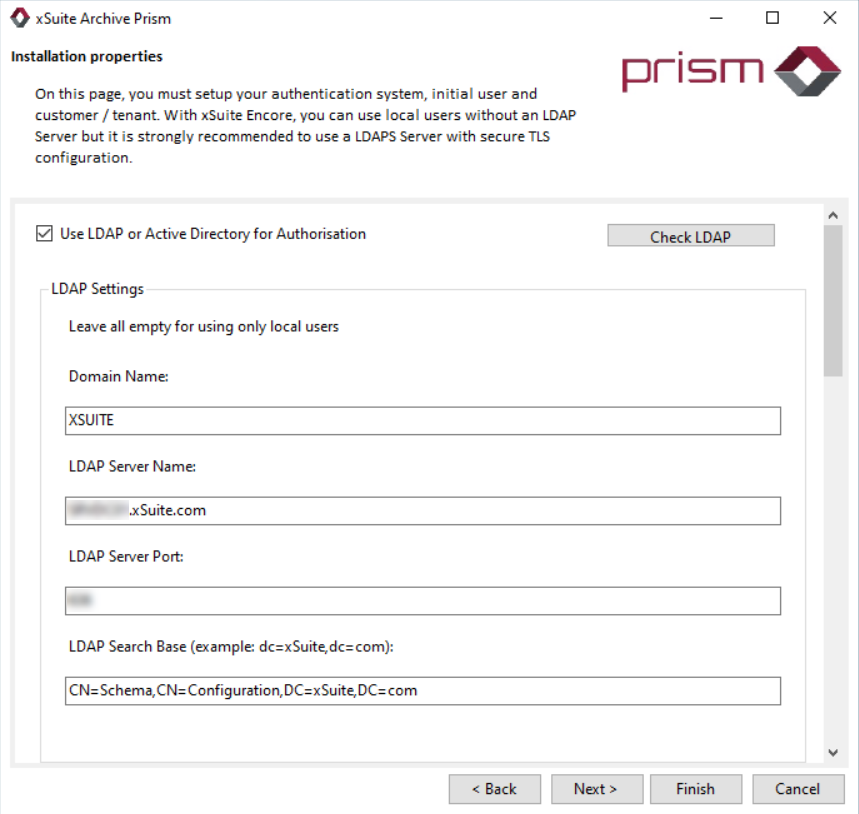
f you are not using Active Directory, create an initial user in the User area in the Name field and enter a user password in the Initial password field.

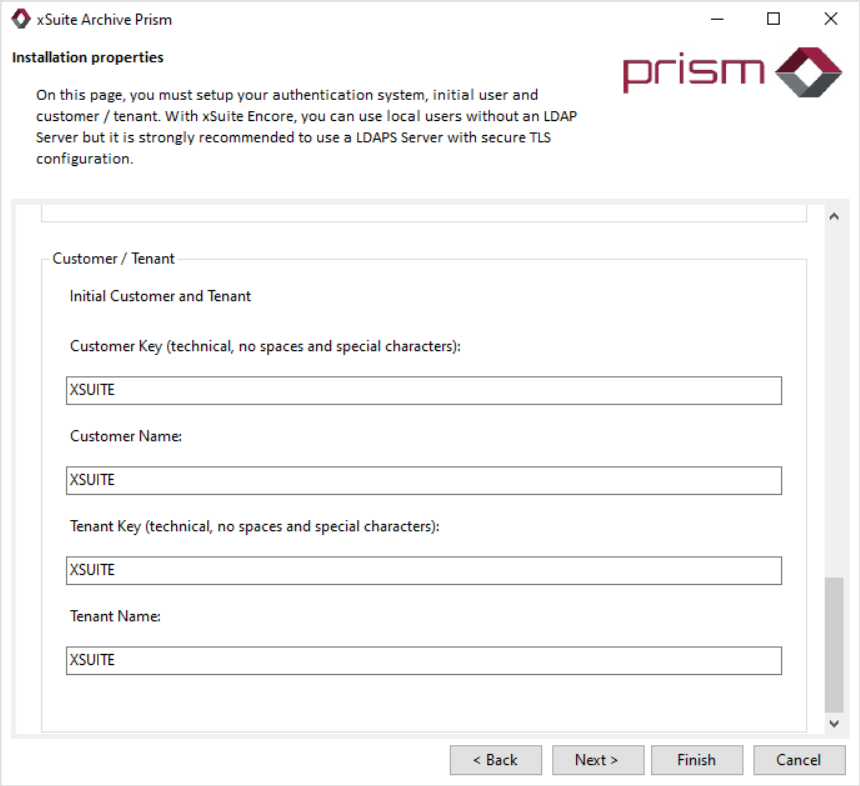
Create an initial customer and tenant in the Customer/Tenant area.
Notice
The values in the Customer Key and Tenant Key fields must not contain any special characters or spaces.
Click Next to continue with the next step.
➣ The Archive Expert Settings view will open.
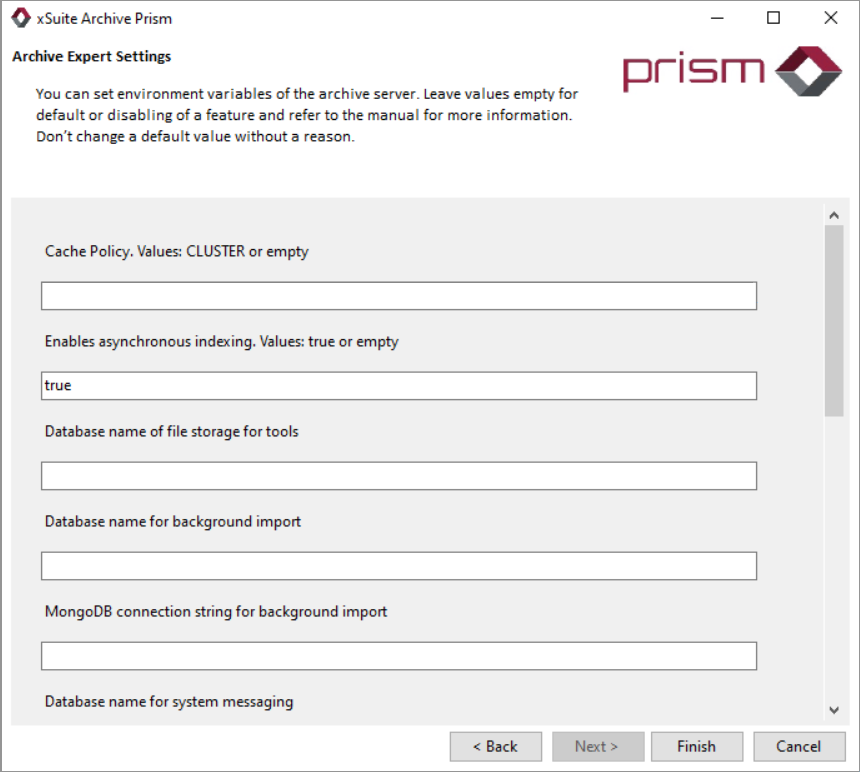
If necessary, use expert settings. For information on the different settings and possible values, see Changing Settings in the appsettings.json File.
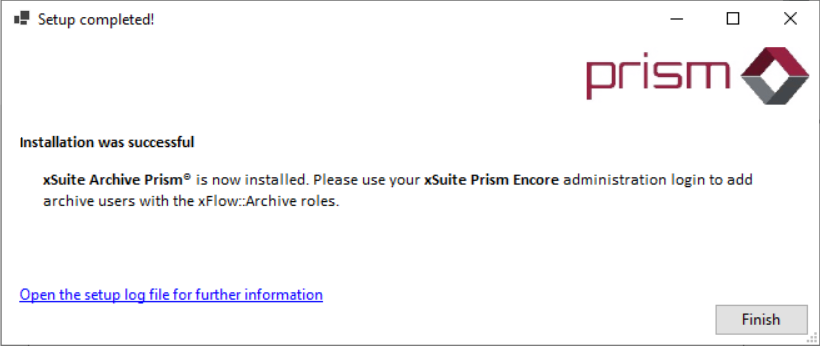
Click Finish to complete the installation.
Notice
After confirming the security prompt, it may take approx. 8 to 10 seconds before the installation is completed.
➤ The installation is complete. The Windows service
xSuite Archive Prismhas been created. You can access xSuite Archive Prism via the following URL:[server address]/xflowclient/.➤ A confirmation dialog will open, indicating that the installation was successful.
Use the link Open the setup log file for further information to view more details about the installation.
Notice
If UAC (User Account Control) is active, an error message may appear after the setup is complete. This message will not affect the installation. The installation has been successfully completed irrespective of whether a message appears.