Updating xSuite Archive Prism
Caution
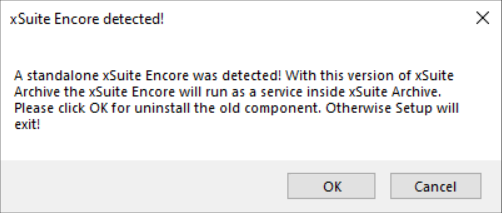
Previous versions of xSuite Archive Prism consisted of 2 separate installations for xSuite Archive Prism and for xSuite Encore Prism. In the current version, xSuite Encore Prism is integrated into xSuite Archive Prism.
After updating xSuite Archive Prism to version 2.0.2, only a Windows service is available.
Caution
Create the necessary backups before updating. Missing backups can lead to data loss.
An update from xSuite Archive Prism 2.0.x to version 2.0.2 is carried out using the same setup as a new installation (see [→Install xSuite Archive Prism]). The setup steps for an update are basically the same as for a new installation. When updating, most of the fields are pre-assigned with the data of the existing xSuite Archive version.
Open the setup file and agree to the installation.
➣ The xSuite Archive Prism setup will open.
Click Next to continue with the next step.
➣ The License Agreement view will open.
Select the I accept the agreement option and click Next.
➣ The Network Setup view will open.
➣ The two ports of xSuite Archive Prism and xSuite Encore Prism are specified in the Port field.
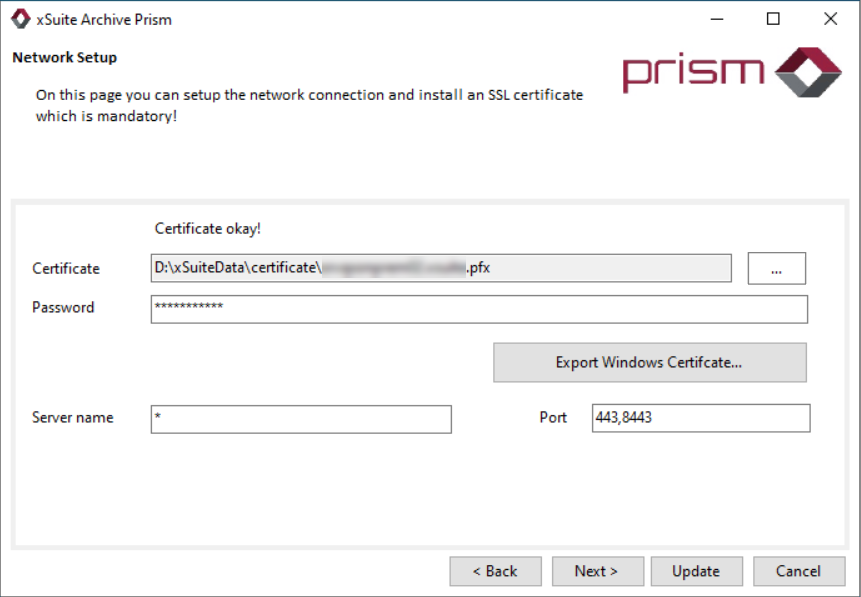
Click Save to continue to the next step.
➣ The Database Connection view will open with options for connecting MongoDB.
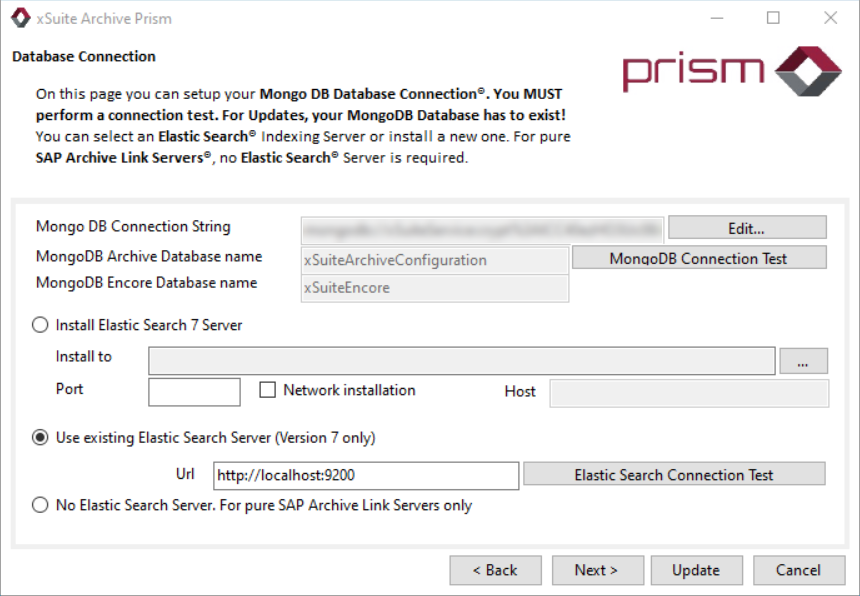
Click the MongoDB Connection Test button to test the connection to MongoDB.
Caution
The connection test must be carried out. If you do not test the connection, you will not be able to successfully complete the xSuite Archive Prism update.
➣ The connection to the database is tested. If a connection to MongoDB can be established, a dialog opens with the message
Database connection was successful.Click Save to continue to the next step.
➣ The Archive specific Settings view for configuring archive-specific settings will open.
Notice
It is not possible to select a file directory for temporary files during an update. This directory can only be selected during a new installation of xSuite Archive Prism.
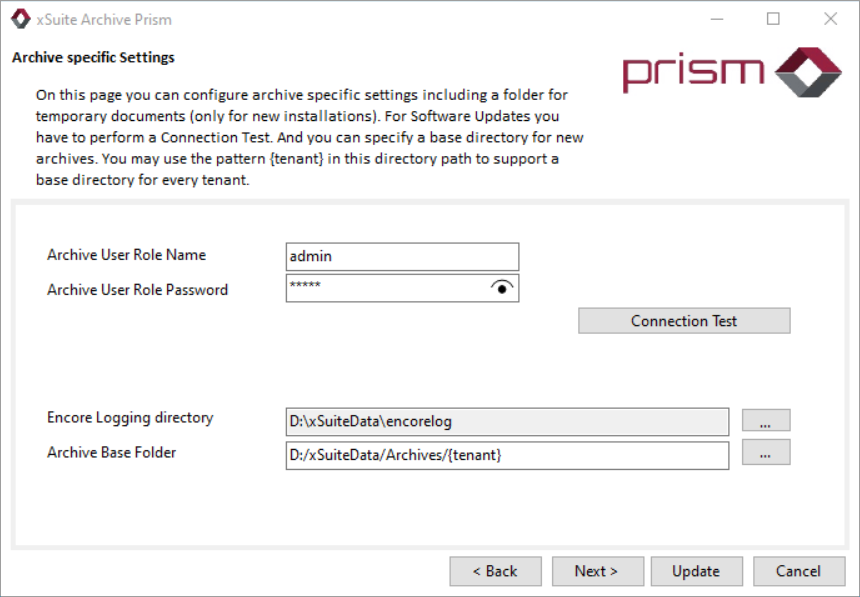
Click on Connection Test to test the connection to xSuite Archive.
Caution
The connection test must be carried out. If you do not test the connection, you will not be able to successfully complete the xSuite Archive Prism update.
Click Next to continue to the next step.
➣ The Archive Expert Settings view will open.

If necessary, use expert settings. For information on the different settings and possible values, see Changing Settings in the appsettings.json File.
Click Update.
➤ The update is complete. Only the Windows service
xSuite Archive Prismis still available.➤ A confirmation dialog opens and indicates that the update was successful.